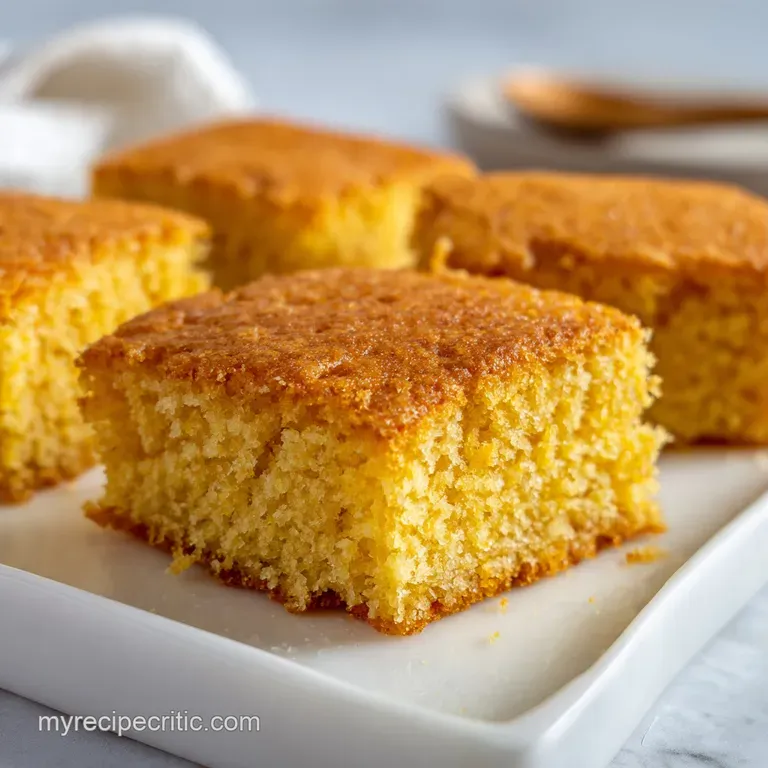
The Best Christmas Cookie Bars: Chewy and Browned Butter
- Time:15 minutes active + 1 hours 25 mins cooling = Total 1 hours 40 mins
- Flavor/Texture Hook: Nutty, velvety base with a salty sweet crackle on top
- Perfect for: Holiday cookie swaps, last minute dessert platters, or beginner bakers
The Best Christmas Cookie Bars
That smell of toasted, nutty butter hitting the air is when I know the holidays have actually started. I remember one year trying to make traditional cut out cookies, and I spent four hours chilling dough and fighting with a rolling pin only for half of them to warp in the oven.
I was exhausted and honestly just wanted something that tasted like a celebration without the stress.
That's when I realized we've been lied to about holiday baking. There's this myth that the only way to get a rich, professional texture is through hours of labor and precision chilling. Trust me, you don't need a fancy stand mixer or a 24 hour wait to make something that tastes like it came from a high end bakery.
This recipe is all about the layers of flavor. We start with the deep, toasted notes of browned butter, build a velvety chew with brown sugar, and finish with a hit of flaky salt that stops the sweetness from being overwhelming.
If you're looking for the best christmas cookie bars, this is the one that actually behaves in the oven and tastes like a cozy winter night.
Why These Bars Work
The difference between a bar that tastes like a bland cake and one that tastes like a decadent cookie comes down to a few specific choices.
- Browned Butter: By cooking the butter until the solids toast, we introduce a nutty aroma and remove some water, which prevents the dough from puffing up too much.
- The Sugar Split: Using more brown sugar than white sugar creates a denser, more moist dough texture that stays soft for days.
- Temperature Control: Using a room temperature egg prevents the browned butter from seizing, keeping the batter smooth and glossy.
- Minimal Agitation: Folding the flour in by hand instead of beating it prevents gluten development, which is why these stay chewy instead of bready.
According to the guides at Serious Eats, browning butter (beurre noisette) fundamentally changes the flavor profile by creating toasted milk solids. This is what gives these bars that signature "bakery" depth.
| Method | Prep Time | Texture | Best For |
|---|---|---|---|
| Fast (Melted Butter) | 10 minutes | Softer, more cake like | Quick cravings |
| Classic (Browned Butter) | 15 minutes | Chewy, nutty, rich | Holiday gifts |
I've found that the classic method is always worth the extra five minutes. The way the butter behaves when it's toasted creates a structure that supports the heavy chocolate chips and sprinkles without collapsing.
Component Analysis
Understanding what each ingredient does helps you adjust the recipe if you're missing something in the pantry.
| Ingredient | Science Role | Pro Secret |
|---|---|---|
| Browned Butter | Flavor base & fat | Let it cool slightly so it doesn't scramble the egg |
| Brown Sugar | Moisture & chew | Pack it tight for a more consistent caramel taste |
| Baking Soda | Lift & browning | Ensure it's fresh so the bars don't stay pale |
| All Purpose Flour | Structure | Measure by weight to avoid a dry, crumbly bar |
The Shopping List
When picking your ingredients, don't bother with low-fat alternatives. The fat is what carries the flavor and creates that velvety mouthfeel.
- 1 cup (225g) unsalted butter Why this? Allows you to control the salt levels
- 3/4 cup (150g) packed light brown sugar Why this? Adds molasses notes and chew
- 1/2 cup (100g) granulated white sugar Why this? Helps the edges crackle
- 1 large (50g) egg, room temperature Why this? Emulsifies the fats and sugars
- 2 tsp (10ml) vanilla extract Why this? Rounds out the sweetness
- 2 cups (250g) all purpose flour Why this? Standard protein for the right bite
- 1 tsp (5g) baking soda Why this? Creates a slight rise and gold color
- 1/2 tsp (3g) salt Why this? Balances the sugar
- 1 cup (170g) semi sweet chocolate chips Why this? Classic contrast to the butter
- 1 cup (170g) white chocolate chips Why this? Adds creamy, milky notes
- 1/2 cup (60g) festive sprinkles Why this? Pure holiday joy
- 1 tsp (5g) flaky sea salt Why this? The final "pop" of flavor
For the best results, I recommend using a high-quality flour from a brand like King Arthur Baking to ensure your measurements are consistent.
| Original Ingredient | Substitute | Why It Works |
|---|---|---|
| All Purpose Flour | Almond Flour | Grain free. Note: Result is much denser and softer |
| Semi Sweet Chips | Dark Chocolate (60%) | Less sugar. Note: More intense, bitter contrast |
| White Chocolate | Butterscotch Chips | Same fat profile. Note: Changes flavor to a caramel vibe |
If you're feeling adventurous, you can swap the sprinkles for crushed candy canes. Just be careful not to overdo it, or the mint will overpower the browned butter.
Essential Gear List
You don't need a kitchen full of gadgets, but a few things make this way easier.
- 9x9 inch baking pan: The standard size for this recipe.
- Parchment paper: Absolutely mandatory if you don't want to fight the pan.
- Small saucepan: For browning the butter.
- Whisk and silicone spatula: For mixing and folding.
- Digital scale: For getting those gram measurements exact.
Chef's Note: I always leave a 2 inch overhang of parchment paper on the sides. It acts like a sling, so you can lift the entire block of bars out of the pan once they've cooled.
Step by step Process
Let's crack on with the baking. Remember to keep an eye on the color that's your best indicator of doneness.
- Prep the pan. Line your 9x9 inch pan with parchment paper, leaving an overhang on two sides.
- Brown the butter. Melt the butter in a saucepan over medium heat. Stir constantly until it foams and you see little brown bits forming at the bottom. Remove from heat immediately and let it cool slightly.
- Mix sugars. Whisk the browned butter, light brown sugar, and white sugar together. Note: Ensure the mixture is smooth and no large sugar lumps remain.
- Add liquids. Stir in the room temperature egg and vanilla extract. Mix until the batter looks glossy and well combined.
- Incorporate dry ingredients. Fold in the flour, baking soda, and salt using a spatula. Note: Stop the moment you see no more flour streaks; overmixing leads to tough bars.
- Fold in cheer. Gently stir in the semi sweet chocolate chips, white chocolate chips, and festive sprinkles.
- Fill the pan. Spread the batter evenly into the pan. Press down firmly to remove any large air pockets.
- Bake. Bake for 25 minutes until edges are deep golden brown and the center is set but still soft.
- Finish with salt. Immediately sprinkle the flaky sea salt over the top while the bars are still hot.
- The hard part. Allow the bars to cool completely in the pan for at least 1 hour.
Solving Common Issues
Even with the best christmas cookie bars, things can sometimes go sideways. Usually, it's a matter of temperature or measurement.
Troubleshooting Common Issues
| Issue | Solution |
|---|---|
| Why Your Bars Are Cakey | If your bars feel more like a sponge cake than a cookie, you've likely overmixed the dough or used too much flour. When you whisk flour too vigorously, you develop gluten, which creates a bread like s |
| Why Your Bars Spread Too Much | This usually happens if the browned butter was still boiling hot when you added the sugars and egg. The heat melts the sugar too quickly, leading to a thin, greasy bar. |
| Why the Center Stays Raw | Under baking is common if your oven runs cool. Ensure you're using an oven thermometer and look for those deep golden edges. |
Mistakes Checklist:
- ✓ Did you brown the butter until nutty, not burnt?
- ✓ Is the egg at room temperature to prevent splitting?
- ✓ Did you stop mixing as soon as the flour disappeared?
- ✓ Did you wait a full hour before slicing?
- ✓ Did you use a 9x9 pan (not a 9x13)?
Fun Flavor Twists
Once you've mastered the base, you can start playing with the mix ins. The beauty of these bars is how they behave with different additions.
Adding Peppermint Bark
Swap the white chocolate chips for crushed peppermint bark. This creates a cooling contrast to the warm, toasted butter.
Creating a Toffee Crunch
Fold in 1/2 cup of crushed toffee bits along with the chocolate. This doubles down on the caramelized flavor of the brown sugar.
Variation Ideas
If you love these, you might also enjoy my Classic PB Kiss Cookies for a different kind of holiday chew. Or, if you want something more delicate, try some Butter Spritz Cookies to round out your platter.
Scaling Your Batch
Changing the size of the recipe requires a few tweaks to ensure the texture stays the same.
Scaling Down (Half Batch) Use an 8x8 inch pan if you have one, or a loaf pan. Reduce the baking time by about 20% (start checking at 18 minutes). For the egg, crack it into a bowl, whisk it, and use exactly 25g.
Scaling Up (Double Batch) I recommend working in two separate batches rather than one giant bowl. If you must double, only increase the salt and baking soda to 1.5x the original amount to avoid a metallic taste. Use two 9x9 pans.
If baking both at once, lower the oven temp by 25°F and extend the time by 5 minutes.
Kitchen Myths
There are a few things people tell you about cookie bars that just aren't true.
Myth: You must chill the dough. For these specific bars, you don't. Since we use browned butter (which is already liquid) and a high sugar to flour ratio, the dough is stable enough to go straight into the oven.
Myth: More butter means more chew. Actually, too much butter will make the bars greasy and cause them to collapse. The chew comes from the brown sugar and the minimal mixing, not the volume of fat.
Storage And Freshness
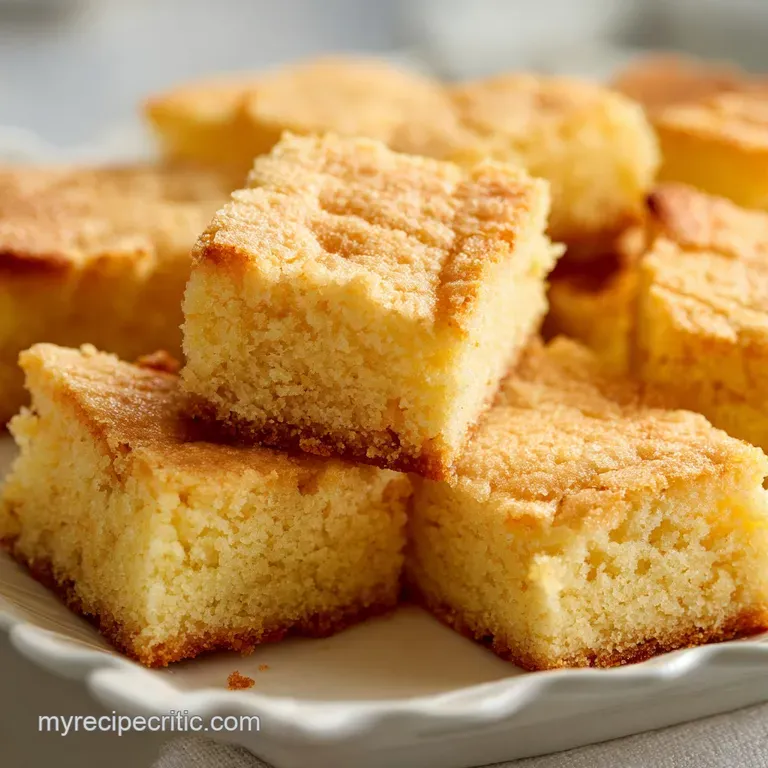
These bars are surprisingly hardy, making them some of the best christmas cookie bars for gifting.
Fridge Storage Keep them in an airtight container for up to 5 days. I find they actually get a bit chewier after a day in the fridge.
Freezing for Later Freeze the baked bars in a single layer on a tray first, then move them to a freezer bag. They'll stay fresh for 3 months. Thaw at room temperature for 30 minutes before eating.
Zero Waste Tips If you have a bit of browned butter left in the pan, don't wash it away! Stir it into your morning oatmeal or use it to sauté some mushrooms. If you have leftover sprinkles, mix them into a plain glaze for a quick cupcake topper.
Serving Your Treats
To really show these off, I like to serve them on a wooden board with a few bowls of fresh raspberries. The tartness of the berries cuts through the richness of the chocolate and butter.
For a more festive look, slice them into small 2 inch squares. This makes them feel more like a "bite" and less like a heavy dessert. Pair them with a cold glass of milk or a hot peppermint mocha.
If you're putting together a holiday platter, these act as the "anchor" dessert because they're so satisfying. They provide a great texture contrast to lighter wafers or airy meringues, ensuring everyone finds something they love.
Recipe FAQs
How to prevent the bars from becoming cakey?
Fold in the flour gently using a spatula. Overmixing develops gluten, which transforms a chewy cookie bar into a sponge like cake.
Is it true that I should overmix the batter to ensure a smooth texture?
No, this is a common misconception. Stirring too vigorously creates a bread like texture; you should stop as soon as the ingredients are just moist.
How to store these bars for gifting?
Place them in an airtight container. They stay fresh in the fridge for 5 days or in the freezer for up to 3 months if frozen in a single layer first.
Why did my bars spread too much and turn out greasy?
The browned butter was likely too hot. Adding boiling butter to the sugars and egg melts the mixture too quickly, leading to a thin, oily consistency.
Can I serve these alongside other holiday treats?
Yes, they pair well with a variety of sweets. If you enjoyed the butter-to-sugar balance here, see how the same principle works in this hard candy recipe.
How to tell when the bars are finished baking?
Look for deep golden brown edges. Bake for 25 minutes until the edges are dark gold and the center is set but still soft.
Do these bars need to be refrigerated?
No, but it is recommended for texture. Keeping them in the fridge for a day actually makes the bars chewier and more satisfying.
The Best Christmas Cookie Bars

