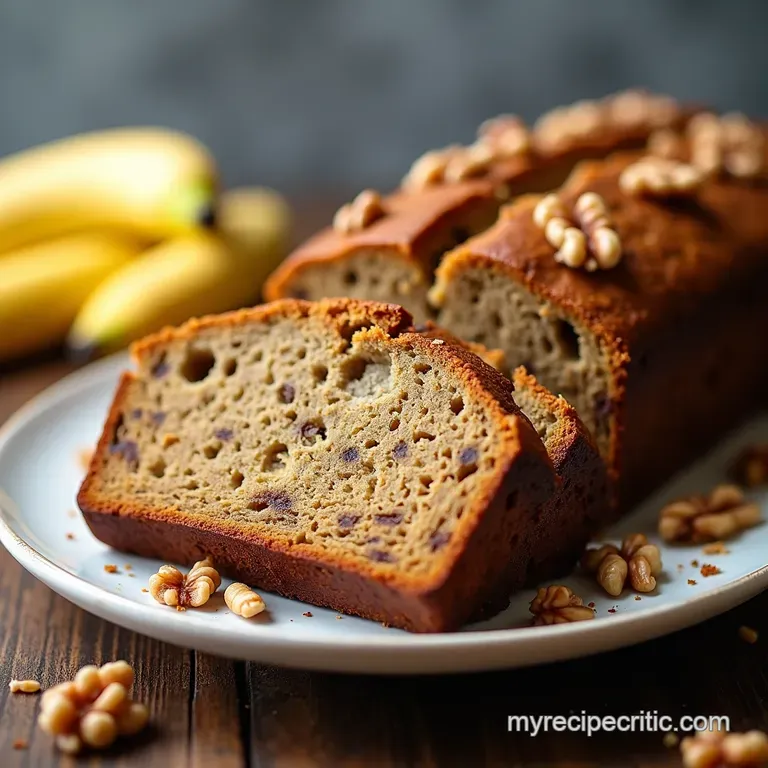
The Ultimate Comfort Gloriously Moist Banana Bread with Toasted Walnuts
- The Definitive Guide to Superior Banana Bread with Walnuts
- Why This Banana Bread Recipe Deserves a Permanent Spot in Your Cookbook
- Essential Components for Fluffy, Flavorful Loaves
- Sourcing the Right Stuff: Ingredient Deep Dive
- Mastering the Method: Step-by-Step Baking Sequence
- Elevating Your Experience: Tips, Tricks, and Customizations
- Nutritional Insights and Long-Term Storage Strategies
- Recipe FAQs
- 📝 Recipe Card
The Definitive Guide to Superior Banana Bread with Walnuts
There is a certain magic that happens in the oven when you combine overripe fruit with simple pantry staples. That transformative aroma warm, spicy, and deeply comforting is the signature scent of home baking.
Today, we are delving deep into creating the Best Banana Bread with Walnuts , a loaf that transcends the ordinary quick bread category. This recipe is engineered not just for flavour, but for an unparalleled, melt-in-your mouth texture that will make you rethink every dry slice you’ve ever endured.
Achieving this level of quality is surprisingly simple when you understand the core principles of balancing moisture, sweetness, and structure.
Why This Banana Bread Recipe Deserves a Permanent Spot in Your Cookbook
This particular Walnut Banana Bread Recipe stands head and shoulders above the rest because it eliminates common pitfalls: dryness, lack of flavour, and gummy texture.
It uses the 'muffin method,' which streamlines the process significantly, making it an Easy Banana Bread with Walnuts Recipe suitable for novice bakers while delivering results seasoned professionals envy. This approach ensures speed without sacrificing depth.
Unlocking Peak Flavor: The Secret to Overripe Bananas
The fundamental ingredient in any excellent Banana Nut Bread Recipe is, naturally, the banana. However, the mistake many bakers make is using yellow or merely spotty fruit.
For true, deep flavour and natural sweetness that allows you to use slightly less refined sugar, your bananas must be aggressively ripe think deeply brown, almost entirely black skins.
This ensures the starches have fully converted to sugar, maximizing the inherent fruit essence that permeates every crumb of your finished loaf.
A Texture Revelation: Achieving Ultimate Moisture in Every Slice
Moisture is the holy grail of quick breads. We achieve supreme softness here through two key techniques: using melted butter, which hydrates the flour differently than creamed butter, and ensuring those aforementioned ultra ripe bananas provide ample liquid content.
When you follow the mixing steps carefully, you guarantee a Moist Banana Bread experience every single time.
More Than Just Dessert: Banana Bread as Kitchen Comfort Food
The appeal of Banana Bread with Walnuts extends far beyond mere sweetness. It is a staple of comfort, evoking memories of rainy afternoons or simple, satisfying breakfasts. It’s versatile enough to be a hearty morning slice or a sophisticated accompaniment to an afternoon tea service.
This loaf truly is kitchen alchemy made practical.
Essential Components for Fluffy, Flavorful Loaves
To create a loaf that is both structurally sound and luxuriously tender, every component plays a vital role. We are aiming for a beautiful rise thanks to the proper leavening agent, complemented by the richness of butter and the subtle warmth of spice.
Related Recipes Worth Trying
- Easy OneBowl Moist Banana Bread Recipe The Best Loaf — Ditch the washing up This easy banana bread recipe guarantees a ridiculously moist loaf using just one bowl Perfect for that afternoon cuppa
- The Never Fails Comfort Classic Banana Bread Recipe — Bake the best moist banana bread loaf that smells like a dream This foolproof recipe uses simple steps for deeply flavoured results Get the recipe now
- The Ultimate Summer Peach Fruit Salad with HoneyLime Mint — Ditch the soggy leftovers This vibrant Summer Peach Fruit Salad recipe uses a zesty honeylime dressing to elevate ripe peaches beautifully Find out how to...
Sourcing the Right Stuff: Ingredient Deep Dive

Selecting your ingredients wisely is the first step toward baking success. For the Banana Walnut Bread Recipe , freshness and ripeness matter more than complex processes.
The Precise List: What You Need to Assemble Your Banana Bread
To begin this wonderful journey, you will need approximately three to four very ripe bananas, mashed until they yield about one and a half cups of rich pulp. For sweetness, we blend three quarters of a cup of packed light brown sugar which imparts depth and moisture with a quarter cup of granulated sugar for clean sweetness balance.
Structurally, one and three quarters cups of all-purpose flour are crucial, activated by one teaspoon of baking soda and enhanced with half a teaspoon of ground cinnamon for warmth, plus a half teaspoon of fine salt to heighten all the other flavours.
Finally, two room temperature large eggs bind everything together, alongside a half cup of melted, slightly cooled unsalted butter, which delivers that luxurious mouthfeel.
Tools of the Trade: Essential Equipment for Perfect Baking
The beauty of this recipe is its minimal equipment requirement. You'll need two medium mixing bowls one for the wet base and one for combining the dry elements a sturdy whisk for the initial incorporation, and, most importantly, a flexible rubber spatula for the gentle final folding stages.
A standard 9x5 inch loaf pan, properly greased and lined with parchment paper that overhangs the sides, ensures easy removal post bake.
Walnut Preparation Secrets: Toasting for Maximum Crunch and Taste
While you can certainly add raw walnuts directly, the difference achieved by a quick toasting is staggering. To properly prepare your cup of roughly chopped walnuts, spread them thinly on a dry baking sheet and place them in the 350° F ( 175° C) oven for just five to seven minutes.
Keep a close eye; they can move from fragrant to burnt quickly. This process releases their oils, deepening their inherent flavour and ensuring a satisfying crunch in your final Banana Bread with Walnuts .
Mastering the Method: step-by-step Baking Sequence
The method here is wonderfully quick, relying on simple incorporation rather than aeration techniques like creaming butter. We combine the wet components, whisk the dry components, and then unite them with caution.
Mixing Technique: The Crucial Balance Between Wet and Dry Components
After preparing the wet ingredients mashing the bananas, whisking in the melted butter, sugars, eggs, and vanilla until smooth set this aside. In your second bowl, lightly whisk the flour, baking soda, cinnamon, and salt to ensure the leavening agent is perfectly dispersed.
The critical juncture comes when you introduce the dry mix to the wet. Add the dry ingredients in batches, using your spatula to fold until just combined. I cannot stress this enough: stop mixing the moment you see no more dry flour streaks.
Overmixing activates the gluten in the flour, which results in a tough, dense loaf, defeating our goal of a soft, tender crumb.
Folding in the Walnuts: Distributing Inclusions Evenly
Once the batter is just combined, it will look thick and slightly lumpy this is correct! Now, gently fold in the majority of your toasted walnuts. Reserve a small handful to sprinkle across the top before baking for visual appeal.
Gentle handling here prevents the development of excess gluten and keeps the structure light.
Oven Dynamics: Setting the Temperature for Ideal Rise and Crust
Preheat your oven to 350° F ( 175° C) before you start mixing. Pour the batter into your prepared pan, smooth the top, and sprinkle with those reserved nuts.
This moderate temperature allows the loaf to rise beautifully and evenly without burning the exterior before the centre is cooked through, leading to that gorgeous golden brown crust synonymous with perfect Banana Bread with Walnuts and Raisins or chocolate chip variations.
The Waiting Game: Cooling Your Banana Bread for Clean Slicing
Patience is rewarded both during baking and cooling. Once removed from the oven after 55 to 65 minutes (verified by a clean toothpick test), allow the loaf to rest in the pan for exactly ten minutes. This brief period allows the structure to set.
After ten minutes, use the parchment sling to lift the loaf out and transfer it directly onto a wire cooling rack to cool completely. Slicing while hot often results in a gummy texture as internal moisture redistributes unevenly; cooling fully ensures clean, perfect slices every time.
Elevating Your Experience: Tips, Tricks, and Customizations
While the base recipe is stellar, experimentation is the joy of baking. For those looking to build upon this foundation, consider subtle upgrades. If you want a richer flavour profile, gently brown your butter before adding it to the wet ingredients letting the milk solids toast adds a complex, nutty backdrop that pairs brilliantly with the walnuts.
Flavor Twists: Variations Beyond the Classic Walnuts Inclusion
If you are looking to branch out, consider adding complementary flavours. A Banana Bread with Walnuts and Chocolate Chips Recipe is a classic for a reason; fold in a half cup of dark chocolate morsels along with the nuts for a decadent swirl.
Alternatively, for a richer, spicier profile akin to a holiday bake, a small grating of fresh nutmeg or a dash of allspice alongside the cinnamon can be transformative.
Nutritional Insights and Long Term Storage Strategies
While homemade baking always offers a superior flavour profile, understanding the components helps in managing consumption. This loaf, rich with fruit and nuts, provides a satisfying source of energy.
Troubleshooting Common Banana Bread Failures
If your loaf sinks in the middle, it is usually a sign of underbaking or too much leavening agent. If it’s dry, you likely overmixed the batter or used bananas that weren't ripe enough. Remember the mantra: mix lightly, use very ripe fruit, and trust the toothpick test.
Keeping Fresh: Optimal Storage for Moist Banana Bread with Walnuts
To maintain that wonderful moistness achieved in the recipe, store your cooled Banana Bread with Walnuts tightly wrapped in plastic wrap or aluminum foil at room temperature for up to four days. If you need longer storage, slice the loaf first, wrap the slices individually, and freeze them.
They can be reheated briefly in a toaster oven directly from frozen for a fresh baked experience days later.
Recipe FAQs
What makes this Banana Bread with Walnuts so moist? I always end up with dry bricks!
The secret to moisture lies in the bananas you must use ones that are nearly black, as they’ve converted all their starch to sugar and liquid. Additionally, we use melted butter rather than creaming it, which results in a tender crumb. Just remember the golden rule: never overmix once the flour is added!
Can I make this recipe ahead of time, and how should I store the finished loaf?
Absolutely, banana bread is often better the next day as the flavours meld! Wrap the cooled loaf tightly in plastic wrap, then foil, and store it at room temperature for up to 4 days.
For longer storage, slice it first, freeze it in an airtight container, and you can simply pop a slice in the toaster whenever you fancy a treat!
My bananas aren't quite black yet; can I still make this loaf?
While the recipe sings with overly ripe fruit, if you’re in a rush, you can speed up the process. Lay your yellow-to-spotted bananas on a baking sheet and bake them at 300°F (150°C) for 15 20 minutes until the skins are blackened.
This intensifies their sweetness and softens them perfectly for mashing.
I don't like walnuts; what other mix-ins would work well in this bread?
No worries if walnuts aren't your cup of tea! Pecans are a fantastic, direct substitute that offers a similar rich flavour. Alternatively, consider swapping them out for ½ cup of dark chocolate chips, or for a little extra texture, use toasted pumpkin seeds or pecans.
Why do you recommend toasting the walnuts before adding them to the batter?
Toasting is a simple trick that really elevates the bread from good to magnificent! It gently heats the oils in the nuts, releasing a deeper, earthier flavour that prevents them from tasting raw. It only takes a few minutes in the oven, and the resulting crunch is far superior.
How do I know when the bread is perfectly baked and not undercooked in the middle?
Trust the skewer test over the clock! Insert a wooden skewer or a thin knife into the centre of the loaf. If it comes out clean or with just a few moist crumbs clinging to it, it’s ready. If it has wet batter, give it another 5 minutes and test again, as oven temperatures can vary wildly.
Moist Banana Bread With Walnuts

