Ice Cream Sandwiches: Freezer-Friendly
- Time: Active 45 mins, Passive 3 hours 47 mins, Total 4 hours 32 mins
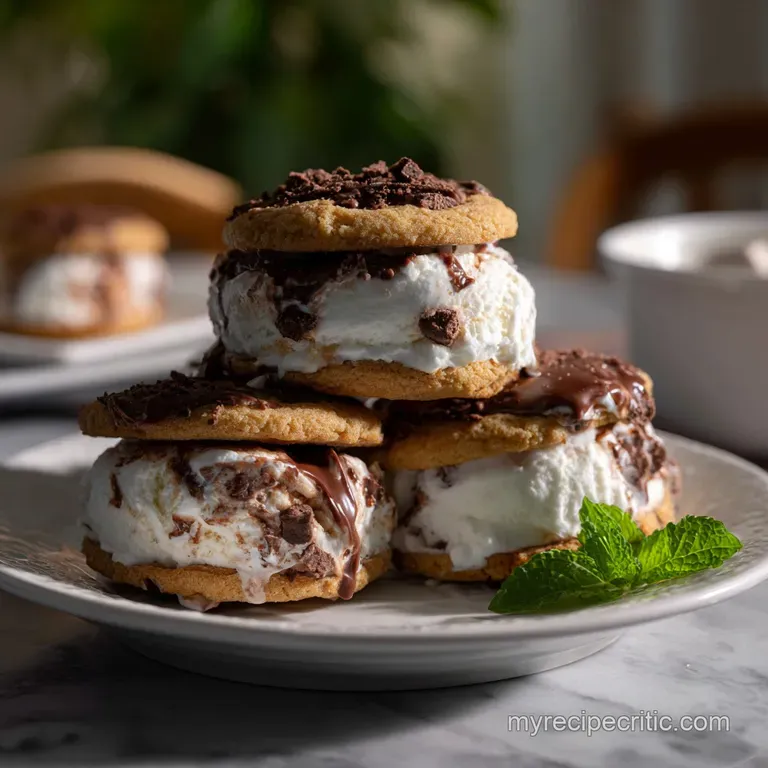
- Flavor/Texture Hook: Velvety vanilla center pressed between fudgy, cocoa rich wafers
- Perfect for: Summer block parties, nostalgic weekend treats, or a refined dessert meal prep
- Creating the Ultimate Soft and Chewy Ice Cream Sandwiches
- Vital Statistics and Timelines for Perfect Freezing
- Navigating the Elements for a Better Component Analysis
- Essential Ingredients and Smart Substitutes
- Essential Tools for Uniform Chocolate Layers
- Executing the Bake and the Frozen Press
- Resolving Common Textural Hurdles and Melting Issues
- Adjusting Flavors and Dietary Preferences Easily
- Resolving Kitchen Myths
- Optimal Preservation and Reducing Kitchen Waste
- Mastering the Art of the Perfect Reveal
- Ice Cream Sandwich FAQs
- 📝 Recipe Card
Creating the Ultimate Soft and Chewy Ice Cream Sandwiches
The scent of deep, Dutch process cocoa hitting melted butter is a core memory for me, right up there with the sound of an ice cream truck turning the corner. But let's be real: most homemade attempts at this classic end in a shattered cookie or ice cream squirting out the sides.
I've spent plenty of afternoons cleaning up sticky chocolate puddles to figure out that the secret isn't just in the bake, but in how we handle the temperature and the structure of the filling.
We are aiming for that specific, nostalgic "bite through" texture where the cookie gives way just as easily as the ice cream. There is nothing worse than a rock hard biscuit that forces all the filling out the back.
This recipe fixes that by using a specific ratio of fats and sugars that behave perfectly at sub zero temperatures.
By the time you finish this batch, you'll have a stack of uniform, professional looking treats that put the boxed versions to shame. The aroma in your kitchen when those cocoa slabs come out of the oven is earthy, sweet, and incredibly inviting.
It’s a process that requires a little patience for the freezing stages, but the reward is a texture that stays soft and a flavor that is intensely chocolatey.
Vital Statistics and Timelines for Perfect Freezing
Getting the timing right is the biggest hurdle for most home cooks. We often want to rush the assembly, but the science of heat transfer doesn't care about our cravings. You need the chocolate layers completely cooled not just room temp, but cold before they ever touch the ice cream bean filling.
Science of Why it Works
- Hygroscopic Balancing: Coconut sugar attracts and holds onto moisture more effectively than cane sugar, which keeps the cocoa shell pliable and "bendy" even when frozen.
- Protein Stabilization: The addition of Greek yogurt to the softened ice cream introduces extra proteins and fats that slow down the melting process through a more stable emulsion.
| Method | Total Time | Texture Outcome | Best For |
|---|---|---|---|
| Fast Method | 1 hours 15 mins | Slightly firmer shell; ice cream may soften at edges | Immediate cravings |
| Classic Method | 4 hours 30 mins | Perfect "bite through" texture; professional finish | Parties and long term storage |
| Overnight Method | 12 hours | Maximum flavor development in the cocoa slab | Ultra clean edges and meal prep |
Giving the chocolate slab a long rest allows the flour to fully hydrate, which is why I always suggest the classic or overnight route. If you've ever made my Oatmeal Cream Pies recipe, you know how important that "soft set" texture is for a sandwich style dessert. These behave similarly, relying on a balanced dough texture that doesn't over expand in the oven.
Navigating the Elements for a Better Component Analysis
The chemistry of a frozen dessert is a delicate dance between fat, sugar, and air. If we have too much water, we get ice crystals; too little fat, and the mouthfeel becomes icy rather than velvety. We're using specific ingredients here to ensure the sandwich remains "biteable" directly out of the freezer.
| Ingredient | Science Role | Pro Secret |
|---|---|---|
| Dutch process Cocoa | Neutralizes acidity for a mellow flavor | Bloom it in the melted butter to wake up the volatile aromatics. |
| Greek Yogurt | Acts as a thermal stabilizer | Use full fat versions to prevent the ice cream from feeling "thin" or watery. |
| Coconut Sugar | Lowers the freezing point of the wafer | Sift it with the flour to avoid tiny "sugar spots" in the finished bake. |
For the Soft Cocoa Shells
The base of the sandwich relies on a thin, brownie like slab. We use Dutch process cocoa specifically because it has been treated with alkali, making it darker and less bitter than natural cocoa. This allows the floral notes of the vanilla bean to really pop.
For the Stabilized Vanilla Filling
Mixing the ice cream with 120g of plain Greek yogurt is my favorite "home cook hack." It adds a subtle tang that cuts through the sugar, but more importantly, it makes the ice cream much easier to spread into a perfectly flat layer without it turning into soup.
Essential Ingredients and Smart Substitutes
- 125g all purpose flour: This provides the structure. Why this? Essential for that specific "wafer" bite that isn't too crumbly.
- Substitute: 125g gluten-free 1 to-1 baking flour (Note: May be slightly grittier).
- 45g Dutch process cocoa powder: For that deep, dark "dark chocolate" look. Why this? Standard cocoa is too acidic and won't give the same color.
- Substitute: 45g Black cocoa powder (Note: Results in an even darker, Oreo like flavor).
- 100g coconut sugar: Keeps the shell soft. Why this? Its moisture retention properties are superior to white sugar here.
- Substitute: 100g Light brown sugar (Note: Adds a slight caramel note; shell stays very soft).
- 115g unsalted butter: Melted and cooled. Why this? Melted butter creates a denser, fudgier texture than creamed butter.
- Substitute: 115g Refined coconut oil (Note: Must be refined to avoid coconut flavor; shell will be slightly firmer).
- 1.5 liters vanilla bean ice cream: The heart of the dish.
- Substitute: 1.5 liters Chocolate or Salted Caramel ice cream.
- 120g plain Greek yogurt: Our stabilizer.
- Substitute: 120g Sour cream (Note: Adds more tang and a very rich mouthfeel).
Essential Tools for Uniform Chocolate Layers
You don't need a professional bakery setup, but a few specific items will make your life significantly easier. I highly recommend using a 9x13 inch (23x33 cm) baking sheet or a specialized brownie roll pan. This ensures the dough spreads to the exact thickness required for a traditional look.
A piece of parchment paper is non negotiable here. You'll use it to lift the entire slab out of the pan once it’s cooled. If you try to cut these inside a high walled pan, you'll end up with mangled edges and a lot of frustration. Also, grab a long offset spatula; it’s the only way to get that ice cream layer perfectly level. It’s the same tool I use when making a Homemade Chocolate Cream recipe to get those silky smooth peaks.
Executing the Bake and the Frozen Press

1. Preparing the Chocolate Slab
Whisk the 125g all purpose flour, 45g cocoa, 1 tsp baking powder, and 0.25 tsp salt in a medium bowl. In a separate large bowl, combine the 115g melted butter with 100g coconut sugar, the egg, 60ml milk, and 1 tsp vanilla.
Note: Whisking the sugar into the warm butter helps it dissolve for a smoother crust.
2. Achieving the Quick Bake
Spread the dough texture into a lined 9x13 inch pan, smoothing it to the edges. Bake at 180°C for 10-12 minutes until the surface looks matte and no longer wobbles. Note: Overbaking will make the sandwiches crack when you bite them later.
3. Mastering the Uniform Filling
While the slab cools completely, let the 1.5 liters of ice cream sit out for 10 minutes until slightly softened, then fold in the 120g Greek yogurt. The mixture should smell like fresh cream and vanilla bean.
4. Executing the Final Press
Cut the cooled chocolate slab in half widthwise to create two equal rectangles. Spread the ice cream mixture over the bottom of one half, then carefully invert the second half on top. Press gently until the filling reaches the very edges.
5. Flash Freezing for Stability
Wrap the entire block in plastic wrap and freeze for at least 4 hours. This ensures the layers bond together as a single unit.
6. The Precision Cut
Remove from the freezer and, using a sharp knife dipped in hot water, slice into 12 even rectangles. Listen for the slight crackle of the wafer giving way to the frozen center.
7. Individual Wrapping
Wrap each sandwich in parchment paper or foil immediately after cutting. Note: This prevents the edges from picking up "freezer smells."
8. Final Hard Freeze
Place the wrapped sandwiches back in the freezer for another 30 minutes before serving. This "sets" the cut edges.
Resolving Common Textural Hurdles and Melting Issues
The most common frustration with homemade ice cream sandwiches is the "sliding" effect. This happens when the ice cream isn't cold enough during the cutting phase or if the cookies are still holding residual heat.
Preventing the "Ice Cream Slide"
If your filling is oozing out as you try to cut the sandwiches, your freezer might not be set cold enough, or you didn't wait long enough during the passive cooling stage. Always use a knife that has been heated under hot water and wiped dry between every single cut.
This melts a microscopic layer of the sandwich, allowing the blade to glide through rather than "squishing" the layers.
Managing the Freezing Point
Different brands of ice cream have different sugar contents. High sugar ice creams melt faster. By adding the Greek yogurt, we are essentially "tempering" the ice cream to behave better at room temperature.
| Problem | Root Cause | Solution |
|---|---|---|
| Wafer is too hard | Overbaked or too much flour | Reduce bake time by 2 mins; check flour weight. |
| Ice cream is grainy | Melted and refrozen too slowly | Ensure the yogurt and ice cream are folded quickly and returned to the freezer immediately. |
| Soggy cookies | Stored in a humid environment | Wrap individually in foil to create a moisture barrier. |
Common Mistakes Checklist
- ✓ Never assemble on a warm cookie; the wafer must be cold to the touch.
- ✓ Don't skip the yogurt; it’s the "glue" that keeps the filling stable.
- ✓ Always use parchment paper; trying to grease the pan instead will lead to sticking.
- ✓ Wipe your knife after every cut to keep the chocolate edges clean and dark.
- ✓ Freeze the serving plates for 10 minutes if serving on a hot day.
Adjusting Flavors and Dietary Preferences Easily
If you're making these for a crowd, you might need to scale the recipe or swap a few things around. This recipe is surprisingly sturdy when it comes to volume changes.
- To Scale Down (6 Sandwiches): Halve all ingredients. Use a smaller 8x8 inch square pan for the bake. Reduce the bake time to 8-9 minutes as the edges will cook faster.
- To Scale Up (24 Sandwiches): Double the ingredients but bake in two separate 9x13 inch pans rather than one large one. This ensures even heat distribution so the middle isn't raw while the edges burn.
- Baking 2x: If you are doing a double batch in one oven, lower the temperature to 170°C and extend the time by 4-5 minutes, rotating the pans halfway through.
1. If you want a "Double Chocolate" version, do this:
- Add 50g of mini chocolate chips to the ice cream and yogurt mixture. This adds a nice crunch to the velvety center.
2. If you want a "Minty Fresh" version, do this:
- Swap the vanilla extract in the dough for 0.5 tsp peppermint extract and use mint chip ice cream.
3. If you want a "Salty Sweet" version, do this:
- Sprinkle flaky sea salt over the dough slab immediately after it comes out of the oven. This creates a flavor profile similar to my Cookie Dough Pretzel recipe.
Resolving Kitchen Myths
Myth: You must use heavy cream to make the cookies soft. In reality, it's the sugar and the "short" bake time that control the texture. Cream can actually make the cookies too cake like and airy, which leads to them absorbing moisture from the ice cream and becoming soggy.
We want a dense, fudgy wafer, not a sponge cake.
Myth: Homemade sandwiches always get icy. Icy texture is usually caused by the ice cream melting too much during assembly and then refreezing slowly. By using the flash freeze method and the yogurt stabilizer, we keep the ice crystals small and the texture smooth.
Optimal Preservation and Reducing Kitchen Waste
Storage Guidelines These Ice Cream Sandwiches will keep perfectly in the freezer for up to 2 weeks if wrapped individually. For longer storage (up to 2 months), place the wrapped sandwiches inside a heavy duty freezer bag or an airtight container.
This prevents the "freezer taste" from migrating into the chocolate.
Zero Waste Tips When you trim the edges of your chocolate slab to make perfect rectangles, don't throw those scraps away! Crumble the leftover cocoa wafer pieces and store them in a jar in the freezer. They make an incredible topping for Sunday morning pancakes or can be folded into a batch of Snickerdoodle Cookies recipe for a chocolate swirl effect. You can also blend the scraps into a milkshake for an instant "cookies and cream" upgrade.
Mastering the Art of the Perfect Reveal
When you're ready to serve, don't just pull them out and hand them over. Let the sandwiches sit at room temperature for about 2 minutes. This very brief rest allows the outer surface of the cocoa wafer to soften just enough to release its full aroma.
If you want to go the extra mile, you can roll the exposed ice cream edges in sprinkles, crushed peanuts, or toasted coconut. This hides any minor imperfections in your cutting technique and adds a layer of texture that makes the whole experience feel like a high end creamery treat.
Trust me, once you nail the balance of that soft chocolate shell and the stabilized vanilla center, you'll never go back to the store-bought ones. They are the ultimate crowd pleaser that actually behaves the way you want it to!

Ice Cream Sandwich FAQs
Who has the best ice cream sandwiches?
It's subjective, but many prefer homemade for superior quality. Brands like Häagen Dazs and Blue Bunny offer well regarded options, but replicating the "just right" texture at home is achievable with techniques like stabilizing the filling with Greek yogurt. If you enjoyed the controlled texture here, you might also appreciate how we achieve a similar firmness in our Classic Strawberry Shortcake A Taste of Summer Bliss.
What is America's number one ice cream sandwich?
The Klondike Bar is often cited as a top seller. However, traditional ice cream sandwiches with cookie wafers hold a significant market share too. Many consumers seek out the nostalgic, softer cookie paired with ice cream.
What do British people call ice cream sandwiches?
They are commonly called ice cream wafers or ice cream biscuits. While "ice cream sandwich" is understood, the terms "wafer" or "biscuit" are more traditional in the UK for this type of confection.
Why do Walmart ice cream sandwiches not melt?
This is a common misconception; all ice cream sandwiches melt eventually. store-bought versions often contain stabilizers and emulsifiers to slow down melting and maintain texture, but they are not "unmeltable." The rapid freeze process and stabilizing ingredients mentioned in our recipe also help to
combat premature melting.
Can I use different types of ice cream in my sandwiches?
Yes, you can experiment with various flavors. While vanilla is classic, chocolate or even a swirl flavor can work. Remember that denser ice creams with higher fat content tend to melt slower. If you enjoyed the rich flavor profile here, consider how a similar flavor balance is achieved in our The Best Homemade Pumpkin Roll Recipe with Cream Cheese Filling.
How can I prevent my ice cream sandwich cookies from becoming too hard?
Don't overbake the cookie wafers and ensure they are slightly chewy. Using ingredients like coconut sugar, as in our recipe, helps maintain pliability even when frozen. If you mastered controlling cookie spread here, you'll find that same fat ratio logic applies to ensuring tenderness in recipes like our Best Classic Peanut Butter Blossoms Recipe Easy Hershey Kiss Cookies.
How do I make sure the ice cream layer is even?
Soften the ice cream slightly and use an offset spatula for smoothing. Letting the ice cream soften for about 10 minutes makes it pliable enough to spread evenly without melting too much. Ensure the cookie slab is completely cool before adding the ice cream layer for best results.
Ice Cream Sandwiches

Ingredients:
Instructions:
Nutrition Facts:
| Calories | 300 kcal |
|---|---|
| Protein | 6 g |
| Fat | 16.5 g |
| Carbs | 35.6 g |
| Fiber | 1.5 g |
| Sugar | 22.3 g |
| Sodium | 110 mg |
