Better Than the Bakery Ultimate Cherry Pie Bars with Buttery Shortbread
- Why These No-Fuss Cherry Pie Bars Triumph Over Traditional Pies
- The Allure of the Buttery Shortbread Foundation
- Gathering Your Components for Perfect Cherry Pie Bars
- Step-by-Step Guide to Crafting Your Cherry Creation
- Baking and Cooling for Optimal Texture
- Elevating Your Homemade Cherry Pie Bars: Pro Baker Secrets
- Storage Strategies for Maximum Freshness
- Recipe FAQs
- 📝 Recipe Card
Why These No-Fuss Cherry Pie Bars Triumph Over Traditional Pies
There’s an undeniable romance surrounding the classic, double crust cherry pie the lattice work, the perfectly crimped edges, the anticipation of that first juicy slice. However, let’s be honest: sometimes romance takes too much effort.
That’s where our Cherry Pie Bars step in, offering all the deep, nostalgic flavour profile of the traditional favourite without any of the structural headaches. We’ve distilled the essence of that beloved dessert into an easy-to-manage format.
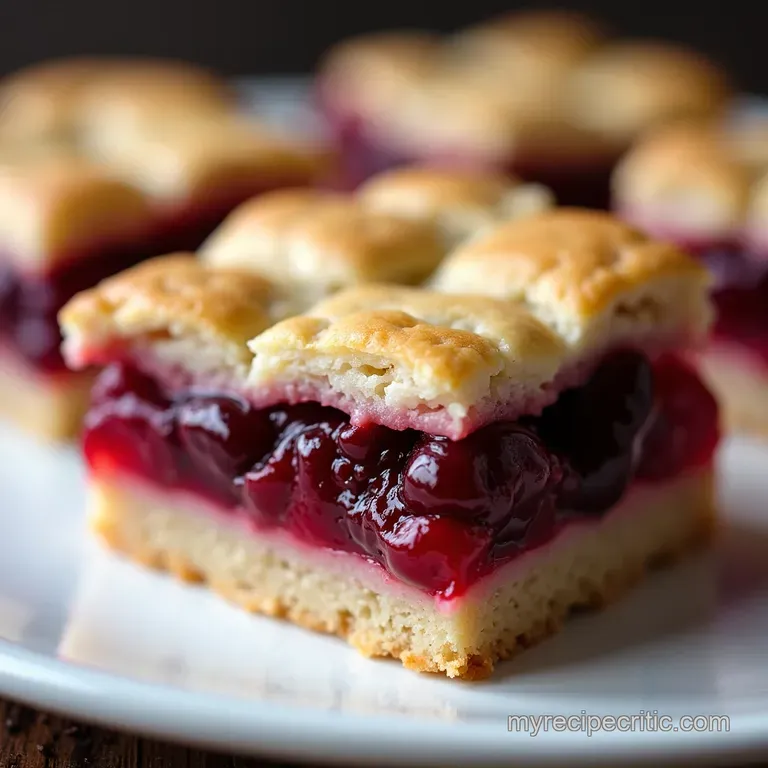
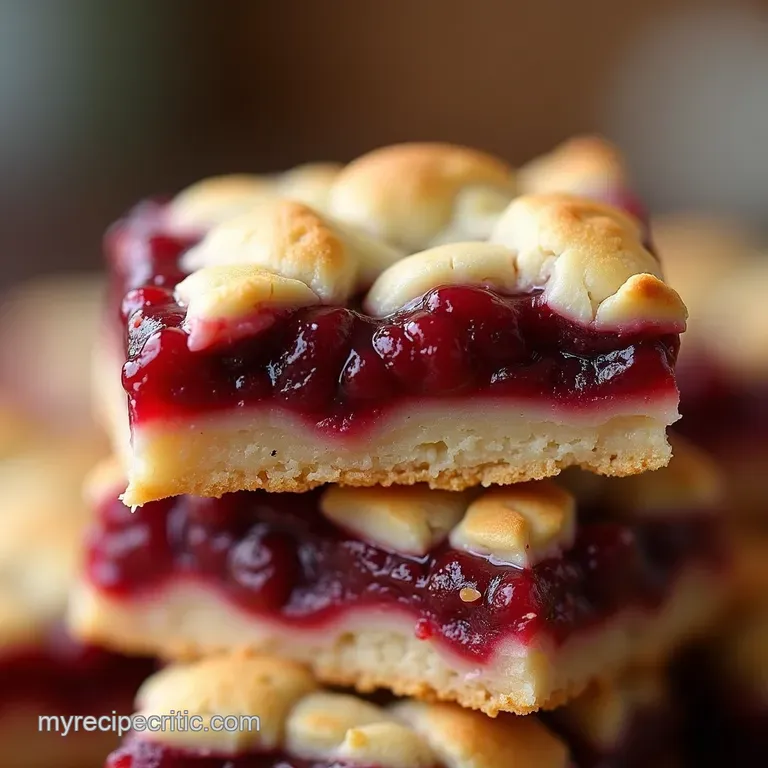
Forget fighting with flaky pastry or wrestling a hot pie tin; these bars deliver a glorious, buttery shortbread base, a vibrant, tart cherry centre, and a satisfyingly crumbly topping.
They are exceptionally easy to transport, making them the ultimate Cherry Pie Bars Picnic contribution, or simply the most satisfying mid-week indulgence. They truly are superior when you crave classic American comfort baking with minimal fuss.
The Allure of the Buttery Shortbread Foundation
The secret weapon in this recipe is, without question, the foundation. We are foregoing standard pie dough entirely in favour of a rich, tender shortbread that performs double duty serving as both the bottom crust and the streusel topping.
This buttery layer not only anchors the sweet filling but adds a delightful textural contrast that keeps the Homemade Cherry Pie Bars from ever becoming heavy or overly dense.
When you see the recipe outline, you’ll notice that most of the flour, sugar, and cold butter mixture is earmarked for these two essential components.
A Picnic Perfect Dessert Solution
The convenience factor cannot be overstated. Imagine trying to serve a slice of warm, wobbly cherry pie at an outdoor gathering it’s a recipe for disaster. These Cherry Pie Bars Dessert squares, however, hold their shape beautifully once fully cooled, slicing cleanly into 16 perfect portions from a standard 9x13 inch pan.
This inherent sturdiness makes them a fantastic make-ahead option, ensuring you have a show stopping, yet utterly reliable, treat ready for any event.
Introducing Our Signature Sweet Tart Flavor Profile
While the crust is critical, the filling is the heart of the experience. We combine pitted sweet cherries which can be fresh, frozen, or even sourced from a good quality tin if fresh aren't available, making these Cherry Pie Bars with Canned Cherries a year round delight with just enough sugar and cornstarch to create a thick, jammy consistency.
A vital addition is a splash of fresh lemon juice to cut through the sweetness, along with a half teaspoon of almond extract. This subtle nutty note deepens the cherry flavour in a way that mimics high end bakery fillings, ensuring a complex, bright, and utterly irresistible flavour.
Demystifying the Lattice: Easy Assembly Guaranteed
One of the main draws of this Cherry Pie Bars Recipe is the utter simplicity of assembly. Instead of painstakingly weaving strips of dough, we divide our shortbread mixture into two parts: the base and the crumb topping.
After pressing the base layer into the pan, the cooked filling is spread evenly over it. Then, the remaining portion of the shortbread mixture is simply crumbled over the top, creating a rustic, textured streusel layer our beautiful, no-stress Cherry Pie Bars Topping .
This method ensures every single bite contains that perfect balance of crisp, buttery crust and gooey fruit.
Gathering Your Components for Perfect Cherry Pie Bars
Successfully executing any baked good starts with preparation, and assembling your mise en place ensures a smooth flow from mixing to baking. While the time estimates suggest this is an Easy Cherry Pie Bars project, mindful preparation will guarantee success, especially when dealing with cold butter and the necessity of chilling the dough.
Stocking Up on Crust & Crumb Ingredients
For the shortbread base and topping, you'll need a substantial amount of all-purpose flour specifically three cups, spooned and leveled correctly. The fat component must be precisely one cup (two sticks) of unsalted butter, which must be cut into small cubes and kept intensely cold.
Combining these dry ingredients with three quarters of a cup of granulated sugar and a teaspoon of fine salt forms the backbone of the structure. Remember, the ratio is key here; too much sugar in the shortbread can cause it to spread too much rather than crumble appealingly.
Selecting the Best Cherry Filling Components
For the vibrant centre of these Cherry Pie Bars Slab Bars , four cups of pitted cherries are required. If you are using frozen cherries, it is best practice not to thaw them, as they release less immediate liquid into the filling mixture.
To ensure that signature thick texture that avoids a soggy bottom, you will need a quarter cup of cornstarch (or tapioca starch works wonderfully too) mixed with half a cup of granulated sugar.
A tablespoon of fresh lemon juice is non-negotiable for brightness, and for that professional touch, a half teaspoon of almond extract pulls the whole flavour profile together beautifully.
Essential Tools Beyond Bowls and Spatulas
While basic mixing bowls and spatulas are necessary, you should have a few specialised tools ready. A 9x13 inch baking pan is essential for the proportions of this recipe. Crucially, line this pan with parchment paper, making sure there is an overhang on two sides these act as handles to lift the entire baked Cherry Pie Bars Dessert block out later.
A pastry blender or a food processor will be your best friend when cutting the cold butter into the flour for the shortbread texture. Finally, a medium saucepan is required to gently cook the cherry filling until it thickens to a pudding like consistency.
Related Recipes Worth Trying
- The Best Blueberry Pie Recipe with Flaky AllButter Crust — Achieve the perfect classic Blueberry Pie with this triedandtrue recipe We nail the sweettart filling and ensure zero soggy bottoms Get the secret to truly...
- Best Homemade Chocolate Cream Pie Recipe Velvety Rich — Ditch the instant mix Master this rich velvety Chocolate Cream Pie with a perfect stovetop filling and crisp buttery crust Totally foolproof
- The Best Homemade Chocolate Cream Pie Recipe Velvety Rich — Discover the ultimate Chocolate Cream Pie recipe featuring a deep velvety filling and a flaky homemade crust This is the best chocolate cream pie youll ever...
Step-by-step Guide to Crafting Your Cherry Creation
The process is designed to be sequential, utilizing the chilling time efficiently. We first build the base, which needs to firm up while you focus on the filling, ensuring the layers remain distinct and beautifully textured.
Baking and Cooling for Optimal Texture
This section covers the assembly, the oven time, and perhaps the most crucial step for any bar cookie: the cooling period. Patience here dictates whether you get perfect squares or a delightful, delicious mess.
Phase 1: Pressing in the Golden Shortbread Base
After whisking together the majority of your dry shortbread ingredients (2 3/4 cups flour, 3/4 cup sugar, and salt), it is time to cut in the cold butter. Work quickly, either with a pastry blender or by pulsing in a food processor, until the mixture resembles coarse, pea-sized crumbs.
Now, you must measure out exactly two-thirds of this mixture, reserving the rest for the topping. Press this designated base portion firmly and evenly across the bottom of your parchment lined 9x13 pan. This firm packing is what provides structure, so don't be shy!
Immediately place this base into the refrigerator to chill for a necessary 30 minutes.
Creating the Vibrant Cherry Layer Spread
While the base firms up, turn your attention to the filling. In your medium saucepan, combine the four cups of cherries, the remaining 1/2 cup of sugar, the cornstarch, lemon juice, and almond extract. Heat this mixture over medium heat, stirring constantly.
You are looking for the mixture to come to a simmer and thicken substantially it should coat the back of a spoon thickly. Once it reaches this stage, remove it from the heat and allow it to cool for about ten minutes.
This slight cooling prevents the hot filling from melting your chilled shortbread base when you combine the layers. Gently spoon this warm, luscious filling over the chilled shortbread base layer.
Achieving the Ideal Crumb Topping Application
Take the remaining one-third of your shortbread mixture. To this, stir in the reserved final 1/4 cup of sugar this slight addition sweetens the topping just enough. Scatter this mixture evenly over the cherry layer.
Don't press it down; allow it to remain loose and crumbly, as this is what will brown beautifully in the oven and provide that signature Cherry Pie Bars with Shortbread Crust texture we crave.
Determining Doneness: Visual Cues for Removal
Slide the assembled Easy Cherry Pie Bars into a preheated oven set to 350° F ( 175° C). Bake time typically falls between 40 and 45 minutes.
The key indicators of doneness are visual: the streusel topping should be a deep, inviting golden brown, and you should see the cherry filling actively bubbling up robustly around the edges. Once these signs appear, immediately remove the pan from the oven.
Elevating Your Homemade Cherry Pie Bars: Pro Baker Secrets
Even simple recipes benefit from expert insight. These little tricks elevate your baking from good to truly memorable, ensuring your Homemade Cherry Pie Bars are the talk of the next gathering.
Flavor Twists: Substituting Fruit & Spice Variations
While cherries are classic, don't hesitate to experiment. This base is incredibly versatile. Try substituting the cherries with equal parts mixed berries blueberries and raspberries create a spectacular, deeper purple hue.
For a sophisticated seasonal variation, use finely diced, slightly tart rhubarb combined with a teaspoon of ground ginger in the filling. If you enjoy a richer profile, a pinch of ground cardamom added to the shortbread mixture complements the fruit beautifully.
Troubleshooting Common Baking Hiccups
The most common issue is a soggy bottom crust. This is almost always due to an under thickened filling or slicing the bars before they cool fully. If your filling seems too loose after cooking, continue heating it until it passes the "coating the spoon" test.
Another potential pitfall is overmixing the shortbread dough; if mixed too long once the butter is incorporated, the gluten develops too much, resulting in a tough, cookie like base instead of a tender crumb. Mix only until the mixture just comes together.
Maximizing Shelf Life: From Countertop to Freezer
Proper storage ensures these Cherry Pie Bars taste just as good the next day, if not better, as the flavours meld. Once completely cooled and I cannot stress enough the importance of complete cooling store them, covered, at room temperature for up to three days.
If you anticipate needing them longer, these bars freeze exceptionally well. Wrap individual squares tightly in plastic wrap, then seal them within a freezer safe bag. They will maintain excellent quality for up to three months, ready to be thawed when that craving for a Cherry Pie Bars Dessert strikes unexpectedly.
Storage Strategies for Maximum Freshness
Ensuring your delicious creation lasts beyond the initial frenzy is key to enjoying them fully. The structure of these bars lends itself well to various preservation methods, allowing you to bake ahead for events or simply enjoy them over several days.
The key to maintaining that perfect contrast between the crumbly top and the dense base lies in controlling moisture and temperature after baking.
Recipe FAQs
Why are my Cherry Pie Bars coming out soggy on the bottom?
Soggy bottoms usually mean the filling was too wet or the base wasn't properly set. Make sure you cook your cherry filling until it’s nice and thick think pudding consistency and don't skip chilling the shortbread base before adding the fruit layer.
Can I make these Cherry Pie Bars ahead of time, and how should I store them?
They are actually brilliant for making ahead; the flavour deepens overnight! Store leftovers tightly covered at room temperature for up to two days, or in the fridge for up to five days. For longer storage, they freeze beautifully once cooled and sliced.
My shortbread dough is too crumbly to press into the pan. What am I doing wrong?
This is a classic case of the butter being too cold or not pressed firmly enough! Ensure your butter is cold but not rock solid, and use the bottom of a measuring cup to press the dough down firmly and evenly into the pan that pressure binds the crumbs together.
I don't have fresh cherries; can I use canned pie filling instead for these bars?
You certainly can swap the fresh filling for canned, but you'll need to adjust things slightly. Use one standard 21-ounce can of cherry pie filling, but drain off about half of the excess syrup first, or they will be too runny for the streusel topping.
How should I slice these bars neatly without everything falling apart?
Patience, dear baker! The absolute secret is to let them cool completely I mean completely to room temperature, which takes a few hours. Once cool, use a large, sharp knife, wiping the blade clean between each cut for pristine edges, much like you would for a flapjack.
Buttery Cherry Pie Bars

