Melt in Your Mouth Chicken Recipe: Creamy and Baked
- Time: 10 min active + 35 min baking = Total 45 mins (plus 10 min resting)
- Flavor/Texture Hook: Velvety topping with a smoke kissed finish
- Perfect for: Busy weeknights or low carb dinner guests
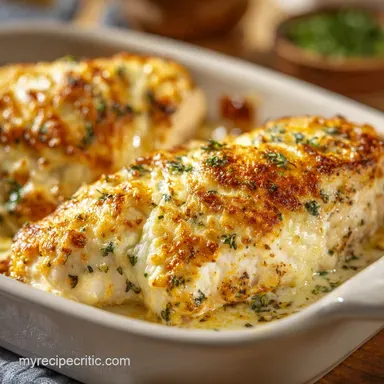
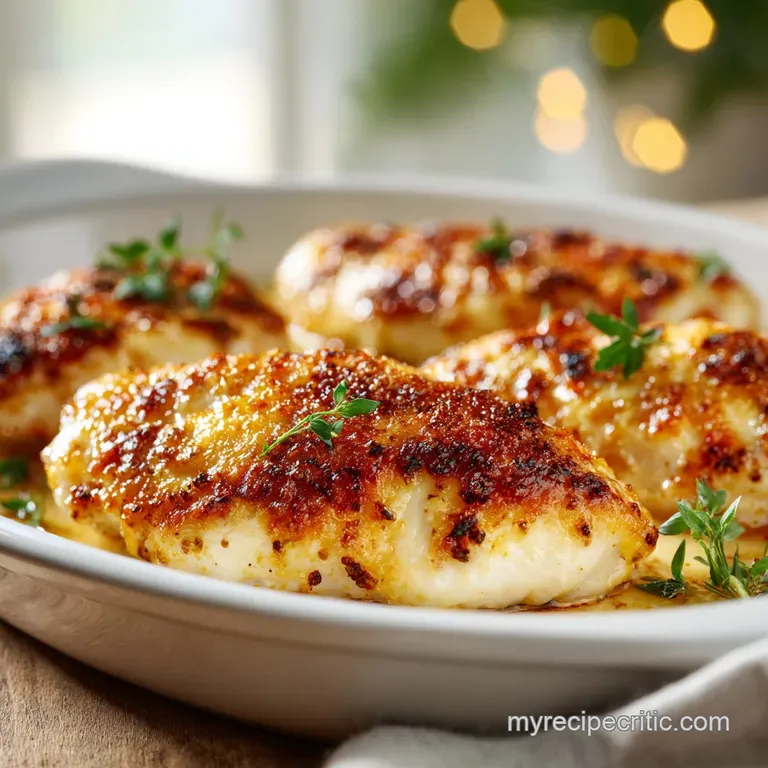
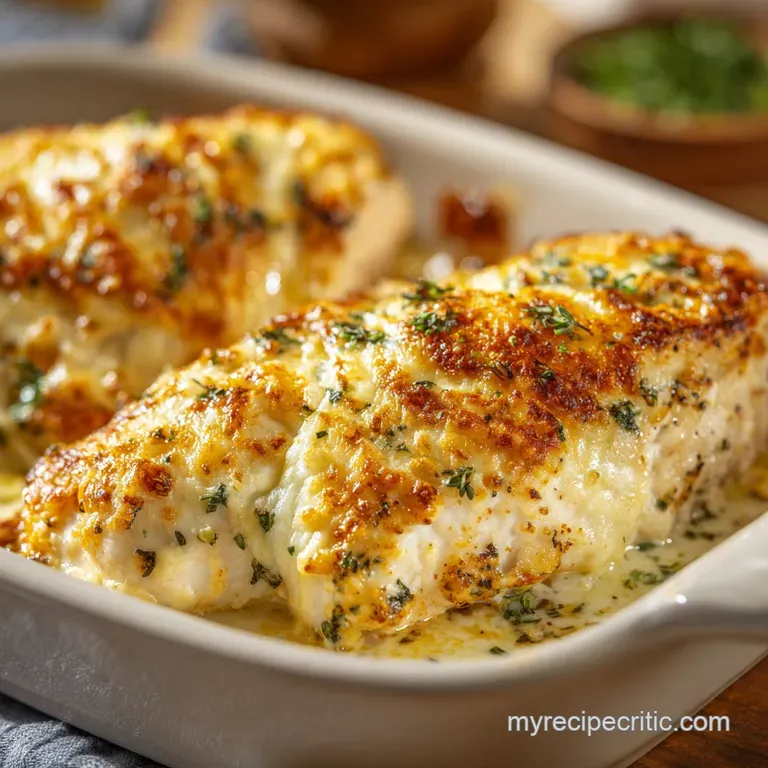
Melt in your mouth chicken recipe
The moment those breasts hit the oven, your kitchen starts to smell like a high end bistro. It's that specific, savory scent of toasted Parmesan and garlic that fills the air, promising something much better than the usual rubbery chicken breast.
I remember the first time I tried a "creamy" chicken dish, and I just dumped everything in a pan. I ended up with chicken that had the texture of a pencil eraser, and a sauce that had split into a greasy puddle.
The secret is the mayo. I know, some people cringe at the thought of mayonnaise in the oven, but it's the absolute hero here. It doesn't taste like a sandwich; it transforms into a rich, velvety blanket that keeps the meat juicy.
This is the only melt in your mouth chicken recipe I trust because it treats the chicken breast like the delicate protein it is, rather than something you can just blast with heat until it's grey.
You can expect a dish where the topping is just barely golden and the meat literally slides apart. We're aiming for a contrast between the rich, salty crust and the tender, smoke kissed center. Trust me, once you see how the meat stays plump and juicy, you'll never go back to plain baked chicken again.
Why Most Recipes Fail
Most people treat chicken breasts like a steak, searing them at high heat or baking them uncovered. The problem is that chicken breasts have almost no internal fat. Once the moisture evaporates, the muscle fibers tighten up and squeeze out every drop of juice, leaving you with that dry, stringy texture we all hate.
Another huge mistake is the "cook until it looks done" approach. Because chicken breasts vary in thickness, the edges often overcook before the center is safe. Without a protective layer or a precise temperature target, you're basically gambling with your dinner.
By using a thick paste of fats, we create a physical shield. This prevents the hot air from hitting the meat directly. It's not just about flavor, it's about thermodynamics. We're essentially poaching the chicken in its own juices and the fats from the topping.
The Fat Shield: Mayonnaise and sour cream create a seal that prevents moisture from evaporating during the bake.
Controlled Heat: Baking at 190°C ensures the topping browns without scorching the meat underneath.
Carryover Cooking: Removing the meat at 71°C allows the internal temperature to climb to the safe 74°C mark without overcooking the outer layers.
| Method | Time | Texture | Best For |
|---|---|---|---|
| Oven Baked | 35 mins | Velvety & Plump | Family meals, meal prep |
| Stovetop | 15 mins | Seared & Tight | Quick lunches, salads |
| Crock Pot | 4 hours | Shredded | Sandwiches, tacos |
The Ingredient Logic
Every single item in this mix has a job. If you remove one, you change the structural integrity of the topping.
| Ingredient | Science Role | Pro Secret |
|---|---|---|
| Mayonnaise | Moisture Barrier | Use a full fat brand for a silkier finish |
| Sour Cream | Tang & Stability | Prevents the topping from becoming too oily |
| Parmesan | Salt & Crust | Use finely grated for a more uniform seal |
| Smoked Paprika | Flavor Depth | Adds a "grilled" aroma without the grill |
Tools You Need
You don't need a professional kitchen for this, but a few specific items make it easier. A 9x13 inch baking dish is the standard here, as it allows the chicken to sit in a single layer without crowding. If they're too close, they'll steam rather than bake.
A digital meat thermometer is non negotiable. If you're guessing the doneness of chicken, you're either eating it raw or overcooking it. According to Serious Eats, precise temperature control is the only way to ensure chicken breast stays juicy.
Finally,, a small whisk or fork for the topping. You want that paste to be completely smooth so it slathers on evenly. Any lumps of garlic powder or oregano will create "holes" in your moisture shield.
Step by step Guide
Right then, let's get into the actual cooking. Keep your movements calm and your temps precise.
- Preheat your oven to 190°C (375°F). Note: Make sure the rack is in the center for even heat.
- In a small bowl, whisk together the mayonnaise, sour cream, Parmesan, garlic powder, smoked paprika, and dried oregano. Mix until a smooth, thick paste forms.
- Place the 680g (1.5 lbs) of boneless, skinless chicken breasts in a 9x13 inch baking dish.
- Season the meat lightly with 1/2 tsp salt and 1/2 tsp black pepper. Note: Don't over salt; the Parmesan is already salty.
- Slather a generous layer of the creamy mixture over each breast. Ensure the edges are completely covered so no meat is exposed to the air.
- Bake for 25-35 minutes until the topping is pale golden brown.
- Use your thermometer to check that the internal temperature hits 71°C (160°F).
- Remove the chicken from the oven and transfer to a platter.
- Let the meat rest for 5-10 minutes until it reaches a final internal temperature of 74°C (165°F).
Chef's Tip: If you have a broiler, you can pop the dish under it for 60 seconds at the very end to get those brown, bubbly spots on the Parmesan. Just watch it like a hawk so it doesn't burn.
Avoiding Kitchen Disasters
The most common issue is the "soggy bottom." This happens if you use a dish that's too small or if the chicken releases too much water. Using a wide dish lets the moisture evaporate from the bottom while the top stays sealed.
Why Your Chicken Is Dry
This usually happens because of overcooking or using frozen breasts that weren't fully thawed. Frozen meat releases more water, which can dilute the topping and lead to a longer cook time, which then dries out the fibers.
Why Sauce Separates
If your topping looks oily, it's likely because the oven was too hot, causing the emulsion in the mayo to break. Stick to 190°C to keep the fats stable.
| Problem | Root Cause | Solution |
|---|---|---|
| Dry Meat | Cooked past 74°C | Pull at 71°C and rest |
| Bland Taste | Low salt in meat | Season chicken before topping |
| Topping Slips | Mayo too warm | Chill topping 10 mins before applying |
Common Mistakes Checklist
- ✓ Checked that chicken is fully thawed.
- ✓ Topping covers every millimeter of the meat.
- ✓ Oven is fully preheated before the dish goes in.
- ✓ Meat rested for at least 5 minutes.
- ✓ Thermometer used instead of "eye balling" it.
Alternative Flavor Twists
If you want to switch things up, this base is very flexible. For a Mediterranean vibe, swap the smoked paprika for lemon zest and add a pinch of dried basil. It's a great way to vary your weekly menu without learning a whole new method.
If you're looking for something even more hearty, you could try a Pulled Chicken recipe for those days when you want something shreddable rather than sliced.
Dietary Swaps
| Original Ingredient | Substitute | Why It Works |
|---|---|---|
| Sour Cream (1/2 cup) | Greek Yogurt (plain, 1/2 cup) | Similar tang and thickness. Note: Slightly higher protein, lower fat |
| Parmesan (1/2 cup) | Pecorino Romano (1/2 cup) | Similar salty, hard cheese profile. Note: Stronger, more pungent flavor |
| Mayonnaise (1/2 cup) | Avocado Oil Mayo (1/2 cup) | Same fat structure. Note: Neutral flavor, heart healthier fats |
If you're doubling the recipe for a party, don't just double the salt and paprika. Go for about 1.5x the spices, but double the fats (mayo and sour cream). Use two baking dishes rather than one giant one to ensure the air circulates properly.
Kitchen Truths
There's a common belief that you need to sear chicken in a pan first to "lock in the juices." This is a myth. Searing creates flavor through browning, but it doesn't stop moisture loss. In this melt in your mouth chicken recipe, the topping does the work of a seal much more effectively than a sear ever could.
Another myth is that you must cook chicken until it's opaque all the way through. While safety is key, waiting for the center to look "white" usually means you've overcooked the outer edges. Trust the thermometer, not your eyes.
Storage And Reheating
Store the leftovers in an airtight container in the fridge for up to 3 days. To keep the texture velvety, avoid the microwave if possible. Instead, put the chicken in a 150°C oven for about 10-15 minutes. This gently warms the fats without breaking the emulsion.
You can freeze this dish for up to 2 months. I recommend freezing it after baking. When you're ready to eat, thaw it in the fridge overnight before reheating in the oven.
For zero waste, don't toss the leftover creamy sauce from the bottom of the pan. Spoon it over some steamed vegetables or stir it into a pot of rice for a quick, flavor packed side.
Perfect Side Dishes
Because this dish is rich and creamy, you need something with a bit of brightness or a crisp edge to balance it out. A fresh green salad with a sharp vinaigrette works well, or some roasted root vegetables.
I highly recommend pairing this with my Greek Lemon Potatoes, as the acidity from the lemon cuts through the richness of the Parmesan topping. If you're keeping it low carb, some sautéed spinach or roasted asparagus is the way to go.
Right then, you've got the tools and the technique. Just remember: don't skimp on the mayo, trust your thermometer, and let that meat rest. You're about to have the juiciest chicken of your life. Let's crack on!
Recipe FAQs
How to make melt in the mouth chicken?
Slather chicken breasts in a thick paste of mayonnaise, sour cream, and Parmesan. Bake at 375°F (190°C) for 25 35 minutes until they reach 160°F (71°C), then let them rest for 10 minutes to hit a final 165°F (74°C).
Is chicken breast good for diabetics?
Yes, lean chicken breast is an excellent choice. It is high in protein and low in carbohydrates, which helps maintain stable blood glucose levels.
How to cook chicken if you have gallstones?
Minimize the high fat toppings like mayonnaise and sour cream. Stick to baking or poaching the meat to avoid triggering a gallbladder attack caused by heavy fats.
How to make chicken extremely soft?
Create a moisture seal by covering the meat with the creamy topping. This prevents the oven's dry heat from evaporating the natural juices, ensuring the meat stays velvety.
How should I reheat leftovers to maintain the texture?
Warm the chicken in a 150°C oven for 10 15 minutes. Avoid the microwave, as it can break the emulsion of the sauce and make the protein rubbery.
What sides pair best with this creamy chicken?
Steamed vegetables or toasted bread complement the richness. If you love these savory herb notes, they pair perfectly with a classic Italian focaccia.
Is it true that chicken breasts must be cooked for an hour to be safe?
No, this is a common misconception. Cooking for an hour will dry out the meat; instead, use a meat thermometer to ensure the internal temperature reaches exactly 165°F (74°C).
Melt In Your Mouth Chicken