Banana Oatmeal Bars: the Wholesome Cinnamon Crumble Treat
- The 'Golden Hour' Banana Oatmeal Bars: Your New Go-To Treat
- Achieving the Perfect Texture: Why This Recipe Succeeds
- Key Ingredients and Expert Substitutions for Your Oat Bars
- Step-by-Step Guide: Baking Your Ultimate Banana Oatmeal Bars
- Chef’s Tips, Troubleshooting, and Avoiding Common Mistakes
- Proper Storage and Freezing Guide for Baked Goods
- Recipe FAQs
- 📝 Recipe Card
The 'Golden Hour' Banana Oatmeal Bars: Your New Go-To Treat
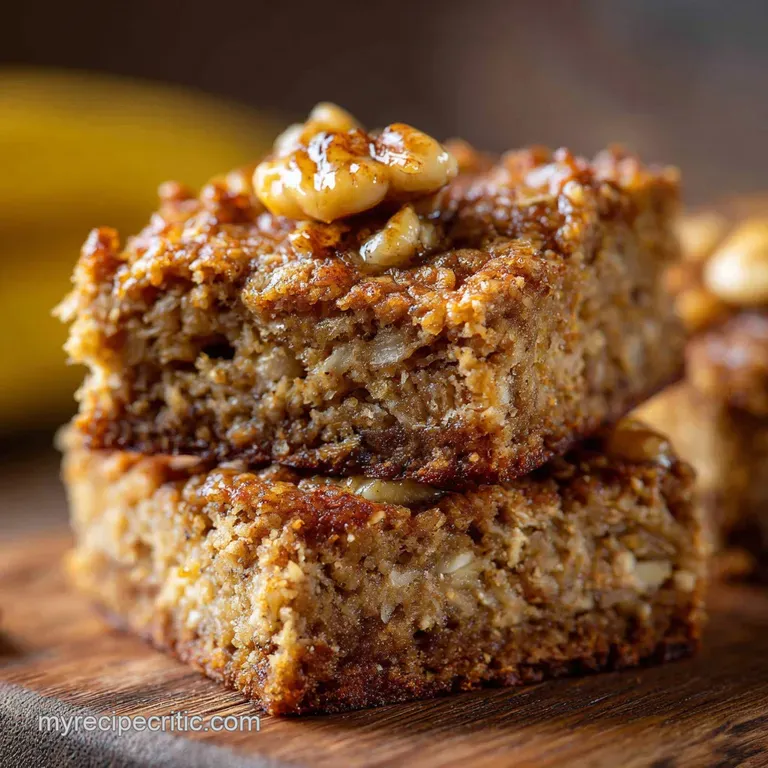
The moment these banana oatmeal bars hit the oven, your kitchen transforms into a cozy bakery. Seriously, the combination of warm, melting butter, fragrant cinnamon, and super sweet ripe bananas creates an aroma that should be bottled and sold as pure happiness.
The resulting bar is gorgeously chewy, slightly fudgy thanks to the fruit, and topped with a delicate, crunchy crumble.
I originally developed this recipe because I couldn't bear to throw away yet another bunch of blackening bananas sitting sadistically on my counter. It is fast, inexpensive, and genuinely wholesome a massive win for anyone needing healthy breakfast options or quick snacks to keep you full through the afternoon slump.
Trust me, these are perfect for keeping hungry toddlers happy, too!
Ready to transform those leftover oats and spotty bananas into something truly spectacular? We are going to dive straight into the tricks I learned to make sure these banana oatmeal bars hold together perfectly every single time, without being dry or crumbly. Let's get baking!
Achieving the Perfect Texture: Why This Recipe Succeeds
What Makes These Bars Better Than Traditional Banana Bread?
We all love a slice of The Ultimate Buttery Brown Sugar Banana Bread Best Moist Recipe , but sometimes you want chewy portability, not cakey slices. These bars succeed because we use an oat-forward base rather than a flour heavy batter. This gives you that satisfying chewiness found in baked oatmeal breakfast bars, which is far superior for grab and go treats. The crust is sturdy enough to cradle the moist filling without falling apart.
Ease and Speed: How Long Does This Recipe Really Take?
The active prep time here is genuinely minimal, clocking in at around 15 minutes. It’s a dump and stir process, really. While the bars need about 35 minutes in the oven and a mandatory cooling period, your hands-on work is over before your coffee is even cold.
It’s perfect for prepping on a Sunday afternoon for the week ahead.
Dietary Benefits of Our Wholesome Oat Base
The foundation of this recipe is good Old-Fashioned rolled oats. They are packed with fiber, which makes these bars incredibly filling and supports digestion. Since we are harnessing the natural sweetness of very ripe bananas, we can keep the added sugar surprisingly low compared to most bakery treats.
The Role of Ripe Bananas in Natural Sweetness and Binding
Overripe bananas aren’t just sweeter; they also contain more pectin and starches that break down, creating a natural binding agent. Using three large, mashed, spotty bananas provides enough moisture and structure that we don't need excessive eggs or oil. This is key to making the final product fudgy, not dry.
Wet vs. Dry Ratio: Ensuring a Chewy, Not Crumbly, Bar
The addition of just one tablespoon of cornstarch (or cornflour) to the banana filling is non-negotiable. This prevents the filling from becoming liquidy and seeping into the crust, which would make the base soggy. It ensures that when the bars cool, the filling sets up into a defined, delightfully chewy layer.
Cinnamon and Spice: Balancing the Flavor Profile
Don't skimp on the cinnamon! A full teaspoon in the crumble mixture adds necessary warmth and depth. It prevents the bar from tasting overwhelmingly just like banana, balancing the sweetness and giving that classic, comforting "baked goods" flavor.
Key Ingredients and Expert Substitutions for Your Oat Bars
Choosing Your Oats: Rolled vs. Quick Cooking for Texture
Use Old-Fashioned Rolled Oats. These provide the most desirable chewy texture and structure for both the base and the topping. Quick cooking oats absorb moisture too fast and can result in a mushy or dense bar, though you can use them in a pinch if you slightly reduce the amount of mashed banana.
| Ingredient | Role | Substitution (1:1 unless noted) |
|---|---|---|
| Rolled Oats | Structure, Chew | Quick oats (may require less liquid) |
| All-Purpose Flour | Binding, Crumble | 1:1 GF Baking Blend (make sure it contains xanthan gum) |
| Brown Sugar | Sweetness, Moisture | Coconut sugar or Granulated sugar (texture will be less moist) |
| Unsalted Butter | Fat, Flavor | Cold, solid Coconut Oil or vegan butter block |
| Honey/Syrup | Sweetener | Maple syrup (for vegan) or Agave |
| Cornstarch | Thickener | 2 tsp All-Purpose Flour or Arrowroot Powder |
Mashed Banana Mastery: The Optimal Ripeness Level
Your bananas should look borderline offensive deep yellow skin with significant brown and black spots. If they still look slightly green or firm, save them for a smoothie.
If you only have firm bananas, you can roast them quickly (skins on, 300°F/150°C for 15 minutes) to soften and concentrate the sugars.
Sweetener Swaps: Honey, Maple Syrup, and Granulated Sugar Notes
I love using brown sugar in the crumble for its molasses notes and moistness, and honey or maple syrup in the filling for added liquid binding. If you need to cut refined sugar, swap the brown sugar for coconut sugar and use maple syrup instead of honey.
You might notice the bars are slightly less fudgy, but still delicious and much healthier.
Dairy and Fat Alternatives for Vegan Friendly Bars
Making these vegan is super easy! Simply swap the cold, cubed dairy butter for the same amount of a quality vegan butter block or refined coconut oil. Ensure you use maple syrup instead of honey for the filling. The process is exactly the same, and the result is still wonderfully rich.
step-by-step Guide: Baking Your Ultimate Banana Oatmeal Bars
Prep Work: Lining and Preheating for Success
Preheating the oven to 350°F (175°C) is step one, obviously. But the most important prep step is lining your 8x8 inch pan with parchment paper, leaving generous overhangs. That parchment sling is your absolute best friend for lifting the finished, cooled bars cleanly out of the pan.
Trying to pry these out of an unlined pan? Absolute disaster, trust me.
Creating the Base and Crumble Mixture
In a big bowl, whisk together all the dry ingredients for the crumble, including the cinnamon and oats. Then, introduce the cold butter. You need to work quickly here, using a pastry blender or your fingertips to rub the butter into the mix until you have coarse, pea-sized crumbs.
Now, set aside exactly one cup of this mix for your topping later.
Layering Technique: Achieving Uniform Thickness
Pour the majority of the mixture (what's left after reserving the topping) into your prepared pan. Press it down very, very firmly, using the bottom of a flat measuring cup or glass. You want a solid, compact foundation that won't crumble when you cut it.
Give it a quick 10 minute pre-bake to set it solid before adding the filling.
The Baking Process and Visual Doneness Cues
While the base pre-bakes, mash your bananas and mix them with the syrup, vanilla, lemon juice, and crucial cornstarch. Spread this filling evenly over the warm crust. Sprinkle the reserved crumble evenly on top, pressing lightly. Bake for 30– 35 minutes.
They are done when the topping is golden brown and the filling looks set and perhaps slightly bubbly at the center edges.
Chef’s Tips, Troubleshooting, and Avoiding Common Mistakes
The Cooling Rule: Slicing Your Bars Cleanly
This is the most critical step, and where I messed up big time the first couple of times I made these. I learned the hard way that warm banana filling is basically liquid lava. You must allow the bars to cool completely to room temperature (at least one hour) before attempting to slice them. Think of it like cutting St Patricks Day Desserts: Ultimate Irish Cream Cheesecake Bars — if it’s warm, it’s a mess.
Why Are My Bars Too Soft/Too Dry? (Moisture Control)
- Too Soft/Wet: You probably used too many bananas or your bananas weren't ripe enough (leading to more water content). Ensure you measure the cornstarch properly.
- Too Dry/Crumbly: You may have used quick oats instead of rolled oats, which absorbed too much moisture, or you over baked them. Next time, try adding an extra tablespoon of maple syrup to the filling for insurance.
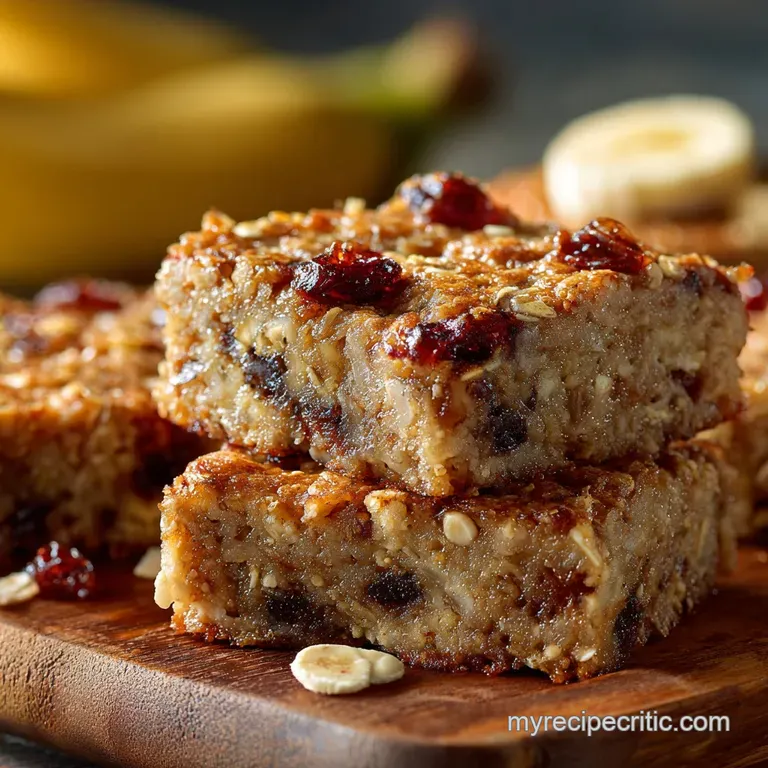
Boosting Flavor: Optional Mix-Ins (e.g., Chocolate Chips or Walnuts)
Want to level up these banana oatmeal bars with chocolate chips ? Add ½ cup of mini chocolate chips to the reserved topping right before sprinkling them over the filling.
Alternatively, adding ¼ cup of finely chopped walnuts or pecans to the dry crumble gives a fantastic, nutty crunch.
Chef’s Note: If you add highly moist additions like frozen berries, compensate by increasing the cornstarch in the filling by half a teaspoon to manage the extra liquid.
Proper Storage and Freezing Guide for Baked Goods
Shelf Life and Airtight Container Best Practices
Once completely cool, slice your bars and store them in an airtight container. At room temperature, they will last about 2 days, especially if your kitchen is warm. They are much safer and stay fresher for longer in the refrigerator, where they will happily last for 5 to 7 days.
Freezing Fully Baked Bars (Thaw and Reheat Instructions)
But does it freeze well? You bet! These bars make fantastic freezer snacks. Allow the bars to cool completely, slice them, and then wrap individual squares tightly in plastic wrap before transferring them to a freezer safe bag or container. They will last for up to 3 months.
To reheat, you can thaw them overnight in the fridge or pop them straight into a 300°F (150°C) oven for about 10– 15 minutes until warmed through.
Breakfast Boosts: Yogurt and Fresh Fruit Toppings
If you are using these breakfast banana bars as a quick morning fix (which I highly recommend, maybe alongside a few Homemade Protein Bars Easy NoBake Peanut Butter Chocolate Recipe for an extra kick), serving them alongside a generous spoonful of Greek yogurt or cottage cheese adds protein and creaminess. A little fresh berry or extra sliced banana on top never hurts either!

Recipe FAQs
Why did my Banana Oatmeal Bars turn out dry or too crumbly?
This often happens when the banana-to-dry-ingredient ratio is slightly off, or if the bars were overbaked. Ensure you are using very ripe, properly mashed bananas, aiming for about 1.5 cups of puree for the ideal moisture content. Check for doneness at the earliest time specified in the recipe to prevent moisture loss.
Can I make these Banana Oatmeal Bars completely vegan?
Absolutely, these bars adapt beautifully to a vegan diet. Simply substitute the traditional butter with an equal amount of good quality plant based butter or use refined coconut oil for a slightly different flavor profile. If the recipe calls for dairy milk, oat or almond milk are excellent 1:1 substitutes.
Do I need to use super ripe (spotty) bananas for this recipe?
Yes, ripe bananas are crucial for both maximum sweetness and achieving the correct moist texture. Overripe bananas (brown and spotty) break down easily and provide enough natural sugar that you may be able to reduce or eliminate any added sweeteners.
Using firm, yellow bananas will result in a much dryer, less flavorful bar.
What is the best way to store and freeze these bars?
Once completely cooled, store the bars in an airtight container at room temperature for up to 3 days, or refrigerate for up to one week. To freeze, wrap individual bars tightly in plastic wrap before placing them in a freezer safe bag or container; they will maintain quality for up to three months.
My bars turned out slightly soggy or gummy. What caused this?
Sogginess usually points toward insufficient baking time or using too many mashed bananas, which adds excess moisture. Ensure your oven is calibrated correctly, and confirm the bars are baked until the edges are nicely golden brown before removing them from the oven.
Always let them cool completely in the pan before cutting.
Can I substitute instant oats or steel cut oats for the rolled oats?
We highly recommend using old-fashioned rolled oats, as they provide the best structure, chew, and absorption rate for this recipe. Instant oats absorb liquid too quickly and tend to produce a mushy, gummy texture.
Steel cut oats require significantly more liquid and cooking time and are unsuitable for this specific bar format.
How should I reheat leftover Banana Oatmeal Bars?
These bars are delightful served warm, especially if they have been refrigerated. You can reheat them quickly in the microwave for 15-20 seconds or place them in a 300°F (150°C) oven for about five minutes until heated through. They pair beautifully with a drizzle of honey or a side of vanilla yogurt.
Healthy Banana Oatmeal Bars Recipe

Ingredients:
Instructions:
Nutrition Facts:
| Calories | 1018 kcal |
|---|---|
| Protein | 9.8 g |
| Fat | 74.7 g |
| Carbs | 81.7 g |
