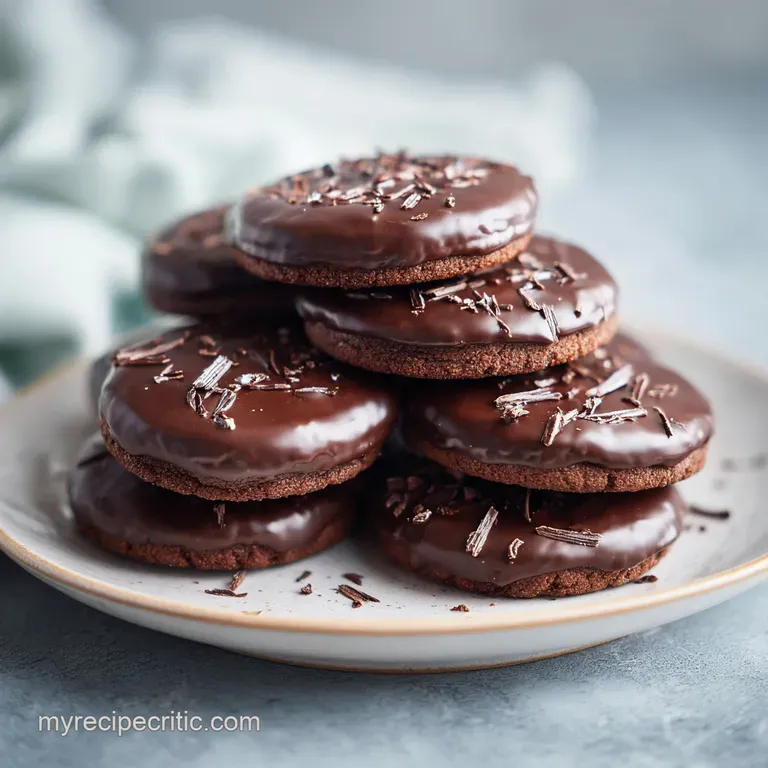
Chocolate Biscuits Recipe: Velvety and Deeply Cocoa Rich
- Time: Active 10 mins, Passive 12 mins, Total 22 mins
- Flavor/Texture Hook: Crackled, velvety, and deeply cocoa rich
- Perfect for: Late night cravings or holiday gift tins
- Rich Flavor and Fudgy Centers
- Component Analysis
- Timing and Batch Size Details
- Quality Ingredients for Best Results
- Essential Tools for Easy Baking
- Simple Mixing and Baking Steps
- Expert Techniques for Better Texture
- Smart Substitutes and Flavor Variations
- Proper Storage and Reheating Methods
- Serving Ideas and Pairings
- Kitchen Myths Debunked
- Scaling for Large Groups
- Recipe FAQs
- 📝 Recipe Card
The second the whisk hits the bowl of melted butter and cocoa, that deep, earthy scent fills the kitchen and you just know things are going right. I remember the first time I tried a version of these Chocolate Biscuits, I was so impatient that I didn't let the butter cool even a little.
I ended up with a greasy mess that wouldn't hold its shape, but man, those ugly "disasters" still tasted like pure fudge.
Since then, I’ve tweaked the ratios and refined the method so you get that signature crackle on top every single time. It’s all about how the sugars interact with the fat, creating a delicate, shiny crust that yields to a center so soft it almost melts.
We’re going for a texture that sits right between a biscuit and a truffle, and honestly, you'll never go back to the boxed stuff.
Rich Flavor and Fudgy Centers
The secret to getting that intense, dark color and the melt in-your mouth feel isn't just luck, it's chemistry. When we use melted butter instead of creamed, we’re intentionally limiting the amount of air we whip into the dough. This keeps the structure dense and chewy rather than light and cakey.
- Cocoa Blooming: Mixing the cocoa powder into the warm butter dissolves the solids and releases dormant flavor compounds for a more intense chocolate hit.
- Sugar Synergy: The combination of light brown sugar and white sugar balances moisture. Brown sugar adds a molasses like chew, while white sugar helps create those iconic crackled edges.
- Protein Control: Using all purpose flour provides just enough gluten to keep the biscuit from falling apart without making it tough or bread like.
- Leavening Balance: A small amount of baking soda reacts with the acidic cocoa and brown sugar to give a slight lift, ensuring the biscuit doesn't turn into a flat puddle on the tray.
| Method | Time | Texture | Best For |
|---|---|---|---|
| Stovetop Melt | 22 mins | Fudgy and dense | Quick weeknight cravings |
| Chilled Dough | 2 hours | Thicker, less spread | Bakery style presentation |
| Room Temp Butter | 30 mins | Softer, more cake like | Kids' lunchboxes |
If you have leftover cocoa from this bake, it behaves beautifully in my Homemade Chocolate Cream recipe which uses a similar blooming technique to ensure a silky finish.
Component Analysis
| Ingredient | Science Role | Pro Secret |
|---|---|---|
| Dutch processed cocoa | Adds deep color and neutralizes acidity | Always sift this to avoid bitter, unmixed clumps |
| Melted butter | Provides fat and controls gluten development | Let it cool slightly so it doesn't cook the egg |
| Light brown sugar | Retains moisture for a softer middle | Pack it tightly into the cup for accurate weight |
| Espresso powder | Enhances the perception of chocolate | It won't taste like coffee, it just makes cocoa sing |
Timing and Batch Size Details
This recipe is designed for efficiency, moving from the pantry to the cooling rack in under half an hour. Because the dough doesn't require a long chill time, you can have a fresh batch ready before your coffee even finishes brewing. It's a high yield, low stress bake that works for almost any occasion.
The batch size is also quite manageable. You'll get exactly 20 biscuits if you use a standard medium cookie scoop (about 1.5 tablespoons). If you need more for a larger gathering, doubling the recipe is straightforward, but you should stick to weighing your ingredients to keep the texture consistent across the larger volume.
Quality Ingredients for Best Results
- 115g unsalted butter, melted: Use high-quality butter for a richer mouthfeel.
- 45g Dutch processed cocoa powder, sifted: Why this? It's darker and less acidic than natural cocoa powder.
- 1 tsp espresso powder: This is the "volume knob" for the chocolate flavor.
- 150g light brown sugar, packed: Provides the chewiness and moisture we need.
- 100g granulated white sugar: Gives the edges a slight crispness.
- 1 large egg, room temperature: Cold eggs can cause the melted butter to seize up.
- 2 tsp vanilla extract: Rounds out the sweetness.
- 190g all purpose flour: The structural backbone of the biscuit.
- 0.5 tsp baking soda: Our primary leavening agent.
- 0.5 tsp fine sea salt: Essential for balancing the sugar.
- 170g semi sweet chocolate chips: Why this? Chips hold their shape better than chopped bars during the bake.
| Original Ingredient | Substitute | Why It Works |
|---|---|---|
| Light Brown Sugar | Dark Brown Sugar | Adds more moisture and a deeper molasses flavor. Note: Biscuits will be slightly darker and softer. |
| Dutch processed cocoa | Natural Cocoa Powder | More acidic. Note: You may need an extra pinch of baking soda to balance it. |
| Semi sweet chips | Dark Chocolate Chunks | Higher cocoa content. Note: These will create larger pools of melted chocolate. |
For those days when you don't want to turn on the oven but still need a fix, try this No Bake Chocolate recipe which uses similar pantry staples in a different format.
Essential Tools for Easy Baking
You don't need a heavy stand mixer for this recipe. In fact, a simple whisk and a sturdy spatula are better because they prevent over mixing, which can lead to tough biscuits. A medium sized microwave safe bowl for melting the butter and mixing the base is perfect.
I always recommend using parchment paper or a silicone baking mat. Chocolate based doughs can be sticky, and there is nothing worse than a beautiful biscuit leaving its bottom half stuck to the pan.
A cooling rack is also vital here; because these are so fudgy, they need airflow to set properly once they leave the oven.
Simple Mixing and Baking Steps

1. The Cocoa Emulsion
Whisk the 115g of melted butter with the 45g of sifted cocoa powder and 1 tsp of espresso powder. Note: This "blooms" the cocoa, intensifying the flavor. Mix until the mixture is glossy and smooth.
2. The Sweeteners and Binding
Add the 150g light brown sugar and 100g granulated sugar to the chocolate mixture. Whisk vigorously until the sugar is partially dissolved and the mixture looks like wet sand.
3. Incorporating the Lift
Beat in the 1 large egg, 2 tsp of vanilla extract, and 0.5 tsp of fine sea salt. Whisk for about 1 minute until the batter lightens slightly in color.
4. The Dry Foundation
Switch to a spatula and fold in the 190g of all purpose flour and 0.5 tsp of baking soda. Stop mixing the moment no white streaks remain.
5. Folding and Finishing
Gently fold in the 170g of semi sweet chocolate chips. Note: Don't overwork the dough now or it will become tough.
6. The Precision Bake
Scoop rounded tablespoons of dough onto your prepared baking sheet. Bake at 180°C (350°F) for 10 to 12 minutes until the edges are set and the tops have crackled.
7. The Set
Remove from the oven and let the biscuits sit on the hot pan for at least 5 minutes. Note: They are very fragile when hot and finish setting during this time.
8. The Cooling
Transfer to a wire rack. Wait until the chocolate chips have firmed up before storing.
Expert Techniques for Better Texture
1. Avoiding the "Cakey" Calamity
If your biscuits turn out more like little cakes, you likely over mixed the flour. Gluten starts developing the second liquid hits flour, and the more you stir, the stronger those bonds get. To keep things tender, use a "cut and fold" motion with your spatula instead of a circular stirring motion.
2. The Flat Liner Fix
When biscuits spread too much and turn into one giant sheet, it's usually because the butter was too hot when the sugars and eggs were added. If you find your kitchen is particularly warm, pop the dough in the fridge for just 10 minutes before scooping.
This firms up the fat just enough to control the spread in the oven.
3. Structural Integrity Meets Chew
For the best texture, always weigh your flour. Using a measuring cup can result in up to 30% more flour than needed if you pack it down. Too much flour makes the biscuit dry and crumbly, while the correct weight (190g) ensures a perfect balance between a soft center and a sturdy edge.
| Problem | Root Cause | Solution |
|---|---|---|
| Greasy surface | Butter was too hot | Let melted butter cool to lukewarm before adding sugar |
| No crackle on top | Sugar wasn't whisked enough | Beat the egg and sugars for a full minute to dissolve crystals |
| Dry and hard | Over baked | Remove when centers still look slightly underdone |
Common Mistakes Checklist
- ✓ Sift the cocoa powder to prevent bitter chocolate lumps in the dough.
- ✓ Use a room temperature egg so the fat in the butter stays emulsified.
- ✓ Don't over bake; the biscuits should still look soft in the center when pulled out.
- ✓ Let them rest on the pan; the residual heat is part of the cooking process.
- ✓ Use a kitchen scale for the flour and cocoa for the most consistent results.
Smart Substitutes and Flavor Variations
1. The Salted Caramel Twist
If you want to take these to the next level, press a small soft caramel into the center of each dough ball before baking. Sprinkle the finished, hot biscuits with a pinch of flaky Maldon sea salt. The salt cuts through the richness and makes the chocolate flavors pop even more.
2. gluten-free Adaptation
You can easily make these gluten-free by swapping the all purpose flour for a high-quality 1 to-1 gluten-free baking blend. Look for one that contains xanthan gum. Because this dough relies on melted butter and cocoa for structure, the gluten-free version is remarkably similar to the original.
Chef's Tip: If you want a "Mexican Hot Chocolate" vibe, add 0.5 tsp of ground cinnamon and a tiny pinch of cayenne pepper to the dry ingredients. It adds a warming glow that is incredible on a cold day.
Proper Storage and Reheating Methods
These Chocolate Biscuits are best eaten within 3 days. Store them in an airtight container at room temperature with a small piece of white bread. The bread will give up its moisture to the biscuits, keeping them soft for much longer.
Avoid the fridge, as it tends to dry out the crumb and make the chocolate chips feel waxy.
For long term storage, these freeze beautifully. Place the baked and cooled biscuits on a tray in the freezer for an hour until hard, then transfer to a heavy duty freezer bag. They will stay fresh for up to 3 months.
When you're ready for one, just let it thaw at room temperature or pop it in the microwave for 10 seconds to get those chocolate chips melty again.
Serving Ideas and Pairings
These are quite rich, so they pair perfectly with something that has a bit of acidity or bitterness. A cold glass of whole milk is the classic choice, but a sharp espresso or a tart raspberry coulis on the side works wonders.
If you're feeling adventurous, crumble a few over a bowl of vanilla bean ice cream while they are still slightly warm.
If you want to go all out for a dessert platter, serve these alongside some fresh strawberries. The brightness of the fruit provides a necessary contrast to the deep, fudgy profile of the biscuit. Just remember, these are dense sometimes one really is enough to satisfy that chocolate craving!
Kitchen Myths Debunked
Many people believe that you must chill every cookie or biscuit dough to get a good result. While chilling helps some recipes, this specific dough is designed for immediate baking.
Chilling it for more than 30 minutes can actually cause the sugar to crystallize differently, resulting in a duller surface rather than that beautiful, shiny crackle we’re looking for.
Another common myth is that "Dutch process" and "Natural" cocoa are interchangeable. They are not! Dutch process cocoa has been treated with an alkalizing agent to lower its acidity.
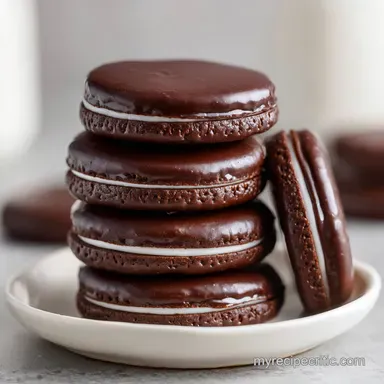
Since our recipe uses baking soda (which needs acid to react), switching to natural cocoa without adjusting the leavening can lead to a metallic taste or a poor rise. Stick to the Dutch process for that dark, Oreo like flavor profile.
Scaling for Large Groups
When you need to make a massive batch of Chocolate Biscuits for a party, you can double or triple the ingredients easily. However, be mindful of the "crowding" effect. Bake only one tray at a time on the middle rack for the most even heat distribution.
If you must bake two trays at once, rotate them halfway through the cooking time.
If you are scaling down to a half batch, the most difficult part is the egg. Simply crack one egg into a small bowl, whisk it well, and use exactly half of the liquid by weight (usually about 25-27g). This ensures your hydration levels stay perfect so the biscuits don't end up too dry or too runny.

Recipe FAQs
What is the best chocolate biscuit in the world?
This is subjective, but many experts favor the texture of a rich, fudgy, crackled biscuit. The best ones balance intense cocoa flavor with a slightly chewy center and a crisp edge.
If you master the technique of blooming the cocoa in warm butter, you’ll create a flavor depth rivaling any bakery favorite.
What do Americans call chocolate biscuits?
They are almost universally called chocolate cookies. The term "biscuit" in the US generally refers to a soft, savory quick bread similar to a scone, often served with gravy. This recipe aims for a dense, rich structure more akin to a truffle than an American biscuit.
What's the secret to good biscuits?
Temperature control and avoiding over mixing are the primary secrets. For a fudgy texture, use melted butter and ensure it cools slightly before adding the egg to prevent scrambling or seizing the fats. If you enjoyed controlling the fat ratios here, see how that same careful approach to consistency improves our Honey Butter Recipe.
What makes a biscuit a chocolate biscuit?
A chocolate biscuit is defined by having cocoa solids integrated into the dough structure itself, rather than just being dipped or filled. This allows the cocoa powder to bloom in the fat, deepening the flavor dramatically. This technique is crucial for achieving the intensity found in treats like our Peanut Butter Oatmeal recipe.
Is it true that I must use Dutch processed cocoa powder for the signature dark color?
No, this is a common misconception, but it's highly recommended. Natural cocoa is more acidic and will yield a lighter brown color because of its chemical reaction with baking soda. Dutch processing neutralizes the acid, resulting in a darker, deeper, and often milder chocolate flavor.
How to ensure the biscuit tops crackle beautifully instead of remaining smooth?
Whisk the sugars vigorously with the egg until the mixture starts to lighten slightly in color. This step partially dissolves the sugar crystals, allowing them to rise to the surface during baking and then crack as the biscuit sets. Mastering this sugar dissolution is key to surface texture; if you enjoyed this, apply that sensory timing to our The Classic Scottish recipe for the perfect crisp edge.
How to store chocolate biscuits to keep them soft for several days?
Store them in an airtight container at room temperature with a slice of fresh bread added. The bread releases moisture slowly into the container, softening the biscuits over time. Avoid refrigeration, as it dries out the crumb significantly and can cause the fat in the chocolate chips to feel waxy.
Easy Chocolate Biscuits Recipe
Ingredients:
Instructions:
Nutrition Facts:
| Calories | 174 kcal |
|---|---|
| Protein | 2.1 g |
| Fat | 7.4 g |
| Carbs | 26.5 g |
| Fiber | 1.2 g |
| Sugar | 17.9 g |
| Sodium | 62 mg |
