Chocolate Whoopie Pie Cake: Velvety and Rich
- Time: Active 20 minutes, Passive 30 minutes, Total 50 minutes
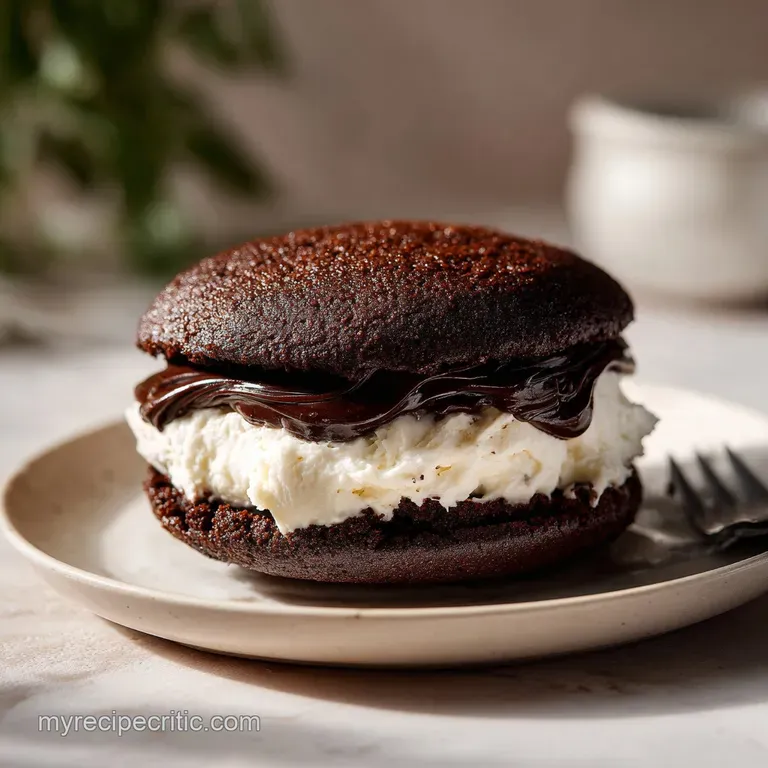
- Flavor/Texture Hook: Deeply mahogany, velvety sponge paired with airy, sweet marshmallow filling
- Perfect for: Family celebrations, birthday parties, or a nostalgic weekend treat
- Master the Velvety Chocolate Whoopie Pie Cake
- Sponge Texture and Marshmallow Cloud Contrast
- The Science of Boiling Water Bloom
- Prep Times and Porting Guidelines
- Component Analysis of Key Ingredients
- Essential Tools for Fluffy Success
- Step-by-Step Guide to Perfection
- Solutions for Better Baking Results
- Flavor Variations and Texture Tweaks
- Keeping Your Cake Fresh Longer
- Ideal Pairings for Rich Cocoa
- Recipe FAQs
- 📝 Recipe Card
Master the Velvety Chocolate Whoopie Pie Cake
Nothing ruins a midnight snack craving like a chocolate cake that tastes like a dry tire. We've all been there: you bite into what looks like a rich dessert, only for the sponge to behave like a piece of rubber that requires a gallon of milk just to swallow.
It’s frustrating because the visual promise of a deep, dark cake should result in a melt in-your mouth experience, not a chore for your jaw.
The struggle is real when the cake layers are too dense to match the light, airy nature of the filling. In many versions of this dessert, the sponge is either too crumbly to hold the marshmallow weight or so tough that the filling squishes out the sides before you can even take a clean bite.
I spent a long time wondering why my layers felt disconnected from that iconic "Whoopie" texture until I realized the moisture balance was completely off.
This recipe is the targeted fix for those textural woes. By leaning into a high moisture batter and a specific blooming technique, we create a sponge that stays moist for days and has enough structural integrity to hold a thick layer of fluff without feeling heavy.
We are moving away from the standard "birthday cake" crumb and toward something much more velvety and intentional.
Sponge Texture and Marshmallow Cloud Contrast
When you first slice into this cake, you’ll notice the sponge has a distinct mahogany hue. It’s dark, almost obsidian, which provides a stunning visual contrast against the snow white marshmallow filling.
Unlike a standard chocolate cake which can sometimes be light and airy like a chiffon, this particular sponge has a tighter, more "damp" crumb. It feels substantial on the fork but dissolves quickly on the tongue, which is the hallmark of a true Whoopie Pie.
The filling is where the magic happens. We aren’t just making a basic sugary frosting; we are whipping together butter at exactly sixty five degrees Fahrenheit with marshmallow fluff to create something that feels like eating a sweetened cloud. It’s stable enough to hold up the top layer of cake without collapsing, yet soft enough that it creates a velvety mouthfeel in every bite. If you enjoy rich desserts, you might also find my Velvety Chocolate Cream Pie hits those same decadent notes.
What sets this Chocolate Whoopie Pie Cake apart is the way the flavors build. You get the slight bitterness from the Dutch process cocoa first, followed by the tang of the buttermilk, and finally, the nostalgic, creamy sweetness of the marshmallow.
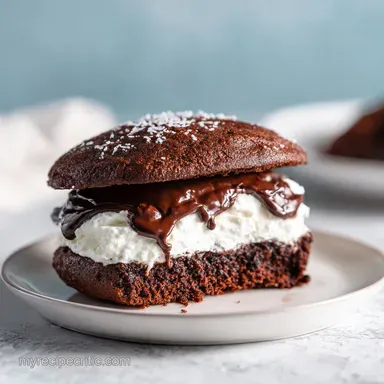
It’s a sophisticated take on a childhood favorite that doesn't sacrifice the "fun" factor. The layers actually stay separate and clean, giving you that beautiful striped look once the cake is fully assembled.
The Science of Boiling Water Bloom
The most critical step in this entire process is the addition of boiling water at the very end of the batter preparation. While it might feel counterintuitive to pour hot liquid into a batter with eggs, this serves a dual purpose that standard room temperature recipes miss.
- Cocoa Activation: Hot water "blooms" the cocoa powder, dissolving lumps and releasing the flavor compounds trapped within the cocoa solids for a deeper chocolate profile.
- Starch Gelatinization: The heat begins to swell the flour’s starches immediately, which helps the batter hold onto moisture throughout the 30 minutes of baking.
- Texture Management: This creates a very thin batter that results in a more uniform, flat topped cake, preventing the need for heavy leveling before assembly.
- Leavening Boost: The heat gives the baking soda a "jump start," creating tiny, consistent air bubbles that lead to a velvety rather than cavernous crumb.
| Thickness | Internal Temp | Rest Time | Visual Cue |
|---|---|---|---|
| 1.5 inches | 205°F (96°C) | 10 minutes | Sides pull slightly from pan |
| 2.0 inches | 208°F (98°C) | 15 minutes | Center springs back when touched |
| 0.5 inches | 195°F (90°C) | 5 minutes | Edge begins to crackle slightly |
This quick decision table helps you understand exactly when your sponge is ready. Since we are using two 8 inch pans, you’re aiming for that 205°F internal temperature to ensure the middle isn't gummy.
If you pull it out too early, the center will collapse under the weight of the marshmallow fluff later on.
Prep Times and Porting Guidelines
Timing is everything when you’re building a layered masterpiece. We are looking at 20 minutes of active prep, where you’ll be whisking and whipping, followed by 30 minutes of cook time. However, the most important "hidden" time is the cooling phase.
You cannot rush the assembly of a Chocolate Whoopie Pie Cake; if the layers are even slightly warm, your marshmallow filling will turn into a puddle.
| Servings | Ingredient Adjustments | Pan Size | Cook Time |
|---|---|---|---|
| 6 people | Halve all ingredients | 6 inch rounds | 22-25 minutes |
| 12 people | Standard recipe | 8 inch rounds | 30 minutes |
| 24 people | Double all ingredients | 9x13 sheets | 35-40 minutes |
When scaling up for a larger crowd, remember that the "Whoopie" experience is all about that cake to filling ratio. If you move to a 9x13 pan for 24 people, you'll want to slice the large sheet in half and stack it to maintain those iconic layers.
The 50 minutes of total time remains relatively consistent as long as your oven can handle the airflow for multiple pans.
Component Analysis of Key Ingredients
To get that repeatable sweetness and perfect dough texture, we have to look at how these specific ingredients behave together. Using 250g of all purpose flour provides the necessary structure, while the 350g of granulated sugar does more than just sweeten; it actually interferes with gluten development to keep the cake tender.
| Ingredient | Science Role | Pro Secret |
|---|---|---|
| Dutch process Cocoa | Lowers acidity | Sift it with the flour to prevent "cocoa pockets" in the sponge. |
| Buttermilk | Protein tenderizer | Use full fat for a richer, more velvety mouthfeel. |
| Vegetable Oil | Lipid moisture | Oil stays liquid at room temp, keeping the cake softer than butter would. |
| Marshmallow Fluff | Structural stabilizer | Provides the "tacky" grip that keeps the cake layers from sliding. |
Selecting your elements carefully is the difference between a good cake and a "where did you buy this?" cake. For example, unsweetened Dutch process cocoa is non negotiable here. Because it’s treated with alkali, it reacts beautifully with the baking powder and soda to create that dark, almost black color.
Regular natural cocoa will be too acidic and will result in a lighter, reddish cake that lacks the flavor depth we want for this specific Whoopie Pie Cake.
For the velvety cloud filling, make sure your butter is softened but not greasy. It should be sixty five degrees Fahrenheit cool enough to hold its shape when whipped but soft enough to incorporate the marshmallow fluff without lumps.
If the butter is too warm, the filling will look broken; if it's too cold, you'll have tiny yellow beads of fat throughout your white filling.
| Original Ingredient | Substitute | Why It Works |
|---|---|---|
| Buttermilk (240ml) | Whole Milk + 1 tbsp Lemon Juice | Mimics the acidity needed to react with the baking soda. |
| Vegetable Oil (120ml) | Melted Coconut Oil | Provides similar fat content. Note: Adds a subtle tropical scent. |
| Marshmallow Fluff (215g) | Homemade Meringue | Similar texture. Note: Less stable for long term storage. |
Using the right fat source is essential for the moisture level. While butter tastes great, vegetable oil is the secret to a cake that stays soft even after a night in the fridge. This is because oil doesn't solidify as firmly as butter does when chilled.
Essential Tools for Fluffy Success

You don't need a professional kitchen, but a few specific tools will make your life much easier. A stand mixer, such as a KitchenAid, is nearly essential for the filling. You need to beat the butter and fluff for a full 3 minutes to aerate it properly.
Doing this by hand is a workout most of us aren't looking for on a Sunday afternoon.
Chef’s Tip: Line the bottom of your pans with parchment paper even if you’ve greased them. This chocolate batter is high in sugar, which can caramelize and stick to the bottom, causing the sponge to tear during removal.
You’ll also want a long, offset spatula for spreading the marshmallow filling. Because the filling is so light, a regular knife tends to pull at the cake crumb, dragging dark bits into your pristine white center. An offset spatula allows you to glide over the surface with minimal pressure. If you're feeling adventurous with your dessert presentations, you might even consider serving slices of this alongside a Chocolate Charcuterie Board for a total cocoa blowout.
step-by-step Guide to Perfection
- Preheat and Prep: Set your oven to 350°F (175°C). Grease two 8 inch round pans and line the bottoms with parchment paper. Note: This ensures the delicate sponge releases perfectly every time.
- Whisk Dry Components: In a large bowl, combine 250g all purpose flour, 350g sugar, 75g cocoa, 1.5 tsp baking soda, 1 tsp baking powder, and 1 tsp salt. Whisk until the color is a uniform dusty brown.
- Incorporate Wet Ingredients: Add 240ml buttermilk, 120ml vegetable oil, 2 large eggs, and 2 tsp vanilla extract. Whisk until the batter is thick and dark.
- The Bloom Step: Carefully pour in 240ml boiling water. Whisk by hand until the batter is thin and glossy. Note: Don't panic if it looks like soup; this is exactly how it should behave.
- Divide and Bake: Pour the batter evenly into the two pans. Bake for 30 minutes until a toothpick comes out clean and the kitchen smells like a chocolate factory.
- Initial Cool: Leave the cakes in their pans for 10 minutes. This allows the structure to set before you move them.
- Final Cool: Transfer to a wire rack to cool completely. They must be room temperature before you even look at the filling.
- Whip the Filling: In a stand mixer, beat 225g softened butter and 215g marshmallow fluff. Add 240g powdered sugar, 2 tbsp heavy cream, and a pinch of salt. Beat on high for 3 minutes until it looks like a stiff, white cloud.
- Layer Assembly: Place one layer on a plate, flat side up. Spread all the filling to the edges. Place the second layer on top, pressing gently until the filling reaches the very edge.
Watching the batter go from thick and chunky to thin and glossy after adding the water is one of the most satisfying parts of this recipe. It’s that precision moment where you know the cocoa is blooming and the texture is going to be spot on.
When the cakes are in the oven, you'll notice they don't dome much; they stay relatively flat, which is the perfect "Whoopie" profile.
Solutions for Better Baking Results
The most common frustration with this Chocolate Whoopie Pie Cake is the filling "bleeding" out or the cake feeling too dense. Usually, if the cake is dense, the water wasn't hot enough, or the leavening agents were past their prime.
If the filling is sliding, it’s almost always a temperature issue either the cake was still warm, or the butter in the filling was too soft.
Why Your Filling Is Runny
If your marshmallow center looks more like a glaze than a fluffy layer, it’s likely because the butter was over softened. If it’s already made, try popping the whole bowl of filling into the fridge for 15 minutes, then re whipping it.
The cold will firm up the fats, allowing the air bubbles to hold their shape again.
Preventing the "Sticky" Sponge
Sometimes this cake can be so moist that the top sticks to the plastic wrap or the plate. To prevent this, ensure the cake is completely cooled before covering it. If you're stacking the layers for storage before assembly, always place a piece of parchment paper between them to prevent them from becoming one giant chocolate block.
| Problem | Root Cause | Solution |
|---|---|---|
| Sunken Center | Oven door opened too early | Keep the door closed until at least the 25 minute mark. |
| Filling Slides Off | Cake layers still warm | Cool cakes for at least 2 hours before assembling. |
| Gritty Filling | Sifting skipped | Always sift powdered sugar to ensure a velvety mouthfeel. |
- ✓ Use a kitchen scale for the 250g of flour; it’s too easy to pack a measuring cup.
- ✓ Ensure eggs are at room temperature so they emulsify properly with the oil.
- ✓ Use Dutch process cocoa specifically for that dark color and mild acidity.
- ✓ Let the boiling water sit for 1 minute after boiling before adding to the batter.
- ✓ Never frost a cake that feels even slightly warm to the touch.
Flavor Variations and Texture Tweaks
If you want to move away from the traditional, there are several ways to tweak the flavor profile. Adding a tablespoon of espresso powder to the dry ingredients doesn't make the cake taste like coffee, but it deeply intensifies the chocolate notes. It’s like turning the volume up on the cocoa.
| Method | Time | Texture | Best For |
|---|---|---|---|
| Standard Bake | 30 minutes | Velvety and damp | Traditional layered cake |
| Cupcake Style | 18-20 minutes | Light and airy | Individual servings / Kids' parties |
| Sheet Cake | 35 minutes | Dense and fudgy | Large crowds / Easy transport |
If you’re looking for a "fast" version, you can technically use a boxed devil's food cake mix, but you’ll need to swap the water for buttermilk and add an extra egg to get closer to this scratch made texture.
Honestly, though, once you’ve tasted the "bloomed" cocoa version, it’s hard to go back to the box. The depth of flavor just isn't there in the pre mixed stuff.
For a Salted Peanut Butter Twist, swap half the butter in the filling for creamy peanut butter. It changes the dynamic from a nostalgic sweet treat to something a bit more savory and complex. The salt in the peanut butter cuts through the sugar of the marshmallow fluff beautifully.
Keeping Your Cake Fresh Longer
Because of the high moisture content from the oil and buttermilk, this Chocolate Whoopie Pie Cake keeps remarkably well. You can store it at room temperature in an airtight container for up to 2 days. However, if your kitchen is warm, the marshmallow filling might start to soften too much.
In that case, the fridge is your friend.
- Fridge: Store for up to 5 days. The oil based sponge stays relatively soft even when cold, though I recommend letting a slice sit out for 10 minutes before eating.
- Freezer: You can freeze the un frosted cake layers for up to 3 months. Wrap them tightly in plastic wrap and then foil. The filling doesn't freeze quite as well due to the marshmallow fluff, so it's best to make that fresh.
- Zero Waste: If you have cake scraps from leveling the tops, don't toss them! Crumble them up and use them as a topping for vanilla ice cream, or mix them into the leftover marshmallow filling for a "Whoopie" cake pop treat.
If you find yourself with extra marshmallow filling, it makes an incredible dip for graham crackers or fresh strawberries. Nothing goes to waste in a kitchen that loves dessert.
Ideal Pairings for Rich Cocoa
This cake is a star on its own, but pairing it correctly can take the experience to another level. Because it is so rich and sweet, it demands something to cut through the fat. A cold glass of whole milk is the classic choice, but a sharp, acidic cup of black coffee or a dark roast espresso is even better for grown up palates.
If you’re serving this at a party, consider a side of fresh raspberries or tart cherry compote. The acidity of the fruit balances the sugar in the fluff and the deep chocolate of the sponge.
For those who want to lean into the indulgence, a scoop of salted caramel ice cream on the side provides a temperature and flavor contrast that is hard to beat.
This Chocolate Whoopie Pie Cake is all about those layers of flavor: the bitter cocoa, the tangy buttermilk, and the sweet marshmallow cloud. When you get all three in one forkful, it’s easy to see why this has remained a favorite for generations.
Just remember to watch those temperatures, bloom your cocoa, and give the cake the time it needs to cool your patience will be rewarded with every velvety bite.

Recipe FAQs
What is a whoopie pie cake?
It is a layered version of the classic handheld treat. Instead of individual sandwich cookies, this cake features two chocolate sponge layers held together by a thick, fluffy marshmallow filling.
What is the best frosting for chocolate whoopie pies?
Marshmallow fluff buttercream is the gold standard. Combining butter, marshmallow fluff, and powdered sugar creates that authentic, nostalgic flavor profile required for the traditional texture.
What is the world's most famous chocolate cake?
There is no single global winner, but the devil's food style is widely considered the most iconic. If you enjoyed achieving the moist, tender crumb structure here, you can apply that same moist loaf technique to elevate other chocolate based bakes.
What do Amish call whoopie pies?
They are traditionally referred to as "gobs." This regional name is deep rooted in Pennsylvania Dutch culture where these handheld sweets originated.
How to ensure the cake doesn't stick to the pan?
Grease the pans thoroughly and use parchment paper. Lining the bottoms with parchment is the most effective way to guarantee the delicate sponge releases perfectly after cooling for 10 minutes.
How to fix a thin cake batter?
Do not add extra flour, as a thin batter is intentional. The boiling water added to the cocoa powder blooms the flavor and creates the specific light, tender crumb characteristic of this recipe.
How to tell when the cake is finished baking?
Insert a toothpick into the center and check for clean results. Bake for exactly 30 minutes at 350°F (175°C) to ensure the sponge is set without drying out the interior.
Chocolate Whoopie Pie Cake
Ingredients:
Instructions:
Nutrition Facts:
| Calories | 584 kcal |
|---|---|
| Protein | 5.3 g |
| Fat | 27.4 g |
| Carbs | 84.1 g |
| Fiber | 2.8 g |
| Sugar | 63.7 g |
| Sodium | 372 mg |
