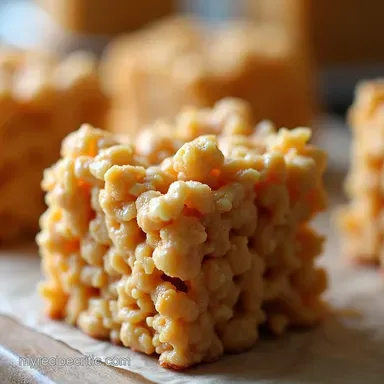
The Ultimate Brown Butter Sea Salt Crispy Clouds Nofuss Gourmet Rice Krispy Treats
- Kicking Off with a Nostalgic Crunch
- Sorting Out Your Sticky Situation
- Our Secret Ingredient Upgrade
- What You Need for This Batch
- Core Shopping List
- Flavor Architecture
- Equipment & Mise en Place
- Getting Ready: Prepping for Perfect Rice Krispy Treats
- Guided Cooking Sequence
- Post-Cooking Care and Storage Advice
- Chef’s Insights: Taking Crispy Clouds to the Next Level
- Frequently Asked Questions
- 📝 Recipe Card
Kicking Off with a Nostalgic Crunch
Do you remember the smell? That sweet, slightly toasted, sugary aroma flooding the kitchen. Honestly, nothing snaps you back to being a kid quicker than making Rice Krispy Treats . They are just so brilliantly simple, aren't they?
We are definitely going for speed here. Seriously, you can have these ready for setting faster than it takes to boil a kettle for a cuppa. Forget fussy baking; this is the ultimate no-fussel, maximum reward sweet fix.
Sorting Out Your Sticky Situation
I know what usually trips people up. Everyone asks the same things, right? First, "Why are mine always rock hard?" Second, "How do I get that truly chewy middle bit?" And finally, "Can I swap out the butter?"
This guide covers all those tricky bits. Unlike those other over complicated recipes out there, we nail the precise marshmallow ratio and the heat management needed for perfect softness. Get ready, because these will be the Best Rice Krispy Treats you’ve ever made.
Our Secret Ingredient Upgrade
Forget using just plain butter. We are going to introduce a little depth. We are using brown butter in this Rice Krispy Treats recipe .
It sounds posh, but it’s dead easy. Browning the butter gives these a lovely, nutty warmth that makes everyone go, "Ooh, what's different?" Plus, we’re adding a sprinkle of flaky sea salt right at the end for balance. Trust me on this one; it stops them from tasting like pure sugar.
What You Need for This Batch
Gather your kit before you start melting anything. You need a decent, heavy bottomed pan so your butter doesn’t burn on the edges. We are relying on just a few core Rice Krispy Treats ingredients , so make sure they are good quality.
You’ll need about six tablespoons of lovely unsalted butter to start the browning process. Then, it’s standard stuff: ten ounces of mini marshmallows, a splash of real vanilla extract, and six cups of the puffed rice cereal. Simple, innit?
Related Recipes Worth Trying
- The Best Soft Marshmallow Rice Krispie Treats Recipe — Learn how to make truly soft Rice Krispie Treats with this foolproof recipe We nail the golden butter ratio for ultimate gooey texture every time
- Fluffy Cilantro Lime Rice Recipe RestaurantStyle Zesty — Get that Chipotle copycat fluff This is the only Cilantro Lime Rice recipe you need mastering the absorption method for perfectly separated zesty grains
- Easy Fluffy Cilantro Lime Rice Recipe The Ultimate RollsRoyce Side Dish — Stop serving sticky rice Our Basmati Cilantro Lime Rice recipe is guaranteed fluffy Its the perfect easy Mexican rice side dish for tacos or summer BBQs
Right then, let's get these delightful things sorted. We’re not just making any old snack here; we are aiming for The Ultimate Brown Butter & Sea Salt Crispy Clouds . Honestly, the difference a bit of browned butter makes? It’s night and day.
It takes these Rice Krispy Treats from zero to hero faster than you can say "tea time."
Core Shopping List
When you’re grabbing your bits, pay attention to the butter, mate. You need unsalted butter because we are controlling the salt level ourselves later. For the US gang, that’s 6 tablespoons (or 85g metric).
We want good quality marshmallows the little ones melt better and faster, about 10 ounces ( 280g ). If you can't find miniature ones, just chop up the big ones; no drama.
Finally, grab your puffed rice cereal make sure you’ve got 6 cups (that’s about 150g level scoops).
Flavor Architecture
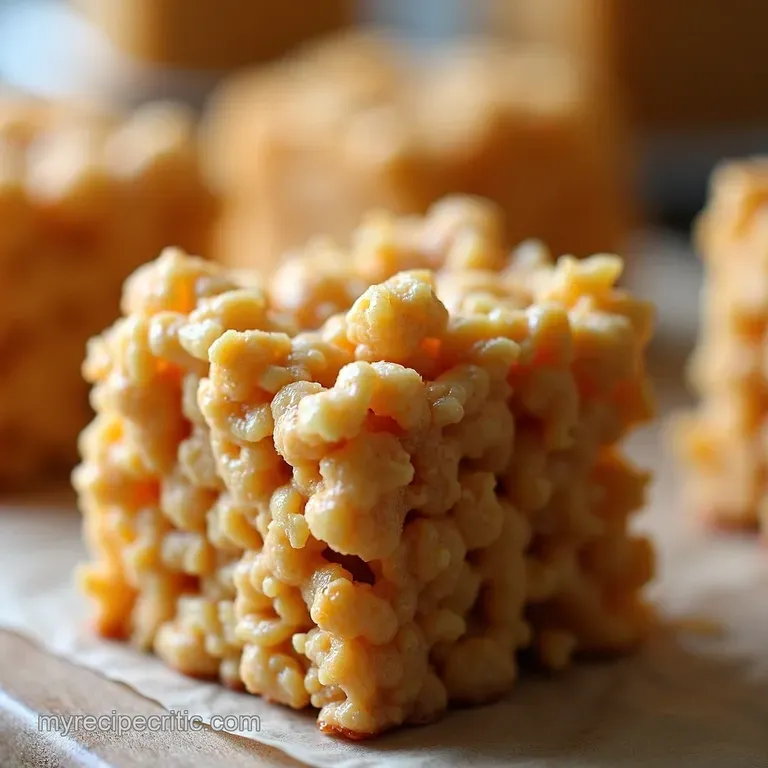
The flavour secret sauce here, beyond the crunch, is that brown butter. When you cook butter until those milk solids toast, it brings in this gorgeous, deep, nutty aroma, like hazelnuts. That’s our umami booster, really.
The vanilla ( 1 teaspoon or 5ml ) is essential for depth, and that final sprinkle of flaky sea salt is what makes your palate wake up and notice these aren’t just sugar bombs.
If you’re out of vanilla, don’t panic. Use the same amount of almond extract just a tiny bit goes a long way. If you’re worried about the richness, you could swirl in 1 tablespoon of smooth peanut butter right when you add the vanilla; that makes for fantastic Peanut butter Rice Krispy Treats .
And for something totally left field? Try adding a tiny pinch of finely ground black pepper with the salt topping. Trust me, it pops!
Equipment & Mise en Place
You don’t need a massive kitchen setup for these Easy Rice Krispy Treats . The most important tool is a good, heavy bottomed saucepan. Why heavy? Because it stops the butter from scorching when you’re browning it.
You’ll also need a 9x13 inch pan lined with parchment paper leaving an overhang makes lifting them out so much simpler later.
My top tip for prep (or mise en place , as the fancy chefs call it) is to measure out your cereal first . Seriously. Once the marshmallows start melting, things move quickly, and you don't want to be faffing about looking for the cereal box.
Get your vanilla measured, your salt ready, and your butter cubed. Having everything ready means you can focus purely on achieving that perfect golden colour on the butter, not scrambling for cups.
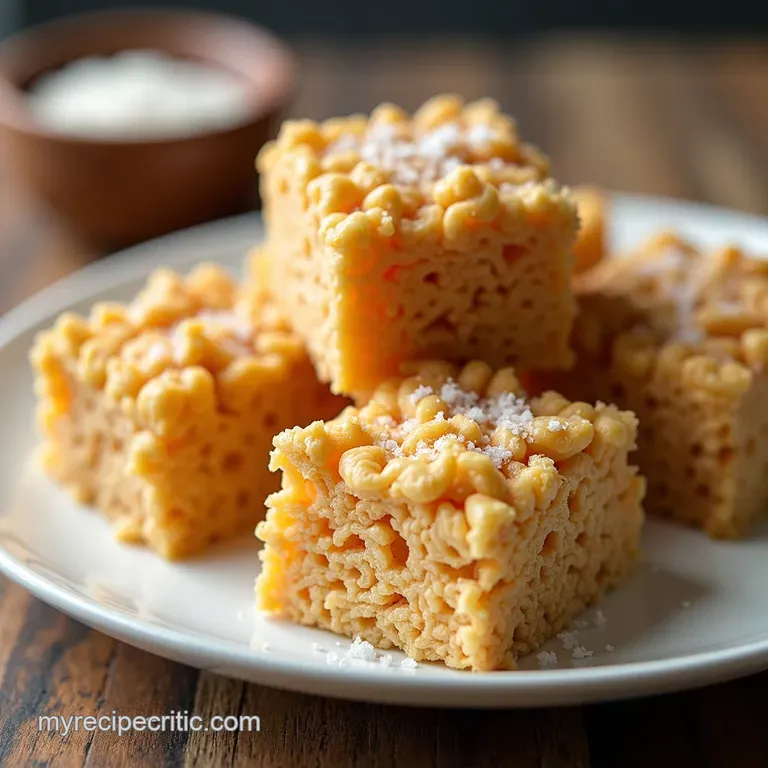
These Homemade Rice Krispy Treats are brilliant because they are so quick. They are the perfect bake for when you need something impressive fast, without turning the oven on. Once they set, slice them up I usually get 16 decent squares and hide them.
They disappear quicker than a free biscuit trolley at a meeting!
Getting Ready: Prepping for Perfect Rice Krispy Treats
Right then, let's get organized before we start the magic. These aren't just any puffed rice bars; we’re aiming for The Ultimate Brown Butter & Sea Salt Crispy Clouds . Think of these Homemade Rice Krispy Treats as a grown-up version of the childhood classic.
Before You Cook
The main job before we switch the hob on is getting the pan ready. Grab your 9x13 dish and line it with parchment paper. Make sure you leave an overhang this is key for lifting the whole block out later. Trust me, trying to chip one out stuck to the base is a nightmare you don't need.
We don't want that sticky situation!
Also, we’re browning the butter, which takes about five minutes of active watching. Don't walk off to put the kettle on! If you burn it, you’ll end up with a bitter mess instead of that lovely nutty flavour. We want light brown specks, not black ones.
Keep your measuring cups ready; accuracy matters more here than in most recipes.
Guided Cooking Sequence
This is where the alchemy happens. We need heat control, mate.
Browning the Butter for Maximum Flavour
First up: the butter. Melt the 6 tablespoons of unsalted butter over medium heat. Keep swirling the pan. You’ll see it foam up, and then that foam settles. Keep going until you see those tiny brown bits settle at the bottom and it smells like toasted hazelnuts that’s the sign!
Take it off the heat instantly when you smell that gorgeous aroma. That's crucial for these Best Rice Krispy Treats .
Melting the Marshmallow Base Gently
Once off the heat, toss in the main bulk of your marshmallows about three cups worth. Stir them through the hot butter until they are mostly melted into a gooey sauce. Now, listen up: we are stirring in the vanilla and the salt now . Then, gently fold in the last cup of marshmallows.
You want them to soften a bit but still hold their shape slightly . That mix of fully melted and half melted goo is what gives you the best texture.
Folding in the Cereal Without Compacting Them
Tip the 6 cups of cereal right into that sticky, sweet mass. Now, grab your spatula. You must fold this gently. I learned the hard way years ago if you stir like you’re mixing concrete, the treats set hard as old boots! We’re mixing just until every bit of cereal is coated.
Stop stirring the second it looks uniform.
Pressing and Topping the Mixture
Get that mixture straight into your prepared pan. Do not press down hard! Use the back of a lightly buttered spatula or your buttered hands, and just gently encourage the mixture into an even layer. Over squashing ruins the airy texture we’ve worked so hard for.
Finally, sprinkle that flaky sea salt over the top right away before it cools. Let these Easy Rice Krispy Treats set at room temperature for at least an hour. No peeking!
Post Cooking Care and Storage Advice
These Rice Krispy Treats variations are even better the next day, honestly. The flavours deepen up.
Keeping Your Treats Fresh
Store these in an airtight container at room temperature. They are best eaten within two days, but they’ll easily last four or five if covered well. Do not put them in the fridge unless your kitchen is scorching hot; chilling them can make them dry and less chewy.
If they do dry out slightly after a few days, you can warm a square in the microwave for about 10 seconds to bring back some of that gooeyness.
Quick Fixes for Sticky Situations
If, by some disaster, your marshmallow mix seems too runny (maybe your heat was too low?), you can try stirring in another quarter cup of cereal very slowly. If you accidentally added too much salt, don't panic! Stir in an extra tablespoon of melted butter to mellow out the overall impact.
These little hiccups happen to the best of us it's all part of the Rice Krispy Treats recipe journey!
Chef’s Insights: Taking Crispy Clouds to the Next Level
Ah, Rice Krispy Treats ! Proper nostalgia fuel, aren't they? They are the sweet treat equivalent of a reliable mate always there for you. We’ve all made the basic ones, the ones that come out of the packet, but trust me, this little upgrade transforms them entirely.
I’ve fiddled with the classic Rice Krispy Treats recipe until I hit gold. We’re moving past basic; we’re aiming for the Best Rice Krispy Treats experience possible.
Elevating Flavor Profiles
We aren't just melting butter here; we are browning it. It sounds fancy, but it’s dead easy. When butter foams and those little brown bits appear, you get this gorgeous, nutty aroma. It’s a total game changer, taking the flavour from basic sugar rush to something more sophisticated.
My biggest lesson learned? Don’t walk away from the pan when browning the butter; it goes from perfect to burnt in about five seconds flat.
Quick Tips for Texture Perfection
The key to avoiding that awful, brick hard texture everyone hates is careful handling of the marshmallows. We use a two-stage melt. Melt most of them down smooth, but fold in the last cup off the heat .
This keeps some of the marshmallows slightly intact, giving you that superb gooey stretch when you bite in. If you press too hard when putting them in the tin, you squeeze out the air and you want air! Keep it light. These are truly Easy Rice Krispy Treats if you follow that little trick.
Pairing and Keeping Your Stash Fresh
These gourmet bars go brilliantly with a proper mug of tea, the strong builders' brew kind, to balance the sweetness. If you must store them, keep them covered at room temperature. They’ll be good for about three to four days, but honestly, mine rarely last that long.
If they start to dry out a tiny bit after day three, wrap individual squares tightly in cling film, then microwave them for about ten seconds . That slight warming softens the marshmallows right up again.
Go on, give this boosted version a whirl. Making these Homemade Rice Krispy Treats is quick, and the flavour payoff is huge. I promise once you try this method, you won't look back!
If you're craving more ideas, explore Gooey Rice Crispy Treats NoFail Recipe Everyone Loves , New Orleans Red Beans and Rice Recipe Proper Cajun Comfort and Pineapple Dog Treats Recipe Paradise Pupscuits .
Frequently Asked Questions
Why are my Rice Krispy Treats turning out hard and brittle instead of gooey?
This is usually down to overheating the marshmallow mixture. If you keep the pan on the heat for too long after adding the marshmallows, they seize up and turn hard once cooled. Remember the golden rule: remove the pan from the heat before the marshmallows are fully incorporated, as residual heat will finish the job perfectly.
How do I stop my Rice Krispy Treats from sticking to everything when pressing them into the pan?
The best trick is to lightly grease your hands with butter or a touch of non-stick cooking spray before touching the mixture it’s like magic! Alternatively, you can use a sheet of parchment paper placed directly over the mixture and press down gently through the paper.
Don't squash them down too hard, or they will lose that essential airy texture.
Can I make these Rice Krispy Treats ahead of time, and how should I store them?
Yes, they are actually better after they’ve set for a few hours. Store them in an airtight container at room temperature never the fridge, as that draws out the moisture and makes them stale much quicker.
They should keep perfectly well for about three to four days, provided you don’t devour them all on day one!
What’s the secret to getting that lovely nutty flavour in this recipe?
That deep, complex flavour comes from browning your butter first; it’s often called beurre noisette in fancy circles. You must cook the butter until the milk solids toast on the bottom and it smells wonderfully nutty before you add the marshmallows.
Just be sure to pull it off the heat the moment it browns to avoid burning it!
My cereal seems really soggy after mixing; what did I do wrong?
Sogginess usually means one of two things: either the marshmallow mixture was too thin (not enough cereal or too much butter/liquid), or you stirred the cereal in too vigorously. You need to fold gently until just combined; aggressive stirring breaks down the cereal and forces it to absorb too much sticky goo.
The Ultimate Brown Butter Sea Salt Crispy Clouds