The Best Baked Potato: Shattering Crispy Skin
- Time:5 minutes prep + 60 minutes roasting = 65 minutes total
- Flavor/Texture Hook: Shatter crisp salty skin with a velvety, fluffy center
- Perfect for: Steakhouse style dinners or a satisfying, cheap weeknight meal
- Achieving the Best Baked Potato Ever
- Essential Planning for Perfect Results
- Selecting Your Star Ingredients Wisely
- Tools for Crispy Skin Success
- Mastering the Multi Stage Roasting Method
- Solving Common Baked Potato Issues
- Creative Fillings and Dietary Swaps
- Storage and Reheating Best Practices
- Perfect Main Dish Flavor Pairings
- Why Your Potato Skins Aren't Shattering
- Very High in Sodium
- Recipe FAQs
- 📝 Recipe Card
Achieving the Best Baked Potato Ever
We need to talk about the tragedy of the soggy potato skin. For the longest time, I thought the "right" way to cook a spud was to wrap it tightly in aluminum foil and toss it in the oven until it felt soft.
It was a mistake I made for years, and honestly, all I ended up with was a potato that had been steamed in its own moisture. The skin was always leathery and dull, and the inside was dense instead of light.
If you are looking for that classic steakhouse experience where the skin is salty and brittle, you have to ditch the foil completely.
This recipe is the targeted fix for every rubbery, mediocre potato you have ever eaten. We are going to use a concentrated salt brine to season the skin from the outside in, and then a blast of high heat to ensure the starch inside transforms into a delicate, fluffy mass.
The real magic happens in the final ten minutes when we add the oil, turning the skin into something that resembles a perfectly fried potato chip. It is a simple shift in technique, but the results are world class.
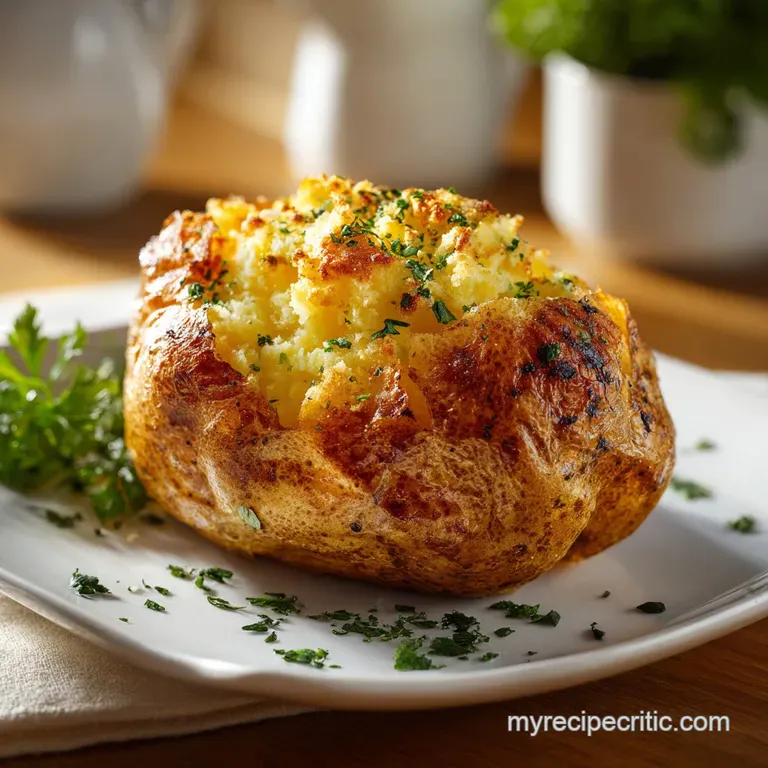
You will never go back to the old way once you hear that first crack of the skin under your knife. We are aiming for a mahogany colored exterior and a center so light it practically melts when it hits the butter.
Right then, let's get into why this method works so well and how you can master it every single time in your own kitchen. Trust me on this one, the details matter here, but they are incredibly easy to execute.
Essential Planning for Perfect Results
The Brine Effect: Dissolving salt in water allows it to penetrate the microscopic nooks of the potato skin, creating a seasoned crust that regular dry salting cannot achieve. This also helps draw out surface moisture early on, which is the key to getting that initial crunch.
Starch Gelatinization: At 450°F (230°C), the high heat causes the starch granules inside the Russet to swell and eventually burst, creating that sought after "puffy cloud" texture. If the temperature is too low, the starch stays dense and gummy.
Heat Conduction: Using a wire rack ensures that hot air circulates around the entire potato, preventing the "flat spot" or soggy bottom that happens when a potato sits directly on a baking sheet.
| Potato Thickness | Internal Temp | Rest Time | Visual Cue |
|---|---|---|---|
| Small (6-8 oz) | 205°F (96°C) | 2 minutes | Skin looks slightly wrinkled |
| Medium (8-10 oz) | 205°F (96°C) | 3 minutes | Deep mahogany color |
| Large (10-12 oz) | 205°F (96°C) | 5 minutes | Brittle skin that cracks easily |
The internal temperature is the most important part of this whole process. While most people just poke a potato with a fork to see if it is soft, using a digital thermometer ensures you hit the magic number of 205°F (96°C).
This is the point where the moisture has evaporated enough to leave the starch perfectly dry and fluffy. If you pull it out at 190°F, it will still be edible, but it won't have that velvety texture we are chasing.
| Component | Science Role | Pro Secret |
|---|---|---|
| Russet Potato | High starch content | Choose potatoes that feel heavy and firm for the best fluff factor. |
| Kosher Salt | Moisture extraction | The coarse grains dissolve into a brine that seasons more evenly than table salt. |
| Neutral Oil | Heat transfer | Adding oil only at the end prevents the skin from becoming tough during the long bake. |
Selecting Your Star Ingredients Wisely
For this recipe, the type of potato you choose is non negotiable. You must use Russets because their high starch and low moisture content are what allow the center to become light and airy. Waxy potatoes like Yukon Golds or Red Bliss will just turn into a heavy, gluey mass if you try to bake them this way.
- 4 large Russet potatoes (10-12 oz each): These are the gold standard for baking. Why this? High starch levels create the fluffiest interior possible.
- Substitute: Large Yukon Gold potatoes (Note: will be much creamier and denser, not fluffy).
- 2 tbsp warm water: Used to dissolve the salt. Why this? Warm water ensures the salt dissolves completely into a brine.
- Substitute: Room temperature water (just stir it longer).
- 1 tbsp kosher salt: For the brine. Why this? Provides a clean, salty flavor without the metallic tang of iodized salt.
- Substitute: Sea salt (use the same volume).
- 1 tbsp neutral oil: Such as canola or vegetable oil. Why this? High smoke point prevents the oil from burning at 450°F.
- Substitute: Avocado oil or melted ghee.
- 1 tsp flaky sea salt: For the final touch. Why this? Adds a concentrated crunch and pops of flavor on the tongue.
- Substitute: A pinch of regular kosher salt.
- 4 tbsp unsalted butter: The essential topping. Why this? Provides a rich, velvety contrast to the salty, brittle skin.
- Substitute: Extra virgin olive oil or vegan butter.
Tools for Crispy Skin Success
You don't need a kitchen full of fancy gadgets, but a rimmed baking sheet paired with a wire cooling rack is a total game changer here. The rack keeps the potato elevated so the hot air can hit every single millimeter of the skin.
If you place the potato directly on the pan, the bottom will steam against the metal, and you'll end up with a tough, flat patch that isn't pleasant to eat.
A digital instant read thermometer is your other best friend. It takes all the guesswork out of the "is it done yet?" mystery. Instead of stabbing your potato repeatedly with a fork which lets out all that beautiful steam you just do one quick probe. If you are serving these as a side for a hearty Chicken Mushroom Pie, having everything timed perfectly makes the meal much less stressful.
Mastering the Multi Stage Roasting Method
1. The Brine and Prep
Preheat your oven to 450°F (230°C). Scrub the Russet potatoes thoroughly under cold water to remove any dirt or debris, then pat them completely dry with a clean towel.
Note: Excess moisture on the skin at the start will prevent the brine from sticking properly. In a small bowl, dissolve the kosher salt into the warm water to create a concentrated brine.
2. The Initial Roast Phase
Place the potatoes on a wire cooling rack set over a rimmed baking sheet. Using a pastry brush, coat the entire surface of each potato with the salt water brine until they are well saturated. Slide the baking sheet into the center of the oven and roast for 45 to 50 minutes.
Roast until an instant read thermometer reaches 205°F.
3. Oil Rub and Crisp
Remove the potatoes from the oven once they hit the target temperature. Brush the skin of each potato with a thin, even layer of neutral oil. Note: This oil flash fries the skin in the final minutes of cooking. Return the potatoes to the oven for 5 to 10 additional minutes until the skin is mahogany colored and brittle.
4. Releasing the Steam
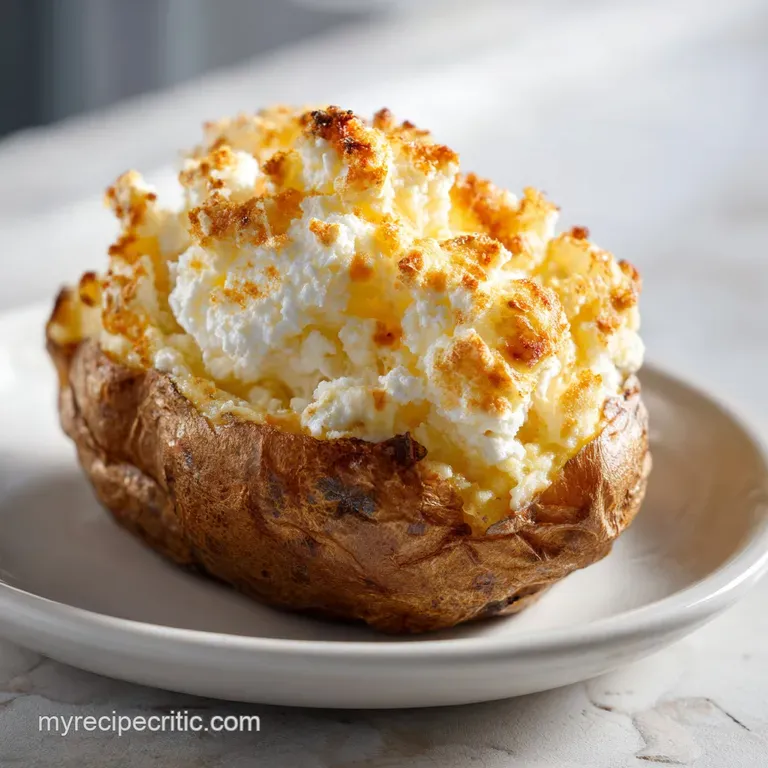
Immediately slice the potatoes open down the center to release the built up steam. Note: If you leave them whole, the steam will settle back into the flesh and make it gummy. Use a fork to fluff up the interior gently. Serve topped with a tablespoon of cold unsalted butter and a pinch of flaky sea salt.
Solving Common Baked Potato Issues
One of the most frustrating things is cutting into a potato only to find a hard, undercooked core. This usually happens if the oven wasn't properly preheated or if the potatoes were straight from the fridge cold.
Always make sure your oven is truly at 450°F (230°C) before the spuds go in. Also, if your potatoes are exceptionally large (over 12 oz), they may need an extra 10 minutes of roasting time before the oil rub.
Hard Centers Explained
If the middle is still firm, the starch hasn't had enough time or heat to gelatinize. This is why the thermometer is so crucial. A fork might slide in easily through the outer layers, but only a thermometer will tell you if the very center has reached the necessary 205°F (96°C).
Fixing Soggy Potato Skins
Soggy skin is almost always caused by trapped moisture. This can happen if you don't dry the potatoes well enough after scrubbing, or if you skip the wire rack. If you find your skins aren't crisping, check that your oven isn't overcrowded, as too many potatoes can create a humid environment that prevents the skin from drying out.
| Problem | Root Cause | Solution |
|---|---|---|
| Gummy texture | Steam trapped inside | Slice open immediately after removing from the oven to let steam escape. |
| Tough, leathery skin | Oiled too early | Only apply oil for the final 5-10 minutes of baking. |
| Flat, soggy bottom | Direct pan contact | Always roast potatoes on a wire rack for 360 degree air circulation. |
Common Mistakes Checklist
- ✓ Never wrap the potato in foil (it steams the skin).
- ✓ Don't skip the wire rack (it prevents soggy bottoms).
- ✓ Check the internal temp with a thermometer (target 205°F).
- ✓ Slice the potato open the second it leaves the oven.
- ✓ Use neutral oil with a high smoke point (not butter) for the skin.
Creative Fillings and Dietary Swaps
While the classic butter and salt combo is hard to beat, you can easily turn this into a full meal. For a "Loaded Mediterranean" style, try stuffing the fluffy center with some chopped kalamata olives, sun dried tomatoes, and a dollop of Greek yogurt instead of sour cream.
It adds a bright, briny acidity that cuts through the starch beautifully.
dairy-free Alternatives
If you are looking for a dairy-free version, swap the butter for a high-quality extra virgin olive oil or a scoop of avocado mash. The richness of the avocado mimics the fat of the butter perfectly.
You can also use a dollop of cashew cream seasoned with a little lemon juice and chives for that tangy "sour cream" vibe without the dairy.
| Original Ingredient | Substitute | Why It Works |
|---|---|---|
| Unsalted Butter | Avocado Mash | Provides a similar creamy fat content with healthy fats. Note: Adds a green hue and mild nutty flavor. |
| Kosher Salt Brine | Soy Sauce Brush | Adds salt and deep umami color. Note: Will result in a much darker, saltier skin. |
Storage and Reheating Best Practices
If you happen to have leftovers, let them cool completely before placing them in a container. They will keep in the fridge for up to 4 days. Whatever you do, do not reheat them in the microwave if you want to keep that crispy skin.
The microwave will turn the skin back into that rubbery texture we worked so hard to avoid. Instead, pop them back into a 400°F (200°C) oven or an air fryer for about 10 minutes until they are heated through and the skin crisps back up.
For a zero waste tip, if you find you only want the fluffy insides for a mash, don't toss the skins! You can brush the empty skins with a little more oil, sprinkle on some smoked paprika, and bake them at 450°F (230°C) for another 5 minutes to make "potato skin chips." They are an incredible snack on their own.
You can also freeze the baked flesh for up to 3 months to use later in soups or as a thickener for stews.
Perfect Main Dish Flavor Pairings
These potatoes are the ultimate sidekick to a juicy steak or roasted chicken. Because the skin is so salty and crisp, they pair exceptionally well with dishes that have a bit of sauce or gravy. I love serving them alongside my Easy Baked Chicken Leg Quarters because the juices from the chicken mingle with the fluffy potato interior in the best way possible.
If you are planning a big Sunday feast, these spuds provide a great textural contrast to softer dishes. After a big savory meal, I always find that a little something sweet is necessary. For a classic finish, you might want to try a shortbread cookies recipe to keep that buttery, comforting theme going through dessert. The simplicity of a well baked potato really allows the rest of your menu to shine while still being a highlight of the plate itself.
Why Your Potato Skins Aren't Shattering
I used to wonder why my potatoes never had that "crack" when I bit into them. It turns out I was being too impatient with the oven temperature. Many recipes call for 350°F (180°C), but that just isn't hot enough to transform the cell structure of the skin.
You need that 450°F (230°C) blast to move the moisture out quickly.
Another myth is that you should poke holes in the potato to "prevent it from exploding." While potatoes can technically burst, it is extremely rare. More importantly, those holes allow steam to escape prematurely, which can lead to a drier, tougher interior.
By keeping the skin intact until the very end, we trap that steam inside to cook the starch perfectly, then release it all at once when we slice it open at the finish line. It is all about controlling the moisture flow!

Very High in Sodium
1120 mg of sodium (49% of daily value)
The American Heart Association recommends no more than 2,300mg of sodium per day for most adults, with an ideal limit of 1,500mg.
Tips to Reduce Sodium
-
Eliminate Kosher Salt-30%
The 1 tablespoon of kosher salt contributes a significant amount of sodium. Remove it entirely from the recipe. This is the single largest contributor to sodium in this recipe.
-
Reduce Flaky Sea Salt-5%
While often used for finishing, flaky sea salt still adds sodium. Reduce or omit the 1 teaspoon of flaky sea salt to further lower your sodium intake.
-
Boost Flavor with Herbs & Spices
Enhance the taste of your potatoes without salt by incorporating fresh or dried herbs like rosemary, thyme, chives, or garlic powder. Experiment with pepper for a little kick.
-
Reconsider Water for Butter
The 2 tablespoons of warm water are likely used to help emulsify the butter. While not a direct sodium source, ensuring your butter is well incorporated can help you feel satisfied with less seasoning.
Recipe FAQs
What is the secret to baked potatoes?
Brining the skin and using a wire rack. Brushing the potatoes with a concentrated salt water solution creates a seasoned, crispy exterior, while the wire rack ensures hot air circulates evenly for perfectly fluffy insides.
Can diabetics have baked potatoes?
Consult your healthcare provider for individual dietary requirements. While potatoes are nutrient dense, they contain carbohydrates that can impact blood glucose levels depending on portion size and meal pairing.
How to do the best baked potatoes?
Preheat your oven to 450°F and roast on a wire rack. Coat the scrubbed, dry potatoes in a salt water brine, roast until the internal temperature reaches 205°F, then finish with a light layer of neutral oil for a final 5-10 minutes to ensure the skin becomes brittle and mahogany colored.
How to cook potatoes for diabetics?
Prepare them using a high heat dry roasting method without excessive fats. Focus on portion control and balance the starch by serving the potato alongside high protein, fiber rich dishes like our crispy chicken parmesan.
Is it true I should wrap my potatoes in foil before baking?
No, this is a common misconception. Wrapping potatoes in foil traps steam, which results in a soggy, boiled texture rather than the light, fluffy interior and brittle skin achieved by roasting them uncovered.
How to store leftover baked potatoes?
Allow the potatoes to cool completely, then store them in an airtight container. They will remain fresh in the refrigerator for up to 4 days, though you must avoid the microwave when reheating to prevent the skin from turning rubbery.
How to get the skin extra crispy?
Brush with neutral oil only during the final 5-10 minutes of cooking. Applying the oil too early prevents the salt brine from properly seasoning the skin, while this late stage addition ensures the heat creates a perfect, brittle finish.
The Best Baked Potato

Ingredients:
Instructions:
Nutrition Facts:
| Calories | 379 kcal |
|---|---|
| Protein | 6.2 g |
| Fat | 15.4 g |
| Carbs | 56 g |
| Fiber | 6.1 g |
| Sugar | 1.8 g |
| Sodium | 1120 mg |
