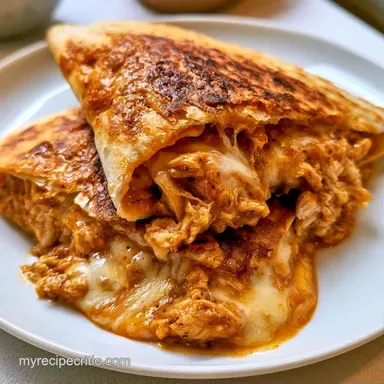
Tailgate Quesadillas in 20 Minutes
- Time: 10 minutes preparation + 10 minutes cooking
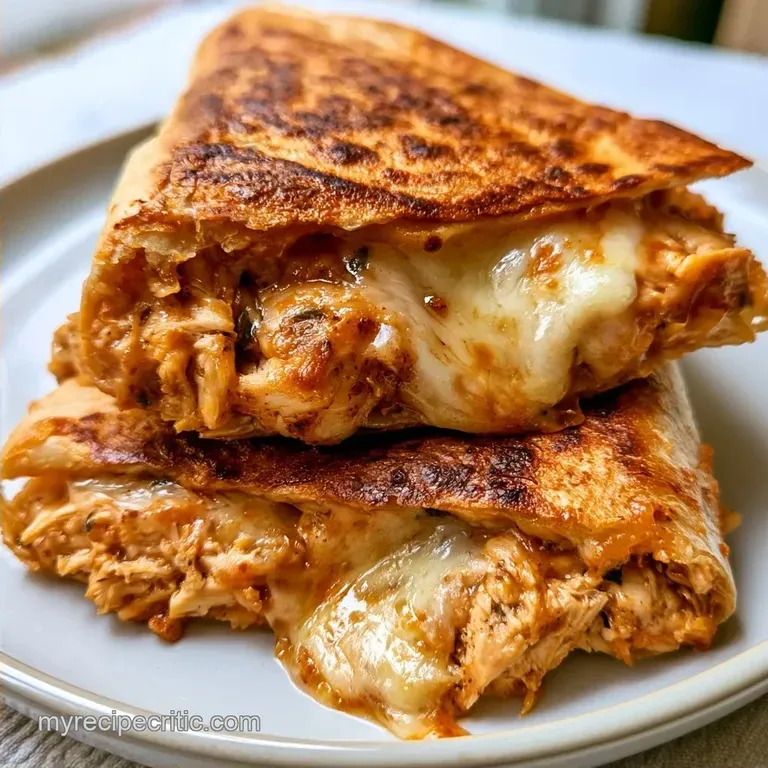
- Highlight: A golden, buttery crunch with a melty, stretchy center
- Perfect for: Easy Football Party Foods and game day crowds
Tailgate Quesadillas
Bringing these to a game once turned into a complete mess. I assumed extra filling would be better and packed the tortillas with far too much chicken and cheese. By the time I reached the parking lot, the tortillas had split, leaving melted cheese sliding all over the foil.
It was a soggy, chaotic pile that no one wanted to touch.
Over the next few months, I worked out the right ratio. The real key isn’t the amount of filling, but the way the layers fuse together. You’re aiming for a thin, firm cheese seal that holds the seasoned chicken securely inside.
Get that balance right, and you’ll have a mahogany colored shell that crackles with every bite. These Tailgate Quesadillas are made to be portable, handheld, and much less expensive than ordering a mountain of takeout.
How to Actually Nail This
- The Butter Sear: Using butter instead of just oil gives the tortilla a toasted, nutty flavor. It helps the outside brown quickly without drying out the inside.
- Double Cheese Logic: Monterey Jack provides the "glue" and the stretch, while Sharp Cheddar brings the punchy flavor.
- Dry Seasoning: Using a dry rub on the chicken instead of a wet sauce prevents the tortilla from steaming from the inside, which is what usually causes a soggy middle.
| Method | Time | Texture | Best For |
|---|---|---|---|
| Fast Skillet | 20 mins | Crispy/Buttery | Small groups, home cooking |
| Traditional Fry | 30 mins | Greasier/Salty | Street style, high volume |
Recipe Specs
Here are the key details. This is a quick process, but you'll need to stay attentive to the pan. The chicken cooks rapidly thanks to the small dice, and the cheese melts almost instantly if the heat is dialed in correctly.
The chicken's internal temperature should reach 165°F to align with USDA safety guidelines. If you're using a meat thermometer, be sure to check the thickest piece before taking the skillet off the heat.
Gathering Your Essentials
Avoid using pre-shredded cheese for this. The anti clumping agents like potato starch or cellulose used in bags prevent a smooth melt. Grate your own cheese for a far superior pull.
Why These Ingredients Work
| Ingredient | What It Does | Best Swap |
|---|---|---|
| Monterey Jack | Ensures a gooey, melted texture | Muenster cheese |
| Sharp Cheddar | Contributes a bold, salty flavor | Colby Jack |
| Taco Seasoning | Adds a layer of smoky, savory richness | Cumin, paprika, and garlic powder |
| Flour Tortillas | Serves as the sturdy wrapper | Corn tortillas (for gluten-free) |
The Full List
- 1 lb boneless skinless chicken breast, diced into ½-inch pieces Why this? A lean option that cooks quickly and takes on spices well.
- 2 tbsp taco seasoning Why this? An easy way to achieve consistent, savory taste.
- 1 tbsp olive oil Why this? It has a high smoke point, making it ideal for sautéing.
- 2 cups Monterey Jack cheese, freshly grated Why this? It melts beautifully.
- 2 cups Sharp Cheddar cheese, freshly grated Why this? Provides a punchy flavor to balance the butter.
- 8 10 inch flour tortillas Why this? The perfect size for party appetizers.
- 3 tbsp unsalted butter, softened Why this? Key to achieving a crisp, golden brown finish.
| Original Ingredient | Substitute | Why It Works |
|---|---|---|
| Chicken Breast | Chicken Thighs | More fat makes the meat juicier, though it's a bit heavier |
| Monterey Jack | Mozzarella | Offers a similar stretch with a more subtle flavor |
| Flour Tortillas | Corn Tortillas | A gluten-free alternative. Note: These can crack more easily |
Equipment Needed
No specialized equipment is required here. Using a heavy bottomed skillet ensures the heat is distributed evenly, preventing any pale or unbrowned spots on your tortilla.
I recommend a wide non-stick or cast iron pan. You will also need a sturdy spatula to press down the quesadillas, helping the cheese bond securely to the tortilla.
From Prep to Plate
Phase 1: Sautéing the Protein
Warm the olive oil in a skillet set to medium high. Toss in the diced chicken and dust the meat with taco seasoning. Stir occasionally and cook until the chicken is cooked through and smells nutty and aromatic. Once finished, remove the chicken from the pan and set it aside.
Phase 2: Building the Layers
Use a paper towel to wipe the pan clean of any charred seasoning. Coat the skillet surface with a bit of butter. Place one tortilla in the pan.
Right away, sprinkle a hearty layer of Monterey Jack over the entire surface. Place a portion of the seasoned chicken on one half of the tortilla, then cover the chicken with Sharp Cheddar.
Phase 3: The Golden Sear
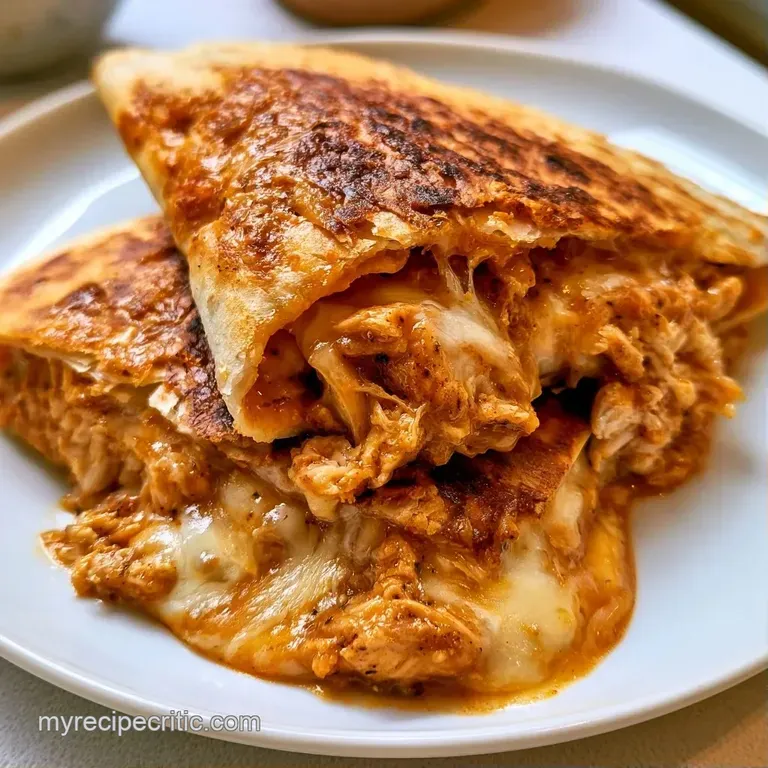
Fold the tortilla in half to form a semi circle. Use a spatula to press down firmly, allowing the cheese to fuse with the tortilla. Cook for 2–3 minutes per side until the exterior is a deep golden brown and the cheese is visibly bubbling at the edges.
Chef's Note: Don't be afraid to press hard. The pressure helps the heat penetrate the center and ensures the chicken doesn't fall out when you slice it.
Troubleshooting Guide
One common issue is the "slide," where the filling moves as you flip. This usually happens if the cheese hasn't melted enough to act as an adhesive. If you notice the filling shifting, keep the heat on medium and use the spatula to hold the fold firmly for an extra 30 seconds.
Then there's the issue of the tortilla tearing. This happens if the pan is too cold and the tortilla sits and steams instead of searing. You want to hear a sizzle the moment the tortilla hits the butter.
Fixing a Gummy Texture
If the inside feels mushy, you might be using too much filling or a wet sauce. Stick to the dry seasoning method for these Tailgate Quesadillas to keep the structure tight.
Dealing with Unmelted Cheese
If you see shreds of cheese but no "ooze," your pan temperature dropped. Turn it back up and press the tortilla down harder to transfer the heat.
Handling Tortilla Tears
Tears often happen if the tortillas are cold from the fridge. Let them sit at room temperature for a few minutes before cooking.
| Problem | Fix |
|---|---|
| Cheese won't melt | Increase heat or grate cheese finer |
| Tortilla is pale | Use more butter and press firmly |
| Filling falls out | Reduce chicken amount per tortilla |
Creative Twists and Swaps
If you want to switch things up, you can easily swap the protein. Ground beef is a great choice for a heartier meal, but be sure to drain the grease before adding it to the tortilla. For another option, my Nachos with Ground Beef recipe uses a similar flavor profile that complements these perfectly.
For a zesty kick, place a thin layer of pickled jalapeños between the Monterey Jack and the chicken. The tanginess offsets the richness of the butter and cheese.
If you are planning ahead, these work wonderfully as Freezer Chicken Quesadillas. Just assemble them, wrap each one in parchment paper, and freeze. When you're ready, warm them in a pan or a small oven until the cheese is melted again.
Adjusting the Batch Size
Scaling these Tailgate Quesadillas is pretty straightforward, but you can't just multiply everything and throw it in one pan.
Scaling Down (Half Batch): Use a smaller 8 inch skillet. You can halve all ingredients, but be careful with the butter; you still need enough to coat the pan surface, so don't drop below 1.5 tablespoons.
Scaling Up (Double or Triple Batch): Do not try to cook four quesadillas at once unless you have a massive commercial griddle. Work in batches of two. For the chicken, you can double the meat and seasoning, but keep the liquids minimal.
If the pan gets too crowded, the chicken will boil in its own juices rather than browning, which ruins the texture.
Busting Kitchen Myths
You might hear that you should "seal" the chicken by searing it at high heat. Searing meat doesn't actually seal in juices, as moisture loss happens regardless of the temperature. The sear is actually for flavor and color, which is why we do it for the chicken in these Tailgate Quesadillas.
Another myth is that you need to use a tortilla press for the best results. While a press is great for corn tortillas, flour tortillas just need a heavy spatula and a hot pan to get that shattering, buttery crust.
Preservation Secrets
Because these are most delicious served hot, how you warm them back up is key.
In the Fridge: Keep leftovers in an airtight container for up to 3 days. To prevent sogginess, avoid stacking them too deep; instead, separate layers with pieces of parchment paper.
In the Freezer: These stay fresh for roughly one month. Wrap each piece individually in plastic wrap or aluminum foil.
The Reheat: Steer clear of the microwave, as it can make the tortilla rubbery. To restore the crunch, warm them in a pan over medium heat, cooking for 2 minutes on each side. If you're preparing other snacks, my Mini Egg Quesadillas follow a similar process.
Zero Waste Tip: Don't toss any leftover seasoned chicken. It's a great addition to a fresh salad or works perfectly as a breakfast burrito filling the next day.
Serving Suggestions
These Tailgate Quesadillas are heavy and rich, so you need something bright to balance them. I usually serve them with a trio of dips: a zesty salsa verde, a cool lime crema, and a chunky guacamole.
Slice them into quarters using a pizza cutter for the cleanest edges. This makes them easier for guests to grab while they're standing around a coffee table or a truck bed. If you're hosting a larger crowd, arrange them on a big platter with bowls of dip in the center.
This turns a simple snack into a full spread of Easy Tailgate Snacks that look a lot more impressive than they are.
Recipe FAQs
What makes this the ultimate quesadilla recipe?
Use a mix of Monterey Jack and Sharp Cheddar for the perfect balance of melt and flavor. The seasoned chicken adds a savory depth that beats plain cheese.
How to prepare these for a crowd?
Cook all the seasoned chicken in one large batch first. Assemble the tortillas and sear them in several pans simultaneously to keep the line moving.
Which budget friendly ingredients work best for game day snacks?
Stick to flour tortillas and shredded cheese to keep costs down. These pair well with other simple appetizers like a savory taco dip.
What are the best fillings for a quesadilla?
Diced chicken breast tossed in taco seasoning provides the best flavor. Pair it with Monterey Jack and Sharp Cheddar for a gooey, rich texture.
Can you make these tailgate snacks healthier?
Stick to lean skinless chicken breast to reduce saturated fats. You can also lightly brush the butter on the tortilla instead of adding it to the pan.
What's the best way to keep quesadillas fresh for a tailgate?
Wrap the finished quesadillas in aluminum foil immediately after cooking. Place them in an insulated carrier to maintain the temperature and crispness.
Is it true that tortillas only tear because they are too thin?
Surprisingly, no. Tearing usually happens when the pan is too cold, causing the tortilla to steam instead of sear.
Do you have to use a glue like sauce to stop the filling from sliding?
This one's false: the cheese itself acts as the adhesive. Just ensure the Monterey Jack melts enough to fuse the ingredients together.
Tailgate Quesadillas