Baked Chicken and Cheese Stuffed Anaheim Peppers
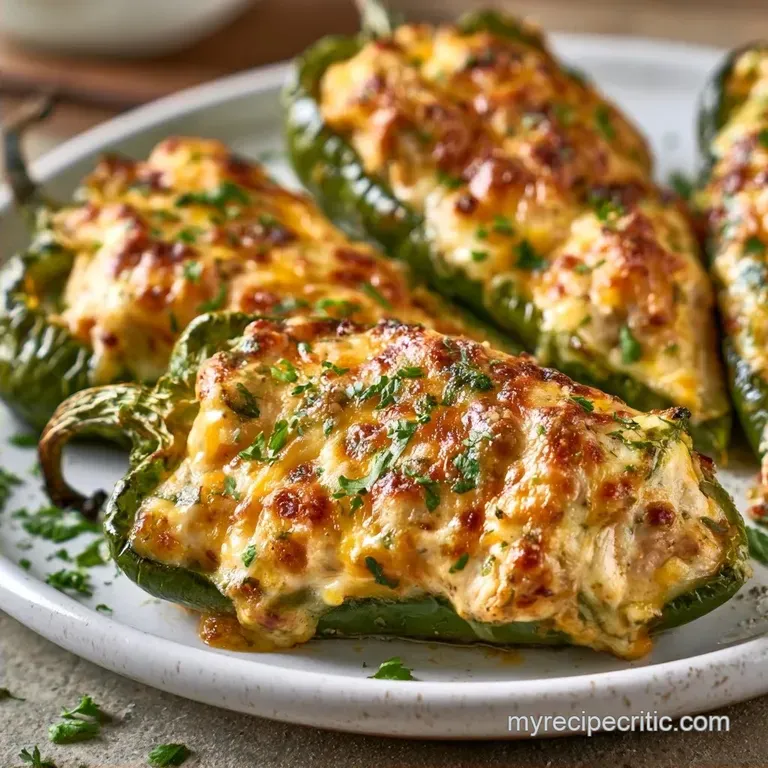
- Time: 10 min active + 30 min bake
- Flavor/Texture Hook: Creamy, cheesy filling with a charred, tender pepper shell
- Perfect for: Easy appetizers or a low carb weeknight meal
That specific smell of roasting peppers always takes me back to my first attempt at this. I thought I had to char the skins over a gas flame for an hour to get them right. I spent half my afternoon scrubbing black soot off my counters, only to realize that a over high heat roast in the oven does the exact same thing in a fraction of the time.
The Anaheim pepper is the real star here. It's mild enough that you don't need a glass of milk on standby, but it has a grassy, bright flavor that cuts right through the heavy cream cheese. If you use bell peppers, you lose that distinct "Southwest" vibe.
You can expect a dish that's rich and filling, but still feels light because of the fresh pepper base. These Stuffed Anaheim Peppers don't require any fancy equipment, just a basic baking dish and a mixing bowl.
Easy Chicken Stuffed Anaheim Peppers
Whether you're making these for a game day or a quick dinner, a few things make this version work.
- over High heat Roasting: Baking at 400°F softens the pepper walls quickly so they don't stay raw while the cheese browns.
- Fat Balance: The sour cream adds a bit of acidity that keeps the Cheese Stuffed Anaheim Peppers from tasting too heavy.
- Texture Contrast: The charred skin provides a slight snap that complements the creamy interior of the Stuffed Anaheim Peppers.
The trick to the filling is using softened cream cheese. If it's cold, you'll get lumps in your mixture, and it won't blend smoothly with the chicken.
| Method | Time | Texture | Best For |
|---|---|---|---|
| Baked (This Recipe) | 40 mins | Creamy and Charred | Weeknight dinners |
| Classic (Relleno) | 90 mins | Fried and Airy | Special occasions |
The reason this approach beats the traditional fried version is simply the cleanup. You aren't dealing with a vat of oil or a messy egg batter station.
Recipe Specs
- 1. Oven Temp
- Exactly 400°F (200°C) for that mahogany char.
- 2. Pan Size
- A 9x13 inch baking dish ensures the peppers aren't crowded, which lets the heat circulate.
- 3. Bake Window
- 20-25 minutes. Any longer and the peppers might collapse.
Shopping List Breakdown
Make sure the chicken is shredded into small pieces. If the bits are too chunky, the filling may spill out of the Stuffed Anaheim Peppers while you eat.
- 6 medium Anaheim peppers Why this? Low spice level and ideal boat shape
- 1 tbsp olive oil Why this? Stops sticking and aids browning
- 2 cups cooked chicken breast, finely shredded Why this? Lean protein that binds the cheese
- 8 oz cream cheese, softened Why this? Creates the rich, creamy base
- 1 cup sharp cheddar cheese, shredded Why this? Provides a bold, salty kick
- 1/4 cup sour cream Why this? Introduces a bright tang
- 1/4 cup diced green chiles (canned) Why this? Adds a gentle layer of warmth
- 1 tsp garlic powder Why this? Ensures consistent seasoning throughout
- 1 tsp smoked paprika Why this? Imparts a grilled, smoky essence
- 1/2 tsp salt Why this? Essential flavor enhancer
- 1/4 tsp black pepper Why this? Mild woody warmth
- 2 tbsp fresh cilantro, chopped Why this? Vibrant, fresh finish
- 1 tbsp sliced green onions Why this? Crisp, sharp bite
| Original Ingredient | Substitute | Why It Works |
|---|---|---|
| Sharp Cheddar | Pepper Jack | Similar melt. Note: Boosts the spice level |
| Sour Cream | Plain Greek Yogurt | Similar acidity. Note: Higher protein and slightly tangier |
| Chicken Breast | Ground Turkey | Similar protein. Note: Must be browned first |
| Anaheim Peppers | Poblano Peppers | Similar shape. Note: More earthy and slightly spicier |
If you are monitoring your sodium intake, you can compare the salt levels of various cheeses at USDA FoodData Central.
Necessary Kitchen Gear
The required tools are quite basic. You'll need a large mixing bowl for the filling and a paring knife to prep the peppers. To bake, a 9x13 inch glass or ceramic dish is recommended for the most even heat distribution. While a pastry brush is great for applying the olive oil, a paper towel is a fine substitute.
I generally set my oven rack to the middle position. This helps the peppers soften at the base while the tops develop a lovely golden-brown bubble.
The Main Steps

Phase 1: Preparing the Vessels
- Heat your oven to 400°F (200°C).
- Cut the Anaheim peppers in half lengthwise.
- Use a paring knife to clear out the seeds and white membranes. Note: This step helps eliminate the bitterness.
- Lightly coat the interior and exterior of the peppers with olive oil to help achieve a deep mahogany char.
Phase 2: Mixing the Savory Filling
- In a large mixing bowl, stir together the softened cream cheese, shredded chicken breast, cheddar, and sour cream.
- Fold in the diced green chiles, garlic powder, smoked paprika, salt, and pepper.
- Blend until the filling is completely smooth and uniform. Note: Avoid overmixing after adding the chicken to prevent the cheese from becoming too oily.
Phase 3: Stuffing and Baking
- Spoon a generous portion of the chicken mixture into each pepper half.
- Press down slightly to ensure the filling is firmly packed into the Stuffed Anaheim Peppers.
- Place the stuffed peppers in a 9x13 inch baking dish.
- Bake for 20-25 minutes until the pepper walls are tender and the cheese topping is bubbling and golden brown.
- Garnish with sliced green onions and chopped fresh cilantro before serving.
Fixing Common Issues
If you find your Stuffed Anaheim Peppers aren't quite right, it's usually a temperature or moisture issue.
If the Peppers Remain Too Firm
This happens if your oven runs a bit cool or your peppers were exceptionally thick. The cheese might look done, but the pepper still has a raw crunch.
If the Filling is Too Loose
This usually happens if the cream cheese was melted in a microwave rather than softened at room temperature. Too much heat breaks the emulsion and makes the filling runny.
If the Filling Overflows
Overstuffing is a common problem. If the cheese leaks all over the pan, you've likely packed too much in, which also prevents the pepper from cooking through.
| Problem | Fix |
|---|---|
| Peppers are too crunchy | Cover loosely with foil for 5 mins to trap steam |
| Filling is runny | Chill the filled peppers for 15 mins before baking |
| Cheese is burning too fast | Lower oven to 375°F for the last 10 mins |
And for those who like a little more control over the flavor profile: - Extra tang? → fold in 1 tsp lemon zest - More heat? → use chopped jalapeños instead of mild chiles - Less richness? → swap cream cheese for Greek yogurt
Customizing Your Filling
This recipe is quite flexible. For a heartier take, I suggest trying the Peppers with Ground Beef recipe, which provides a more traditional, meat-forward experience.
For a lighter approach, you can create a low-carb version by skipping the sour cream and adding extra Greek yogurt. If you prefer a charred flavor without the filling, these Anaheim Peppers with Cheese recipe are an excellent choice.
To add a Zesty Buffalo kick, stir two tablespoons of buffalo sauce into the chicken mixture. This turns the Cheese Stuffed Anaheim Peppers into a spicy game-day appetizer that tastes great alongside celery sticks.
Storage and Leftovers
Leftover Stuffed Anaheim Peppers store well, although the pepper's consistency shifts slightly over time.
In the Fridge: Store them in a sealed glass container. They remain fresh for roughly 3 days. Note that the peppers will be softer upon reheating than they were immediately after baking.
In the Freezer: These hold up remarkably well when frozen. Wrap each pepper in foil and store them in a freezer-safe bag for a maximum of 2 months. Let them defrost in the refrigerator overnight prior to heating.
Zero Waste: Toss the seeds and ribs into your compost bin. Alternatively, you can simmer the ribs in a small pot with water and salt to create a light pepper broth for cooking rice.
Serving Your Platter
These Stuffed Anaheim Peppers are best served warm. I enjoy arranging them on a wooden board with a side of fresh avocado slices or a spoonful of extra sour cream.
To make this a full meal, serve them alongside some simple cilantro lime rice. The citrusy lime acidity perfectly balances the richness of these Cheese Stuffed Anaheim Peppers. If you're presenting them as an appetizer, a bit of salsa or a quick Anaheim pepper relish offers a great contrast.
Just remember to let them rest for about 5 minutes after roasting. The filling is essentially molten lava for the first few minutes, and letting them set makes them easier to handle.
That is the secret to getting Stuffed Anaheim Peppers that are truly tender and creamy without spending your whole evening in the kitchen. Just be sure to soften that cream cheese and don't skip the olive oil brush. Enjoy!
Recipe FAQs
What is the stuffing for Anaheim peppers?
A creamy chicken and cheese blend. Mix shredded chicken breast, softened cream cheese, sharp cheddar, and sour cream with diced green chiles, garlic powder, and smoked paprika.
Should I pre-bake my peppers before stuffing them?
No, it isn't necessary. Baking them for 20–25 minutes at 400°F ensures the pepper walls tenderize while the cheese topping browns simultaneously.
Is it true that Anaheim peppers are hotter than Poblanos?
Surprisingly, no. Anaheims are generally milder, making them an ideal vessel for rich, creamy fillings without overwhelming heat.
How to prevent filling from leaking?
Spoon the mixture generously and press down slightly. Packing the filling ensures the peppers stay stuffed throughout the baking process.
How to prepare the peppers for stuffing?
Slice them lengthwise and scrape out the seeds and ribs. Brush the interior and exterior with olive oil to encourage a mahogany-colored char.
Which other recipes use similar filling techniques?
Many savory appetizers use this base. If you enjoyed blending cream cheese and chicken here, the same flavor profile works in an easy chicken dip.
35-Minute Stuffed Anaheim Peppers