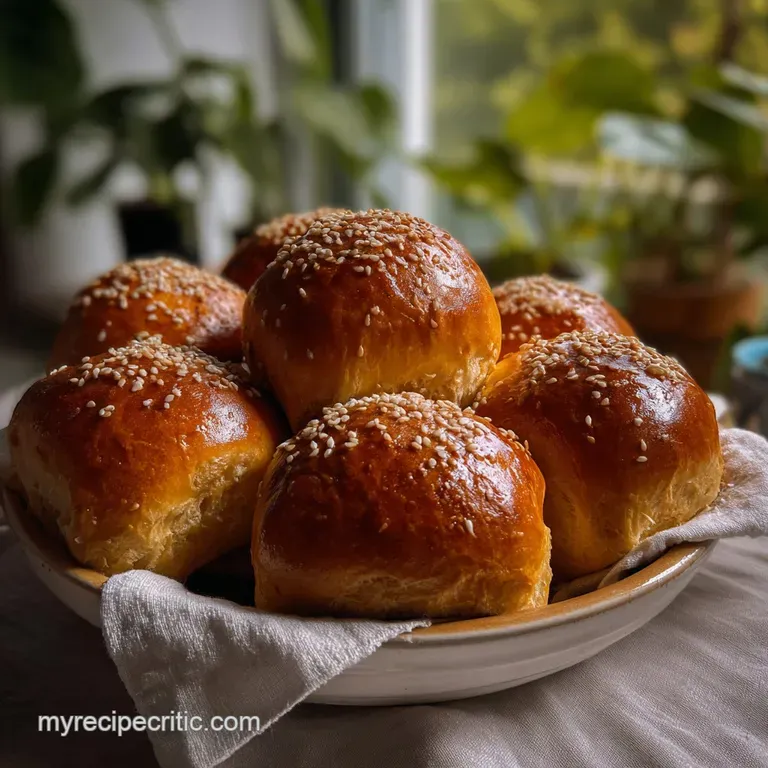
Fluffy Bread Buns Recipe
- Time: Active 45 minutes, Passive 1 hour 15 minutes, Total 2 hours
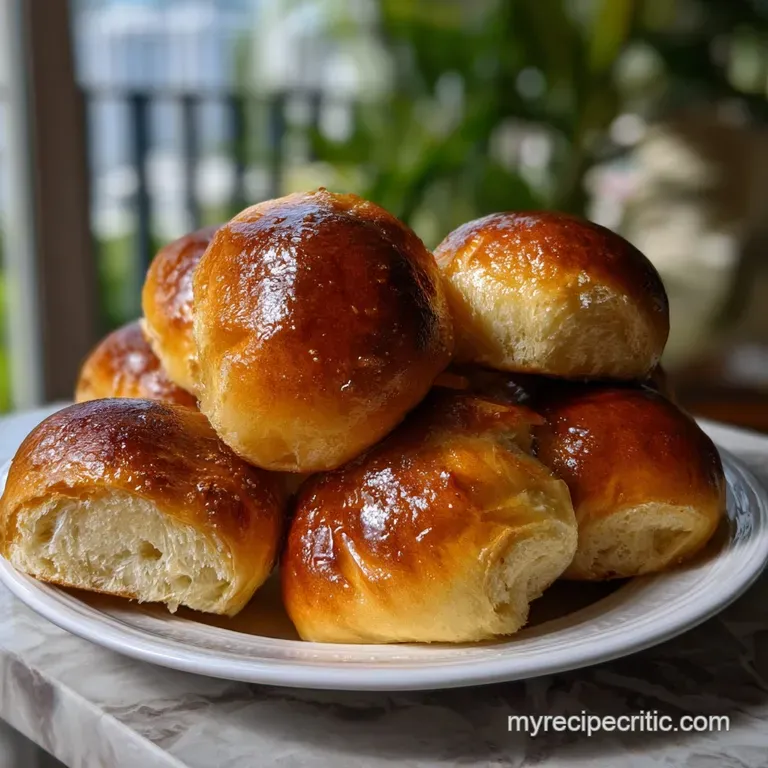
- Flavor/Texture Hook: Pillowy soft interior with a golden, egg washed sheen
- Perfect for: Backyard barbecues, holiday sliders, or weeknight dinner sandwiches
- Bake the Most Pillowy Homemade Bread Buns Recipe
- The Chemistry of Yeast and Protein
- Essential Elements for Your Pantry
- The Tools for Perfect Dough
- A Step-by-Step Shaping Guide
- Common Pitfalls and Pro Solutions
- Choosing Your Method
- Alternative Ingredients and Dietary Needs
- Keeping Your Buns Fresh Longer
- Perfect Pairings for Golden Buns
- Your Pressing Dough Related Questions
- Debunking Common Dough Myths
- Recipe FAQs
- 📝 Recipe Card
Bake the Most Pillowy Homemade Bread Buns Recipe
Have you ever pulled a tray of rolls from the oven, only to find they feel more like hockey pucks than clouds? It is a common frustration for home bakers. We want that specific bakery style softness that yields to the touch but still holds its shape when loaded with pulled pork or a juicy burger.
This bread buns recipe is designed to bridge that gap between artisan structure and commercial fluffiness.
The secret lies in the hydration and the specific way the fat is introduced to the dough. When you bite into one of these, you'll notice a distinct contrast: a thin, slightly sweet exterior that gives way to a center that feels like velvet.
It is a repeatable sweetness that doesn't overwhelm the palate, making these buns suitable for everything from honey ham to spicy fried chicken.
Many people reach for store-bought packs because they think homemade bread is a day long ordeal. Honestly, don't even bother with those dry, preservative filled bags anymore. This method is surprisingly quick, focusing on a over high heat start and a gentle finish.
We are looking for a specific dough texture that is tacky but not sticky, a balance that ensures the crumb stays moist for days. Let's get into how the chemistry of these ingredients creates such a reliable result.
The Chemistry of Yeast and Protein
Gluten Alignment: High protein bread flour creates a strong elastic network that traps carbon dioxide bubbles during the rise. This structural integrity prevents the buns from collapsing under the weight of their own steam.
Maillard Reaction: The combination of granulated sugar and the lactose in whole milk encourages deep browning at lower temperatures. This ensures a rich color before the interior has a chance to dry out.
Lipid Interference: Softened butter coats the flour proteins, shortening the gluten strands just enough to create a tender, "shreddy" texture rather than a chewy, baguette like bite.
Yeast Fermentation: Active dry yeast consumes the sugar and releases ethanol and gas, which stretches the dough and develops the foundational aroma of fresh bread.
| Component | Science Role | Pro Secret |
|---|---|---|
| Whole Milk | Hydration and Fat | Warm to 105°F to wake yeast without killing it |
| Bread Flour | Structural Framework | Sift to ensure even hydration and no lumps |
| Softened Butter | Tenderness Agent | Use room temperature (68°F) for easy emulsification |
| Large Egg | Emulsifier | Lecithin in the yolk creates a finer, tighter crumb |
Essential Elements for Your Pantry
To get the best results, you need to use specific ingredients. I always reach for King Arthur Bread Flour because its consistent protein content ensures the dough will behave every single time. For the yeast, a fresh jar of Red Star Active Dry Yeast is my go to.
- 300ml whole milk: Provides the base liquid and fat for a rich crumb. Why this? Fat in milk keeps the crumb softer than water based doughs.
- 10g active dry yeast: The engine that drives the rise. Why this? Provides a reliable, predictable lift compared to wild starters.
- 25g granulated sugar: Feeds the yeast and aids in browning. Why this? Just enough to assist fermentation without making the bread "cakey."
- 500g high protein bread flour: The skeleton of our bun. Why this? Higher protein (12-13%) is required to hold the bun's round shape.
- 7g fine sea salt: Regulates yeast and enhances flavor. Why this? Fine grains dissolve instantly into the dough mass.
- 50g unsalted butter, softened: Added late for maximum tenderness. Why this? Using unsalted allows you to control the seasoning precisely.
- 1 large egg: Adds structure and color to the dough. Why this? Acts as a natural binder for a more cohesive texture.
- 1 egg and 1 tbsp water: For the signature glaze. Why this? Creates that professional, high gloss finish on the crust.
| Original Ingredient | Substitute | Why It Works |
|---|---|---|
| Whole Milk | Unsweetened Soy Milk | Similar protein/fat profile. Note: Slightly nuttier finish |
| Bread Flour | All Purpose Flour | Lower protein means a softer, but more fragile bun |
| Unsalted Butter | Refined Coconut Oil | Solid at room temp, provides fat without dairy |
The Tools for Perfect Dough
You don't need a professional bakery to pull this off, but a few specific items make the process much smoother. I use a KitchenAid Stand Mixer with the dough hook attachment to save my arms from 10 minutes of heavy kneading.
If you are doing this by hand, a sturdy Lodge Cast Iron Scraper is helpful for managing the dough on the counter.
For baking, a heavy duty rimmed baking sheet lined with Silpat or parchment paper prevents the bottoms from scorching. I also highly recommend a digital kitchen scale like the OXO Good Grips 11lb Scale. Measuring by weight is the only way to ensure your buns are uniform in size and bake at the same rate.
Finally, a bench scraper is your best friend when it comes to dividing the dough into 12 equal portions.
A step-by-step Shaping Guide
- Warm the milk. Heat 300ml whole milk to 105°F. It should feel like warm bath water, never hot.
- Bloom the yeast. Stir 10g active dry yeast and 25g granulated sugar into the milk. Let it sit for 5 minutes until a foamy head forms.
- Mix the base. In your KitchenAid bowl, combine 500g bread flour and 7g sea salt. Pour in the yeast mixture and 1 large egg.
- Knead the dough. Using the dough hook on low speed, mix until a shaggy mass forms. Increase to medium and knead for 5 minutes.
- Incorporate the butter. Add 50g softened butter (room temperature) one tablespoon at a time while the mixer is running. Wait for the dough to absorb each piece.
- Check the texture. Continue kneading for another 5 minutes. The dough should pull away from the sides and feel smooth and elastic. It should "behave" and not stick to your fingers.
- First proof. Place the dough in a greased bowl, cover with a damp cloth, and let rise in a warm spot for 1 hour or until doubled.
- Divide and shape. Punch down the dough. Use a scale to divide it into 12 pieces (roughly 75-80g each). Roll into tight, smooth balls.
- Second proof. Place on a baking sheet, cover, and let rise for 45 minutes. They should look puffy and feel like marshmallows.
- Glaze and bake. Whisk 1 egg with 1 tbsp water. Brush gently over the tops. Bake at 375°F for 15 minutes until deep golden brown and sounding hollow when tapped.
Chef's Tip: To get that professional "shatter" on the crust, spray the oven with a little water right before closing the door. The steam keeps the surface flexible, allowing for a bigger rise before the crust sets.
Common Pitfalls and Pro Solutions
Why the Dough is Sticky
If your dough feels more like paste than bread, you might have added the milk when it was too hot, or your kitchen is very humid. Don't panic and dump in cups of extra flour. This will make the buns heavy. Instead, use a light dusting on your hands and keep kneading. If you've mastered the Classic French Bread recipe, you'll know that high hydration doughs just need a bit of patience to come together.
Preventing a Dense Center
A heavy, lead like interior usually means the buns didn't proof long enough or the yeast was expired. The second rise is the most important. If you poke the dough and the indentation stays, it is ready. If it springs back instantly, it needs more time.
We want the air bubbles to be well distributed for that feather light crumb.
| Problem | Cause | Fix | Pro Tip |
|---|---|---|---|
| Flat Buns | Over proofing | Watch the clock; stop when doubled | Use a cold proof in the fridge to slow it down |
| Tough Crust | No Egg Wash | Use the egg and water glaze | Brush with melted butter immediately after baking |
| Pale Color | Oven Too Cold | Calibrate with an oven thermometer | Increase temp by 15 degrees for the last 3 mins |
Choosing Your Method
| Feature | Fast Method (Instant Yeast) | Classic Method (Active Dry) |
|---|---|---|
| Rise Time | 45 minutes total | 1 hour 45 minutes total |
| Flavor | Mild, milky | Deep, fermented, complex |
| Texture | Very soft, less structure | Sturdier, better for big burgers |
Decision Shortcut: If you want a quick dinner, use Instant Yeast and skip the 5 minute bloom. If you want the best flavor, use the Classic Method with a 12 hour cold ferment in the fridge. If you want a sweeter bun, double the sugar and add a splash of vanilla.
Alternative Ingredients and Dietary Needs
For a dairy-free Alternative
You can easily swap the whole milk for unsweetened almond or soy milk. For the butter, use a high-quality vegan butter stick or refined coconut oil. The texture will be slightly different coconut oil produces a very tender, almost crumbly bun but it will still be delicious.
For a Heartier Whole Grain Version
Swap out 150g of the bread flour for whole wheat flour. You will likely need to add an extra tablespoon of milk, as whole grains absorb more liquid. This results in a nuttier flavor that pairs beautifully with savory meats. Much like the technique used in a Wheat Bread recipe, the key is not to over knead once the whole wheat is added, as the bran can cut through the gluten strands.
Keeping Your Buns Fresh Longer
Storage: These buns stay soft at room temperature for up to 3 days if kept in an airtight container or a Ziploc bag. To keep them even longer, wrap them individually in plastic wrap and store them in the fridge for up to a week.
Freezing: This bread buns recipe freezes beautifully. Once the buns have cooled completely, place them in a freezer bag and squeeze out as much air as possible. They will stay fresh for up to 3 months.
To reheat, let them thaw at room temperature and then pop them in a 350°F oven for 5 minutes to restore the "crackle" of the crust.
Zero Waste: If your buns do go stale, don't toss them! They make the most incredible French toast or bread pudding because of their high egg and butter content. You can also pulse them in a food processor for fresh, buttery breadcrumbs that beat the store-bought canisters any day.
Perfect Pairings for Golden Buns
These buns are the ultimate canvas for flavor. Because they have a slight sweetness, they contrast perfectly with salty, savory fillings. I love serving them alongside a hearty stew where they can soak up the gravy without falling apart.
If you are looking for a sweet application, try slicing them in half, toasting them with a bit of butter, and serving them with a side of The Classic Shortbread recipe style cookies and tea. They also make an incredible base for a breakfast sandwich think crispy bacon, a folded egg, and a slice of sharp cheddar. The "repeatable sweetness" of the dough makes the salty bacon pop.
Your Pressing Dough Related Questions
Why didn't my bread buns rise?
The most likely culprit is the temperature of your milk. If it was over 115°F, it likely killed the yeast cells. Alternatively, if your kitchen is cold (below 68°F), the yeast is simply dormant.
Try placing the bowl inside a turned off oven with the light turned on; the bulb provides just enough warmth to get things moving.
Can I make the dough the night before?
Yes, and I actually prefer this. After the first knead, place the dough in a greased bowl, cover it tightly, and put it in the fridge overnight. The cold temperature slows down the yeast but allows the flavor to develop.
The next morning, shape the cold dough, let it rise for about 90 minutes (it takes longer since it's cold), and bake as usual.
How do I get that shattering crust?
That thin, crisp layer comes from the egg wash and the initial blast of heat. Make sure your oven is fully preheated for at least 20 minutes before the buns go in. If you want an even shinier look, you can brush them with a second coat of egg wash halfway through the baking time.
What if I don't have a stand mixer?
You can absolutely knead this by hand. It will take about 12-15 minutes of vigorous work. Start by mixing everything in a bowl with a wooden spoon, then turn it out onto a floured surface. Use the heel of your hand to push the dough away from you, fold it back, and repeat. It's a great workout!
Can I use this dough for cinnamon rolls?
This dough is a fantastic base for sweet rolls. Because it is an enriched dough (containing fat and eggs), it has the richness needed for desserts. Simply roll the dough into a rectangle after the first rise, spread with butter and cinnamon sugar, roll it up, and proceed with the second rise and bake.
Debunking Common Dough Myths
"You must knead dough until it is perfectly smooth to have soft bread." In reality, over kneading can lead to a rubbery texture. You want to reach the "windowpane stage" where you can stretch a small piece of dough thin enough to see light through it without it tearing, but it doesn't need to look like polished plastic.
"Sugar is only for flavor." This is a big misconception. While sugar does add sweetness, its primary job in this bread buns recipe is to provide food for the yeast and to attract moisture (hygroscopy), which keeps the bread from drying out as it bakes.
"Salt kills yeast." While concentrated salt can inhibit yeast, the 7g used here is essential for controlling the rate of fermentation. Without it, the yeast would work too fast, producing large, irregular bubbles and a bread that tastes bland and "yeasty" in a bad way.
Always mix your salt into the flour before adding the liquid to buffer the contact.
Making your own bread is one of the most rewarding skills you can have in the kitchen. There is something truly special about the way the house smells when a tray of these is in the oven. Trust the process, watch the dough texture, and you'll never go back to the grocery store aisle again.
Let's crack on and get baking!

Recipe FAQs
how to make bread buns?
Yes, using yeast and high protein flour. Mix warm milk (105°F) with yeast and sugar, combine with flour, salt, egg, and softened butter, then knead until smooth and elastic. The process involves a first rise, shaping, a final proof, and then baking at 375°F until golden.
how to make bread buns from scratch?
Yes, the recipe requires five core pantry staples. You start with bread flour, whole milk, yeast, sugar, salt, butter, and egg. The technique relies on properly hydrating the flour and ensuring the butter is room temperature to achieve that pillowy texture.
how to make bread buns at home?
Yes, a stand mixer is highly recommended but not essential. If kneading by hand, dedicate about 12 to 15 minutes until the dough passes the windowpane test. Ensure you allow sufficient time for both the first and second proofing stages for maximum fluffiness.
how to make bread buns in nigeria?
Yes, the process is universal, but monitor your environment. The main consideration is ambient temperature; if your kitchen is very warm, the yeast will work quickly, requiring a shorter proofing time than stated. Alternatively, you can cold ferment the dough in the refrigerator to slow down the rise.
how to make bread buns with yeast?
Yes, active dry yeast is the required leavening agent here. You must activate the yeast by dissolving it in warm milk (around 105°F) with sugar for five minutes until foamy. This confirms the yeast is alive and ready to produce the gas needed for a good rise.
What makes the crust so shiny?
The egg wash applied just before baking creates the sheen. Whisk one large egg with one tablespoon of water until fully combined, then brush it lightly over the puffy dough balls. If you master this surface treatment technique here, you can apply the same principle for that rich color on pastries.
Can I use all-purpose flour instead of bread flour?
No, it is not recommended for structural integrity. Bread flour has a higher protein content which is necessary to form the strong gluten network that supports the bun's shape. Using AP flour results in a softer bun, but it may flatten or collapse during the bake.
Soft Bread Buns Recipe

Ingredients:
Instructions:
Nutrition Facts:
| Calories | 215 kcal |
|---|---|
| Protein | 6.9 g |
| Fat | 5.1 g |
| Carbs | 35.2 g |
| Fiber | 1.2 g |
| Sugar | 2.8 g |
| Sodium | 228 mg |
