The Pub Regulars Proper Hearty Chili
- Unlocking the Secret to Deep, Slow-Simmered Flavor in Record Time
- Why This 'Pub Regular' Chili Stands Apart from the Rest
- Assembling the Cornerstone Components for Robust Chili
- Mastering the Spice Blend: Building Flavor Layers
- The Step-by-Step Journey to Brewing This Magnificent Chili
- Achieving Peak Flavor Through Controlled Searing and Deglazing
- Elevating Your Bowl: Toppings and Presentation Strategies
- Ensuring Longevity: Storing and Revitalizing Leftover Chili
- Recipe FAQs
- 📝 Recipe Card
Unlocking the Secret to Deep, Slow Simmered Flavor in Record Time
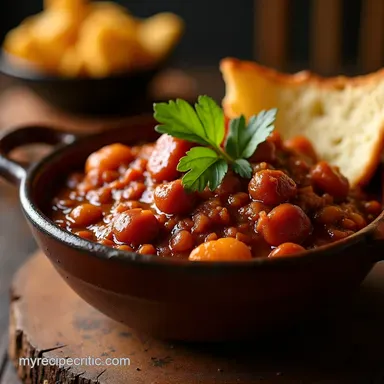
There is something uniquely comforting about a bowl of perfectly executed Chili . It’s more than just a meal; it’s an event, a conversation starter, and the quintessential cold weather companion.
For many of us, finding that perfect balance smoky, savory, slightly spicy, and undeniably rich can feel like a quest reserved only for competition cooks. However, I’m here to share the framework for creating a Deep Rich Chili that captures that slow simmered magic, even when your schedule demands something quicker than an all-day vigil over the stovetop.
This Hearty Chili Recipe relies on strategic layering and key flavour boosters to deliver exceptional results efficiently.
Why This 'Pub Regular' Chili Stands Apart from the Rest
What exactly separates a truly memorable chili from the rest? It often comes down to technique and the intentional addition of ingredients that deepen the savoury base. This specific approach, which I fondly call "The Pub Regular's Proper Hearty Chili," focuses on building a robust foundation right from the first sizzle.
Achieving this result is less about sheer cooking time and more about honouring the process of flavour extraction. This results in an Amazing Chili Recipe that people will ask for again and again.
Defining the Ultimate Hearty Chili Experience
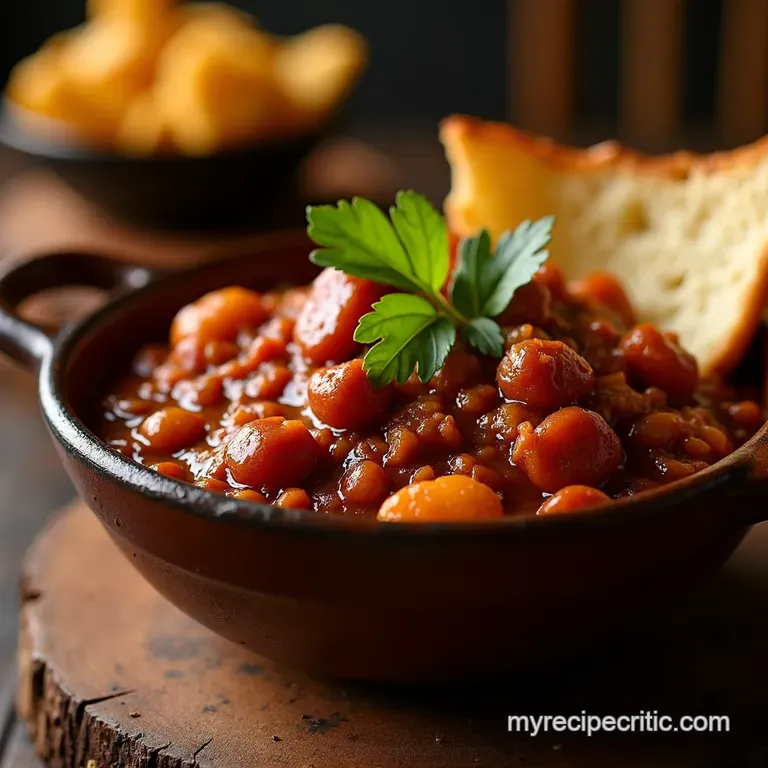
A truly Hearty Chili Recipe should stand up on its own, demanding nothing more than a sturdy spoon and perhaps a slice of cornbread for accompaniment. It should feature tender chunks of beef that have surrendered their structure to the simmering liquid, coated in a thick, unctuous sauce teeming with earthy spice notes.
We are aiming for density and complex mouthfeel, ensuring every spoonful provides that deep, satisfying anchor we crave in comfort food. This is the benchmark we are setting for our Homemade Chili Recipe Easy preparation.
The Unconventional Ingredient Providing Unmatched Depth
When considering What Ingredients Go In Chili , most cooks immediately jump to meat, beans, and tomatoes. While essential, this recipe incorporates two secret weapons that mimic the long cooked flavour profile: tomato paste cooked until caramelized, and a teaspoon of unsweetened cocoa powder.
The cocoa doesn't make the chili taste sweet or chocolatey; rather, it subtly deepens the red hues and amplifies the earthy bitterness of the chili powders, creating a profound, savoury foundation that fools the palate into believing it has been cooking for hours.
Setting Expectations: This Isn't Your Average Weeknight Meal
While the preparation time is manageable (about 25 minutes of focused prep), the 2-hour 15-minute total time reflects the necessity of a slow, gentle simmer. This crucial period allows the collagen in the beef chuck to break down and the bold spices to fully hydrate and meld.
Understanding this timing ensures you are committing to a proper, flavour forward result. This focus on controlled development ensures we craft a Proper Chili Recipe every time.
Assembling the Cornerstone Components for Robust Chili
Before we even touch the stove, gathering high-quality components is vital for success. The richness of this dish starts with the primary protein. For the best texture, opt for 2 lbs of beef chuck, diced into neat half inch cubes rather than using ground beef, which releases too much fat too quickly.
If you prefer a blend, mixing the chuck with some cubed pork shoulder adds wonderful complexity. Equally important are the fire roasted diced tomatoes; their slight char adds a pre-smokiness to the final sauce.
We will rely on 2 cups of low-sodium beef broth to provide a clean, savoury liquid base that won't overpower the nuanced spices we are about to introduce.
Mastering the Spice Blend: Building Flavor Layers
The soul of any great chili lies in its spice management. We are not simply sprinkling spices over meat; we are blooming them activating their volatile oils through heat which unlocks their full aromatic potential. This blend achieves a beautiful balance between heat, earthiness, and smokiness.
Selecting Superior Beef Cuts for Maximum Texture
As mentioned, choosing beef chuck (or boneless short ribs if you're feeling decadent) is key because it contains connective tissue that dissolves beautifully during the slow simmer, naturally thickening the chili and yielding incredibly tender pieces of beef.
Always season the cubed meat aggressively with salt and pepper before it hits the hot pan, encouraging a fantastic crust to form during the browning phase.
The Essential Aromatics and Liquid Base Required
The initial aromatic structure relies on one large yellow onion and one red bell pepper, sautéed until deeply softened this process, known as sweating, releases their natural sugars. We'll also need four cloves of garlic, added later to prevent burning.
The liquid base is formed by combining the browned aromatics with a full 28-ounce can of fire roasted tomatoes, the beef broth, and the crucial cup of dark beer (a stout or porter works wonders) or strong black coffee, which acts as a liquid depth charge.
Precision Measurements for the Signature Spice Rub
For the signature profile of this Best Chili Recipe , precision matters in the spice ratio. You'll need 3 tablespoons of high-quality chili powder seek out New Mexico or Ancho blends for a deep, fruity note rather than just pure heat.
Complement this with 1 tablespoon of ground cumin for earthiness, 1 teaspoon of smoked paprika (which adds that desirable fire pit note), 1 teaspoon of dried Mexican oregano, and, optionally, a half teaspoon of cayenne for a gentle background warmth.
Necessary Cookware for Achieving Perfection
Do not attempt this in a thin, flimsy pot. A large, heavy bottomed Dutch oven is absolutely essential. Its thick base distributes heat evenly, preventing hot spots that scorch the tomato paste or burn the spices.
This consistent, gentle heat transfer is what allows us to build that desirable fond —the browned, flavourful residue left on the bottom of the pot which we will harness in the next phase.
Related Recipes Worth Trying
- My Umami Bomb A Unique Chili Recipe with Stout Miso — Cor blimey this chilis unique Miso stout take this chili recipe unique to the next level Easy homemade chili with layers of flavor you wont believe Get the...
- Proper Pub Grub Beef Chili Hearty Flavorful — This Proper Pub Grub Beef Chili is the BEST Hearty flavorful smoky just like your favorite pub A beef chili hug in a bowl Get the recipe
- Creamy Chicken Chili My Easy Comfort Food Recipe — Craving easy chicken chili This creamy white chicken chili is comfort food heaven Tender chicken cannellini beans and a secret ingredient make it the best...
The step-by-step Journey to Brewing This Magnificent Chili
The execution of this Chili Recipe is divided into distinct flavour building phases. We begin by building texture and colour, move to intensive flavour activation, and finish with a slow marriage of all components.
Achieving Peak Flavor Through Controlled Searing and Deglazing
The initial minutes of cooking are the most active, setting the stage for the hours of mellow simmering to follow.
Phase One: Browning the Meat and Tempering the Spices
Begin by heating 2 tablespoons of oil over medium high heat in your Dutch oven. Brown the seasoned beef cubes in batches; do not crowd the pan, or the meat will steam instead of sear. Use a slotted spoon to remove the browned beef and set it aside, leaving about 2 tablespoons of fat behind. Reduce the heat to medium.
Add the chopped onion and bell pepper, sweating them down gently for 8 to 10 minutes until they are soft and translucent, actively scraping up any browned bits from the base of the pan with your stirring utensil. Introduce the minced garlic and cook for just one minute until fragrant.
Integrating Liquids and Achieving the Initial Simmer
Now, the magic happens. Push the vegetables aside and add 2 tablespoons of tomato paste directly to the hot surface of the pot, stirring it constantly until it darkens and caramelizes about two minutes. Immediately follow with the entire spice blend.
Stir the spices vigorously into the hot paste and fat mixture, cooking for precisely 60 seconds until the aroma intensifies dramatically; this is the "bloom." Next, pour in the cup of dark beer or coffee to deglaze the pot, scraping up every last piece of flavour from the bottom. Let this reduce by half.
Return the seared beef to the pot, then stir in the fire roasted tomatoes, beef broth, and the teaspoon of cocoa powder. Bring the entire mixture just to a gentle simmer.
The Critical Period: Low and Slow Development
Once simmering, reduce the heat to the lowest setting, cover the pot loosely, and allow the mixture to cook for a minimum of 1 hour and 30 minutes. Stir every 20 minutes to prevent sticking.
This low heat is essential for breaking down the beef chuck into yielding perfection. After this time, the sauce should already have thickened considerably. If you are including the optional kidney beans (one 15-ounce can, rinsed and drained), stir them in now.
Continue simmering, uncovered, for an additional 30 minutes to achieve your desired thickness the longer it simmers uncovered, the more concentrated the flavour becomes.
Final Adjustments and Resting Period Before Serving
Remove the chili from the heat source. This is the moment for the critical balancing act: stir in 1 tablespoon of apple cider vinegar. This bright acid counteracts the deep, heavy notes, lifting the entire flavour profile. Taste carefully and adjust the salt and pepper levels.
It is vital to let the Chili rest, covered, for 15 minutes off the heat. This resting period allows the fats to redistribute and the liquids to settle, marrying the flavours completely before you ladle out your first perfect bowl.
Elevating Your Bowl: Toppings and Presentation Strategies
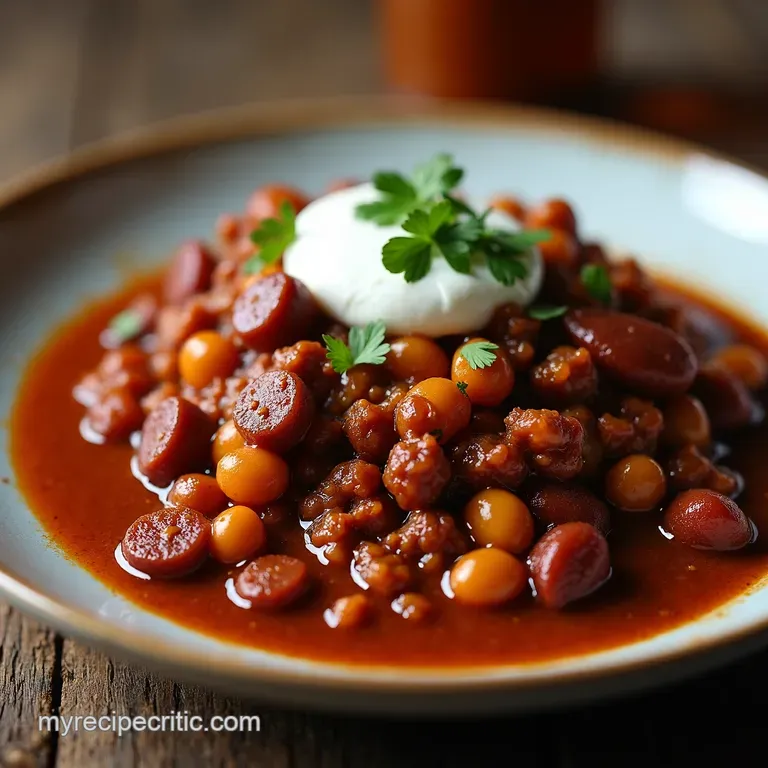
No Chili is truly complete without its crowning glories. Toppings aren't just garnish; they provide textural contrast and cooling elements against the heat.
A dedicated topping bar is always a hit: offer finely grated sharp white cheddar or Monterey Jack, a generous scoop of cool, full fat sour cream, finely chopped fresh cilantro (coriander), and perhaps a scatter of thinly sliced jalapeños for those who crave extra fire.
A side of warm, slightly sweet cornbread is the traditional, and arguably superior, vehicle for scooping up every last drop of the rich sauce.
Ensuring Longevity: Storing and Revitalizing Leftover Chili
This recipe scales wonderfully, and honestly, it tastes significantly better on day two.
Creative Additions and Substitutions for Personalizing Your Batch
If you find yourself with leftover chili but want a different profile the next day, consider stirring in a handful of crumbled tortilla chips and a splash of lime juice just before reheating to create a chewier, almost stew like texture.
A small amount of dark brown sugar can also be added if the final taste leans too bitter after resting.
Can You Successfully Use Ground Turkey in This Preparation?
Yes, you absolutely can substitute ground turkey or chicken, though the inherent richness will decrease as you lose the rendered beef fat. If using leaner meat, start by adding 2 tablespoons of olive oil or butter to the Dutch oven before you brown the meat to ensure you still have enough fat to bloom your spices properly in Phase Two.
Optimal Cooling and Freezing Protocols for Maximum Freshness
When cooling, divide large batches into shallow containers; this speeds up the cooling process, which is important for food safety. Once fully cooled, this Chili freezes beautifully for up to three months.
Thaw overnight in the refrigerator before reheating gently on the stovetop, adding a splash of beef broth if it seems too thick after thawing.
Serving Suggestions That Complement the Richness
Beyond the standard cornbread, try serving this chili over baked potatoes, spooned generously over nachos with melted cheese, or even as a robust filling for homemade tamales. The versatility of this robust base means it adapts seamlessly to almost any application where deep, satisfying flavour is required.
Recipe FAQs
Why is my Chili not as rich and thick as I expected?
That's often down to two things: not building a proper flavour base or rushing the simmer. Make sure you are "blooming" your spices in the fat for a full minute (Step 3) and reducing your liquid slightly before covering it.
For thickness, let it simmer uncovered for the last 30 minutes to allow excess moisture to evaporate, just like reducing a sauce.
Can I make this "Pub Regular's Proper Hearty Chili" ahead of time?
Absolutely, and I highly recommend it! Chili is one of those dishes that tastes even better the next day, much like a Sunday roast left in the fridge overnight. Making it ahead allows the deep spice notes to fully meld together, resulting in a much deeper flavour profile when you reheat it gently.
I’m not a fan of beans; can I skip them in this Chili recipe?
Of course Texans often frown upon beans anyway, so you're in good company! Simply omit the kidney beans entirely and perhaps substitute that liquid volume with an extra half cup of beef broth or a bit more beer. Keep the long simmer time so the meat has time to break down beautifully.
How do I adjust the heat level if I want it spicier or milder?
The heat is easily managed using the cayenne pepper mentioned in the spice list. For milder, leave it out entirely or only use paprika. To crank up the heat, add a finely chopped fresh jalapeño during the onion sauté, or introduce a teaspoon of chipotle powder when blooming the spices.
What's the best way to store leftovers, and how long do they keep?
Once completely cooled, store your leftover chili in an airtight container in the fridge for up to four days it reheats a treat! For longer storage, it freezes brilliantly; portion it out into freezer safe containers for a hearty lunch on a bleak winter's day later on.
What should I use instead of dark beer if I don't want to use alcohol?
Not everyone fancies a tipple in their dinner, even a stout! The beer adds maltiness and body, so the best substitute is a cup of strong, freshly brewed black coffee don't worry, it won't taste like coffee when cooked down. You can also use extra beef broth fortified with a teaspoon of molasses for richness.
Proper Hearty Chili Recipe