Pan Seared Scallops: Restaurant Quality at Home
- Time: Active 10 minutes, Passive 5 minutes, Total 15 minutes
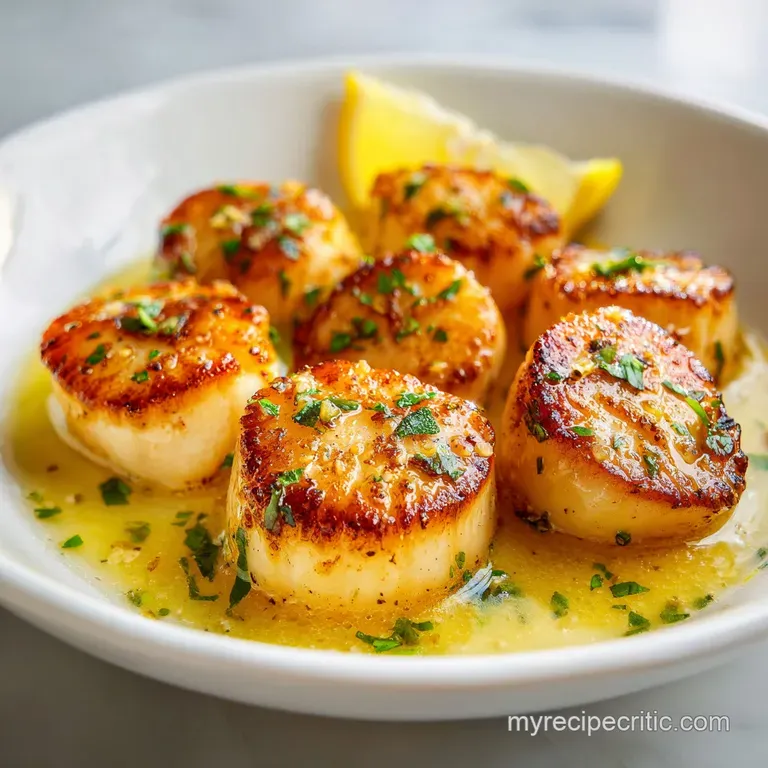
- Flavor/Texture Hook: A shatter crisp golden crust with a velvety, melt in-your mouth center.
- Perfect for: Anniversary dinners, low effort luxury, or a high protein weeknight treat.
- Master the Ultimate Pan Seared Scallops
- Why High Heat Creates Culinary Magic
- Essential Specs for Searing Success
- Deep Dive Into Seafood Components
- Choosing Your Kitchen Arsenal Wisely
- Precise Steps for Golden Searing
- Expert Solutions for Common Mishaps
- Adapting Flavors for Every Lifestyle
- Maximizing Freshness and Reducing Waste
- Pairing Your Scallops Like a Pro
- Dispelling Kitchen Legends
- Recipe FAQs
- 📝 Recipe Card
Master the Ultimate Pan Seared Scallops
The first time I tried making scallops at home, I was terrified of ruining them. Scallops aren't cheap, and the thought of turning them into rubbery hockey pucks kept me from trying for years. I remember standing in my kitchen, heart racing, as the 12 inch cast iron skillet started to wisps with smoke.
Then came the sizzle. That aggressive, rhythmic crackle as the cold protein hit the screaming hot oil. In that moment, the kitchen filled with a nutty, sweet aroma that signaled I was finally doing it right.
When the first scallop flipped, revealing a deep, mahogany colored crust that looked like it belonged on a magazine cover, I knew I’d unlocked something special. This isn't just a recipe; it's a technique that makes you feel like a professional chef without needing a culinary degree.
We’re going to use the "budget smart" approach here focusing on high impact aromatics like garlic and capers to make even more affordable frozen scallops taste like they were plucked from the ocean this morning.
You don't need a massive grocery bill to eat like royalty. By mastering the heat and understanding why we dry the surface of the meat, you'll produce Pan Seared Scallops that rival any high end steakhouse.
We're talking about a dish that takes exactly 15 minutes from start to finish but leaves a lasting impression on anyone lucky enough to sit at your table. Let's get the pan hot and dive in.
Why High Heat Creates Culinary Magic
Creating that iconic crust isn't about luck; it's about managing surface moisture and thermal mass. When we talk about Pan Seared Scallops, we are really talking about the interaction between heat and protein.
- Surface Dehydration: Moisture is the enemy of a crisp sear. Removing the "foot" and pressing the scallops between triple layered paper towels ensures the heat goes toward browning rather than steaming.
- Thermal Stability: Using a heavy 12 inch cast iron skillet provides a consistent heat reservoir. This prevents the pan temperature from dropping when the cold scallops are added, which is vital for an immediate sear.
- Aromatic Infusion: Adding the butter and garlic only after the flip prevents the milk solids from burning during the over high heat phase. This creates a velvety sauce that flavors the delicate meat without overpowering it.
- Acid Balance: The final splash of lemon juice and the addition of capers provide the necessary brightness. This cuts through the richness of the butter and the natural sweetness of the seafood.
| Thickness | Internal Temp | Rest Time | Visual Cue |
|---|---|---|---|
| 1 inch (U12) | 125°F - 130°F | 2 minutes | Sides turn opaque; center is slightly translucent |
| 1.5 inches (U10) | 125°F - 130°F | 3 minutes | Deep golden crust; firm to light touch |
| 0.5 inch (Bay) | 120°F | 1 minute | Just barely golden; very quick cook |
Selecting the right size is the first step in ensuring your cook times are accurate. For this recipe, I highly recommend U10 or U12 sizes, which means there are 10 to 12 scallops per pound.
These larger scallops provide enough surface area to get a great crust before the inside overcooks, making them much more forgiving for home cooks.
Essential Specs for Searing Success
When you're working with a 5 minute cook window, precision is everything. I always tell my friends to treat this like a timed experiment. You want your mise en place that's just a fancy word for having everything chopped and ready perfectly set before the first scallop touches the oil.
| Component | Science Role | Pro Secret |
|---|---|---|
| Avocado Oil | High Smoke Point | Prevents the oil from breaking down and tasting bitter at high heat. |
| Unsalted Butter | Fat & Flavor | Use unsalted to control the seasoning precisely during the basting phase. |
| Sea Scallops | Protein Structure | Look for "dry packed" to avoid chemical additives that prevent browning. |
| Lemon Juice | Chemical Brightener | Breaks down the richness of the butter for a balanced finish. |
If you can't find dry packed scallops, don't panic. Many grocery stores sell "wet" scallops treated with sodium tripolyphosphate. If that's all you have, soak them in a mixture of 1 quart water, 1/4 cup lemon juice, and 2 tablespoons of salt for 30 minutes before drying.
This helps pull out some of the chemicals so you can still get a decent sear, though dry packed is always the gold standard for Pan Seared Scallops.
Deep Dive Into Seafood Components
The ingredients for this dish are simple, but their quality and preparation make all the difference. Since we are going for a budget smart approach, we want to maximize the flavor of every single item in the pan.
- 1 lb dry packed sea scallops (U10 or U12 size): Why this? Larger scallops offer a better ratio of crispy exterior to tender interior.
- 1 tbsp avocado oil: Why this? Its high smoke point allows for the intense heat needed for searing.
- 0.5 tsp fine sea salt: Why this? Fine grains dissolve quickly for even seasoning across the surface.
- 0.25 tsp freshly cracked black pepper: Why this? Freshly cracked provides more aromatic punch than pre ground pepper.
- 3 tbsp unsalted butter: Why this? Creates the base for the luxurious, nutty pan sauce.
- 3 cloves garlic, thinly sliced: Why this? Slicing instead of mincing prevents the garlic from burning too quickly.
- 1 tbsp fresh lemon juice: Why this? Adds the vital acid needed to "wake up" the seafood flavors.
- 1 tsp capers, drained: Why this? Provides salty, briny pops of flavor that compliment the sweet scallops.
- 1 tbsp fresh parsley, finely chopped: Why this? Adds a necessary touch of color and earthy freshness.
| Original Ingredient | Substitute | Why It Works |
|---|---|---|
| Avocado Oil | Grapeseed Oil | Similar high smoke point; neutral flavor profile. |
| Sea Scallops | Large Shrimp | Same cooking method; slightly faster cook time. Note: Texture is firmer. |
| Capers | Green Olives (minced) | Provides the same briny, salty kick to the butter sauce. |
If you're looking to stretch your budget, using large shrimp is a fantastic alternative. You can follow the exact same garlic butter method to create a meal that feels just as fancy but costs a fraction of the price. If you want to dive deeper into seafood pasta techniques, this Seared Scallops Pasta is a great way to make a smaller amount of scallops feel like a massive feast.
Choosing Your Kitchen Arsenal Wisely
You don't need a kitchen full of gadgets, but the pan you choose will dictate the quality of your crust. I always reach for my 12 inch cast iron skillet. It holds onto heat like a champ, meaning when those cold scallops hit the pan, the temperature doesn't plummet.
A stainless steel pan also works beautifully, though you have to be more careful about sticking. Avoid non stick pans at all costs here; they can't handle the high heat required for a true sear and won't give you that beautiful mahogany color we're chasing.
Beyond the pan, a good fish spatula is your best friend. It’s thin and flexible, allowing you to slide under the delicate crust without tearing it. If you only have tongs, be gentle. You also need plenty of paper towels. Seriously, buy the good ones.
We’re going to be pressing these scallops like we’re trying to squeeze water out of a stone. Every drop of moisture on the surface is a drop that will turn into steam, and steam is the enemy of the crunch.
Precise Steps for Golden Searing

- Remove the small, tough side muscle (the foot) from each scallop by pulling it off with your fingers. Note: This muscle is edible but becomes very chewy and unpleasant when cooked.
- Place the scallops on a plate lined with triple layered paper towels. Top with another paper towel and press firmly to ensure they are bone dry and tacky to the touch.
- Heat a 12 inch cast iron skillet or stainless steel pan over high heat and add the avocado oil. Note: Wait until the oil is shimmering and just starting to show a tiny wisp of smoke.
- Season the scallops with salt and pepper immediately before placing them in the pan to prevent moisture from being drawn out.
- Place scallops in the hot pan, ensuring they do not touch. Sear undisturbed for 2 minutes until a deep golden brown crust forms.
- Flip the scallops using a fish spatula or tongs. Immediately add the butter, sliced garlic, lemon juice, and capers to the pan.
- Tilt the pan slightly and use a spoon to baste the scallops with the foaming garlic butter for 1-2 minutes until just opaque.
- Remove from heat, garnish with fresh parsley, and serve immediately.
Mastering the Maillard Reaction
The Maillard reaction is the chemical dance between amino acids and reducing sugars that gives us that brown, savory crust. In this Pan Seared Scallops recipe, we maximize this by ensuring the pan stays above 300°F.
If you crowd the pan, the temperature drops, the scallops release liquid, and they boil in their own juices. Always leave at least an inch of space between each piece.
Eliminating the "Wet Scallop" Syndrome
If your scallops are releasing a white, milky liquid, they were likely treated with phosphates. The best way to combat this is to use the soaking method mentioned earlier or to simply buy from a trusted fishmonger who labels them as "dry." If the liquid appears in the pan, quickly soak it up with a bunched up paper towel held by tongs so the searing can continue.
Expert Solutions for Common Mishaps
Even with the best intentions, things can go sideways in a hot pan. The most common issue people face with Pan Seared Scallops is sticking. If the scallop doesn't want to move when you try to flip it, leave it alone! It will naturally release from the pan once the crust has fully formed.
Why Your Scallops Are Rubbery
Overcooking is the primary culprit here. Scallops continue to cook for a minute or two after you take them out of the pan (carryover cooking). If they feel firm like a well done steak, they are overdone. You want them to have a slight "spring" or bounce when you press the top with your finger.
| Problem | Root Cause | Solution |
|---|---|---|
| No Golden Crust | Surface was too wet or pan wasn't hot enough. | Dry scallops longer; wait for oil to shimmer before adding. |
| Garlic is Bitter | Garlic was added too early or heat was too high. | Add garlic only after flipping; use sliced garlic instead of minced. |
| Scallops are Tough | Cooked too long or over high heat for the whole duration. | Reduce heat slightly after flipping; baste with butter to finish gently. |
Common Mistakes Checklist
- ✓ Never salt the scallops too early; do it seconds before they hit the pan.
- ✓ Ensure the oil is hot enough to "shimmer" if it doesn't sizzle immediately, take it out.
- ✓ Don't move the scallops once they are in the pan; the crust needs uninterrupted contact.
- ✓ Use a heavy bottomed pan like cast iron to maintain consistent heat.
- ✓ Pat the scallops dry at least twice to ensure every bit of moisture is gone.
Adapting Flavors for Every Lifestyle
One of the best things about this recipe is how naturally it fits into various dietary needs without losing its soul. Since scallops are naturally low in carbs and high in protein, they are a staple for healthy eating.
Healthy Pan Seared Scallops (Paleo/Whole30)
To make this Whole30 or Paleo compliant, simply swap the unsalted butter for clarified butter (ghee). Ghee actually has a higher smoke point than regular butter, which makes it even better for the basting phase. The flavor remains rich and nutty, but you lose the dairy proteins that some people find hard to digest.
Pan Seared Scallops with Pasta
If you're looking for a more filling meal, serving these scallops over a bed of angel hair pasta is a classic move. Use the leftover garlic butter in the pan as the base for your sauce. Add a splash of white wine to the pan after removing the scallops to deglaze those brown bits (the fond), toss in your cooked pasta, and you have a restaurant level dinner. For a detailed guide on this pairing, check out my Pan Seared Scallops with Lemon Garlic Butter post.
Maximizing Freshness and Reducing Waste
Seafood is best enjoyed immediately, but I know life happens. If you find yourself with leftovers, you have to be strategic so you don't end up with rubber the next day.
Storage: Place leftovers in an airtight container in the fridge for up to 2 days. I don't recommend freezing cooked scallops, as the texture becomes quite grainy and unpleasant upon thawing.
Reheating: Avoid the microwave! It will turn your beautiful scallops into erasers. Instead, heat a small pan over medium heat with a teaspoon of butter. Add the scallops and just "warm them through" for about 60 seconds per side.
Better yet, slice the cold leftovers and toss them into a hot bowl of pasta or a fresh Caesar salad.
Zero Waste Tip: Don't throw away those parsley stems! Finely mince them and add them to the pan at the same time as the garlic. They have a more concentrated flavor than the leaves and add a great crunch. Also, if you have leftover lemon halves, toss them cut side down into the hot pan for 30 seconds.
The charred lemon juice becomes sweeter and more complex, making for a gorgeous garnish.
Pairing Your Scallops Like a Pro
To make this a complete meal, think about textures. Since the scallops are soft and velvety, I love pairing them with something that has a bit of a bite. A crisp arugula salad with a light vinaigrette is perfect.
If you want something heartier, a creamy risotto or a smooth cauliflower purée provides a beautiful bed for the scallops to sit on, soaking up all that extra garlic butter.
If you are serving this for a special occasion, a cold glass of Sauvignon Blanc or a dry Sparkling Wine is the way to go. The acidity in the wine mimics the lemon juice in the recipe, cutting through the butter and highlighting the natural sweetness of the seafood.
| Method | Time | Texture | Best For |
|---|---|---|---|
| Cast Iron Sear | 5 mins | Maximum crust; buttery interior | The classic, gold standard result. |
| Sous Vide + Sear | 45 mins | Edge to edge perfection | Large dinner parties where timing is tricky. |
| Air Fryer | 8 mins | Evenly cooked; less crust | Low oil, hands off preparation. |
If you want a different vibe, try the air fryer method for a "healthy pan seared scallops" feel. While you won't get the same deep crust as the cast iron, it's incredibly consistent and uses much less oil. Just remember to spray them lightly with avocado oil before they go in!
Dispelling Kitchen Legends
There are a few myths about scallops that I used to believe, but I've learned better over the years. One of the biggest is that you shouldn't use frozen scallops. That’s simply not true!
Most scallops are "flash frozen" on the boat, which actually preserves their freshness better than the "fresh" ones that have been sitting in a display case for three days. Just make sure to thaw them slowly in the fridge overnight and dry them extra well.
Another myth is that you need a huge amount of oil. You only need enough to thinly coat the bottom of the pan. The goal isn't to deep fry the scallops; it's to create a conductive layer of heat between the metal and the meat.
Too much oil can actually prevent a good crust from forming because it acts as an insulator rather than a conductor. Trust the high heat and a well seasoned pan, and you'll get that "shatter" crunch every time.

Recipe FAQs
How to cook the best pan seared scallops?
Dry the scallops thoroughly and use a screaming hot cast iron skillet. Remove the side muscle, press them between paper towels until tacky, and sear for exactly two minutes per side without moving them to develop a deep, golden brown crust.
Should scallops be seared in oil or butter?
Start with avocado oil, then finish with butter. High heat avocado oil prevents burning during the initial crust formation, while adding butter during the final basting stage provides the classic rich flavor and velvety texture.
Are scallops good for diabetics?
Yes, they are an excellent protein source. Scallops are naturally low in carbohydrates and high in lean protein, making them a suitable option for blood sugar management when prepared with heart healthy fats.
How to perfectly sear scallops like a chef?
Avoid salting until the very last second. Seasoning too early draws moisture to the surface, which prevents a proper crust from forming; if you enjoy mastering this kind of precise surface chemistry, see how we achieve a perfectly golden crust on other proteins.
Is it true I should move the scallops around the pan to cook them evenly?
No, this is a common misconception. Moving the scallops prevents the formation of a consistent crust, so let them sit undisturbed in the hot pan for the full two minutes before flipping.
How to tell if the side muscle needs to be removed?
Always check for the small, tough rectangular flap on the side of the scallop. This muscle remains chewy even after cooking, so pull it off with your fingers before you start the drying process.
What should I do if my scallops are releasing too much liquid in the pan?
Stop overcrowding the pan and ensure they were dried properly. If you crowd the skillet, the temperature drops and the scallops steam instead of sear; always pat them dry with fresh paper towels just before they hit the heat.
Pan Seared Scallops Recipe
Ingredients:
Instructions:
Nutrition Facts:
| Calories | 189 kcal |
|---|---|
| Protein | 13.9 g |
| Fat | 12.6 g |
| Carbs | 3.8 g |
| Fiber | 0.2 g |
| Sugar | 0.5 g |
| Sodium | 385 mg |
