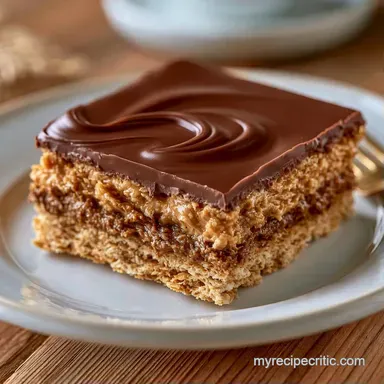
Old School Lunch Lady Peanut Butter Bars
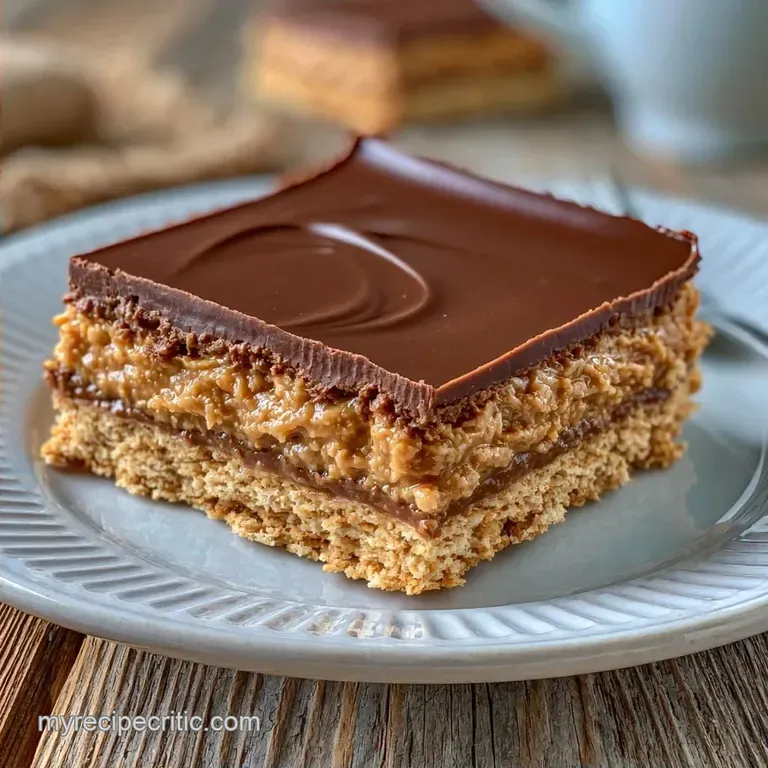
- Time: 10 min active + 45 min chilling
- Flavor/Texture Hook: Dense, sandy base with a glossy, smooth topping
- Perfect for: School snacks, easy dessert platters, or late night cravings
That specific smell of the school cafeteria always brings me back to the third grade. For some, it's the mystery meat, but for me, it was the day the lunch ladies brought out the peanut butter bars. They had this specific, dense texture and a chocolate layer that didn't quite set like a candy bar, but felt more like a fudge.
I spent a while trying to get that exact "cafeteria" feel at home. Most recipes make them too cakey or too oily. The trick is using graham cracker crumbs instead of flour, which gives them that sandy, tight crumb that holds up to the heavy chocolate topping.
These Lunch Ladies Peanut Butter Bars are all about contrast. You get the salt from the peanut butter hitting the sweetness of the chocolate, and the firm base playing against the softer top. They're simple, nostalgic, and honestly, way better than the original school version.
Why This Recipe Works
The Fat to Sugar Ratio: Combining melted butter and peanut butter with powdered sugar creates a stable emulsion. This ensures the base stays firm enough to slice without becoming a sticky mess.
Graham Cracker Structure: The crumbs act like tiny sponges that soak up the fats. This prevents the base from leaking oil and gives the bars a consistent, tight bite.
Quick Specs for the Bars
For those who need the numbers, this recipe makes 24 bars. It takes 10 minutes to prep and 15 minutes of active "cooking" time (mostly melting), with a total time of 70 minutes once you include the chill.
| Method | Prep Time | Active Work | Set Time |
|---|---|---|---|
| Stovetop/Microwave | 10 minutes | 15 minutes | 45 minutes |
| Oven Baked (Alt) | 15 minutes | 20 minutes | 20 minutes |
Since we're going the no bake route, you avoid the risk of over baking the peanut butter, which can sometimes make the bars taste bitter.
What Each Ingredient Does
Before we get into the list, it helps to know how these parts behave together. The balance of salt is what keeps these from tasting like a sugar bomb.
| Component | Purpose | Substitute Notes |
|---|---|---|
| Graham Crumbs | Structural Base | Almond flour works, but the bars will be softer |
| Powdered Sugar | Binding & Sweetness | Granulated sugar makes the base grainy |
| Peanut Butter | Flavor & Fat | Natural PB can separate; stir well before measuring |
| Chocolate Chips | Topping Body | Dark chocolate adds a more bitter, adult contrast |
Equipment Needed
No special equipment is required here. A medium bowl for the base and a microwave safe bowl for the chocolate are all you need. I suggest using a 9x9 inch square baking pan and some parchment paper.
Parchment paper is essential, as it allows you to lift the entire block from the pan for easier slicing into 24 uniform bars. If you lack a spatula, a wide knife works well for smoothing out the chocolate.
Bringing It Together
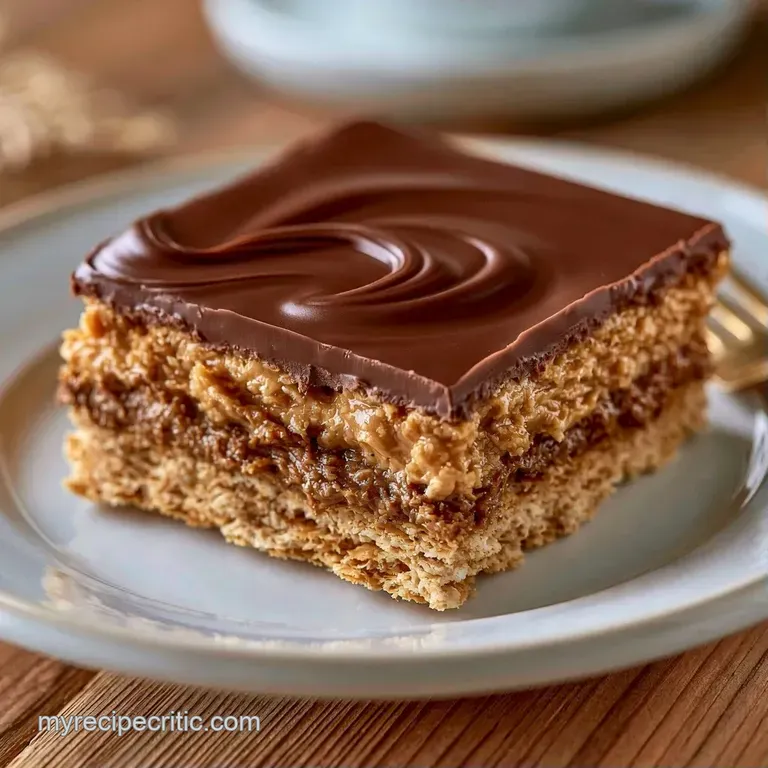
Follow these instructions to assemble the layers perfectly. Ensure your butter is completely melted before you begin.
- Melt the butter. In a medium bowl, whisk together the melted butter, peanut butter, and powdered sugar until the mixture is smooth.
- Incorporate the crumbs. Stir in the graham cracker crumbs until a thick, sandy dough forms. Note: Be careful not to overmix, or the butter may separate.
- Press the base. Firmly pack the mixture into a parchment lined 9x9 pan. Make sure the corners are pressed tight so the bars stay intact when sliced.
- Prepare the topping. Place the chocolate chips and peanut butter in a microwave safe bowl.
- Melt the chocolate. Heat in 20-second intervals, stirring well after each burst, until the mixture is glossy.
- Season. Mix in a pinch of salt to balance the richness.
- Layer the chocolate. Pour the melted chocolate over the crust. Use a spatula to spread it until the surface is level.
- Chill. Refrigerate for a minimum of 45 minutes until the chocolate is firm to the touch.
- Slice. Lift the parchment paper to remove the block from the pan and cut into 24 bars using a sharp knife.
How to Fix Common Problems
When your bars aren't turning out quite right, temperature is usually the culprit. Chocolate can be temperamental, often seizing or separating if it heats up too rapidly in the microwave.
Fixing a Cracking Top
If the chocolate topping cracks as you slice, it may be overcooked or too cold. To get a clean cut, lightly warm your knife under hot water between each slice.
Preventing a Crumbling Base
A base that falls apart usually wasn't packed down tightly enough. Firmly press the dough into the pan and corners with a flat bottomed object to ensure it holds.
Handling Oily Chocolate
Don't worry if the chocolate appears oily or separated. Stirring in a teaspoon of creamy peanut butter will help re-emulsify the fats.
| Problem | Root Cause | Solution |
|---|---|---|
| Base is too soft | Not enough crumbs or too much butter | Add 2 tbsp more graham crumbs |
| Topping is grainy | Overheated chocolate | Stir in a small amount of peanut butter |
| Bars stick to pan | No parchment paper used | Use a thin knife to pry edges loose |
Creative Twists and Swaps
The classic version is fantastic, but you can easily adapt these Lunch Ladies Peanut Butter Bars to suit your taste. For a higher protein option, these homemade protein bars are a great choice for a healthier midday snack.
Ingredient Swaps:
- Graham Cracker Crumbs: Swap for crushed pretzels to get a saltier, crunchier base.
- Semi Sweet Chocolate: Try dark chocolate (70% cocoa) for a richer and less sweet taste.
- Peanut Butter: Use almond butter or cashew butter to change the nutty flavor.
Decision Shortcut:
- For a firmer set: Chill for 2 hours rather than 45 minutes.
- For a saltier punch: Add a pinch of salt to both the base and the topping.
- For a heartier texture: Use rolled oats to replace half the graham cracker crumbs.
Make-ahead and Leftover Tips
To preserve that glossy top, these bars need to stay cool. Store them in a refrigerator container for about 5 days. For extended storage, the freezer is your best bet.
Wrap each bar in wax paper before placing them into a freezer bag for a shelf life of 2 months. When you're ready to serve, let one thaw at room temperature for 10 minutes.
If you have extra peanut butter or graham crumbs, try making some easy homemade lunchables for the kids to keep the theme going.
How to Serve and Enjoy
Since these are very rich, a little goes a long way. I like to serve them on a platter with fresh strawberries or apple slices to add some acidity and freshness to the plate.
For a fancy touch, you can sprinkle a bit of flaky sea salt on top right before the chocolate sets. This gives you a little pop of flavor that breaks up the sweetness of the semi sweet chips. These are best enjoyed chilled, as the base is more stable and the chocolate has a better snap.
Why This Recipe Works
The real magic here is the emulsification. By melting the butter and peanut butter together before adding the dry crumbs, you create a cohesive binder that doesn't feel greasy.
The chocolate topping works because the peanut butter added to the chips prevents the chocolate from becoming a hard, brittle shell. Instead, it creates a fudgy, pourable layer that stays soft enough to bite into without the base cracking.
Recipe FAQs
How to prepare the chocolate topping?
Combine chocolate chips and peanut butter in a microwave safe bowl. Heat in 20-second intervals and stir vigorously until the mixture is glossy and fully incorporated.
Is it true these bars need to be baked in the oven?
Surprisingly, no. This recipe uses a no-bake method where the base is pressed into the pan and the topping is chilled to set.
Why does the base have a sandy texture?
Graham cracker crumbs absorb the fats to create a tight, sturdy crumb. If you enjoyed mastering this base texture, the same principle of fat-to-dry-ingredient ratios helps in making soft chewy oatmeal cookies.
What's the best way to get clean slices?
Use a sharp knife to cut the bars into 24 uniform pieces after chilling. Lifting the parchment paper out of the pan first makes the slicing process much easier.
Could the topping stay too soft?
Chill the bars for longer than the minimum 45 minutes if the chocolate doesn't feel firm. The topping requires sufficient refrigeration time to set properly before slicing.
Lunch Ladies Peanut Butter Bars