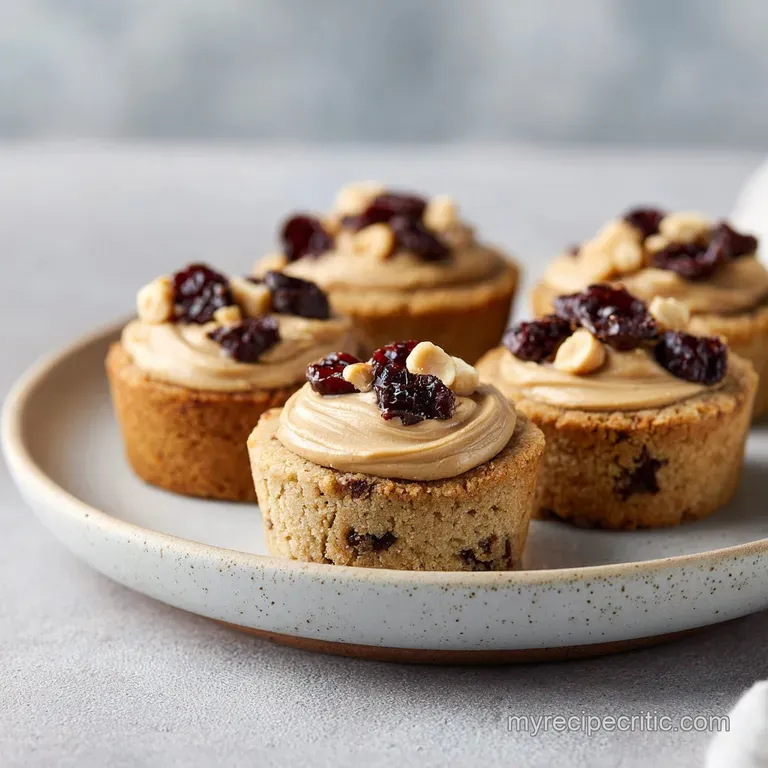
Peanut Butter Cookie Cups: Soft and Fudgy

- Time: Active 15 minutes, Passive 10 minutes, Total 25 minutes
- Flavor/Texture Hook: Shatter crisp edges with a velvety, fudgy chocolate core
- Perfect for: Holiday cookie trays, birthday parties, or a rainy afternoon treat
The moment you pull these out of the oven, the entire kitchen transforms. There is this specific, intoxicating aroma the scent of toasted peanuts meeting caramelizing brown sugar that just hangs in the air.
I remember the first time I made these for my daughter’s school bake sale; I had to guard the cooling rack with a spatula because the neighbor’s kids were practically vibrating with excitement.
The "thunk" of the tart tamper hitting the soft cookie centers to create that perfect little nest is one of the most satisfying sounds in baking.
You’re going to love how the saltiness of the peanut butter plays against the dark, silky ganache. It’s not just another cookie; it’s a tiny, self contained dessert that feels far more sophisticated than the effort required.
We aren't just making a snack here; we are creating those little bites that people talk about for weeks afterward. Every time I bring a tray of these to a gathering, I end up texting the recipe to at least five people before the night is over.
Getting that crumbly yet-tender base right is the secret. It’s about how the fats behave under heat. We want a structure that holds its shape as a cup but doesn't turn into a hockey puck once it cools down.
By the time we’re finished, you’ll have 24 perfect little treasures that look like they came from a high end patisserie but taste like pure, nostalgic comfort.
Why This Dough Becomes Velvety
Understanding how these ingredients interact makes all the difference between a dry cookie and one that melts away. It’s a bit of kitchen magic that happens when we balance the proteins and fats just right.
- Fat Suspension: Using both butter and peanut butter provides a dual fat structure; the butter creates those flaky, aerated pockets while the peanut butter adds dense, creamy stability.
- Sugar Synergy: The combination of white and brown sugar is crucial because the molasses in the brown sugar keeps the "cup" moist and pliable so it won't shatter when you bite in.
- Gluten Control: Sifting the flour and mixing just until combined prevents the gluten from over developing, ensuring the texture remains tender rather than bread like.
- Thermal Timing: Pressing the "well" into the cookie while it is still piping hot allows the structure to set in its new shape without cracking the delicate edges.
| Batch Size | Dough Amount | Pan Type | Finish Cue |
|---|---|---|---|
| 12 Cups | 1/2 Batch | 12 count mini muffin | Edges golden |
| 24 Cups | Full Batch | 24 count mini muffin | Centers puffed |
| 48 Cups | Double Batch | 2 x 24 count mini muffin | Fragrant & set |
When you're deciding how many to make, remember that these disappear faster than you’d think. If you're hosting a dinner for six, a single batch is plenty, but for a larger party, I always suggest doubling up.
The dough scales beautifully, though you should be careful not to over work it when doubling the volume in a stand mixer.
Essential Cookie Specs to Know
Before we get our hands messy, let's look at what's actually happening inside that bowl. Every ingredient has a job to do, and knowing those roles helps you troubleshoot on the fly.
| Ingredient | Science Role | Pro Secret |
|---|---|---|
| Creamy Peanut Butter | Structural Fat | Use processed brands (like Jif) for a smoother, more consistent crumb. |
| Light Brown Sugar | Hygroscopic Moisture | Pack it tightly to ensure the correct ratio of molasses for that chewy texture. |
| Large Egg | Emulsifier | Ensure it's room temperature so it bonds perfectly with the creamed fats. |
The interaction between the baking soda and the acidic molasses in the brown sugar is what gives these cups a slight lift. It’s just enough to make them light, but the weight of the peanut butter keeps them from rising too far and losing their "cup" shape.
If you ever find your cookies are too crumbly, it’s often a sign the egg was too cold, preventing a proper emulsion during the creaming stage.
For a different take on the peanut butter flavor profile, some bakers like to experiment with different base doughs. While this recipe focuses on the classic cup, I’ve found that the logic behind a Chewy Peanut Butter Cookie can be applied here too it's all about that moisture balance.
Selecting The Right Baking Elements
You’ll need a few pantry staples to get these going. Each one contributes to the layered flavor profile we’re building.
- 115g Unsalted Butter: Make sure it is softened enough that your finger leaves an indentation, but not so warm that it’s greasy.
- 130g Creamy Peanut Butter: I recommend a standard creamy variety; natural oils can sometimes separate and make the cups too oily. Why this? Provides the signature flavor and essential structural fats.
- 100g Granulated White Sugar: This gives us those slightly crisp, caramelized edges.
- 100g Light Brown Sugar: Packed tight for moisture and a hint of toffee flavor.
- 1 Large Egg: Room temperature is non negotiable for a silky dough texture.
- 5ml Pure Vanilla Extract: Always go for pure extract over imitation for the best floral notes.
- 190g All Purpose Flour: The scaffold that holds everything together. Why this? Provides enough protein for structure without being "tough."
- 0.75 tsp Baking Soda: Our leavening agent for a tender bite.
- 0.5 tsp Fine Sea Salt: To balance the sugar and intensify the chocolate.
- 170g Semi Sweet Chocolate Chips: These will form our decadent ganache.
- 120ml Heavy Whipping Cream: For that velvety, pourable filling.
- 16g Creamy Peanut Butter: A tiny bit extra to whisk into the ganache for a flavor boost.
| Original Ingredient | Substitute | Why It Works |
|---|---|---|
| Heavy Whipping Cream | Full fat Coconut Milk | Similar fat content. Note: Adds a slight tropical nuttiness. |
| Light Brown Sugar | Dark Brown Sugar | More molasses content. Note: Results in a deeper, more moist cookie. |
| Semi Sweet Chips | Milk Chocolate Chips | Higher sugar content. Note: Makes the filling significantly sweeter. |
Using the right chocolate is a game changer. Semi sweet provides that perfect counterpoint to the salty base. If you use milk chocolate, the whole thing can become a bit one note in its sweetness.
I always keep a bag of high-quality chips on hand just for this ganache because the way it melts determines the final "snap" of the center.
Tools for the Perfect Cup
You don't need a professional kitchen, but a few specific items make the process much smoother. The most important is a 24 count mini muffin tin. This is the only way to get that uniform "cup" shape.
If you try to use a regular muffin tin, the ratio of cookie to filling gets thrown off, and the dough might not bake through properly.
I also swear by a tart tamper. If you don't have one, the back of a round teaspoon works, but a tamper gives you those clean, professional looking edges. You’ll also want an electric hand mixer or a stand mixer (like a KitchenAid) to get that butter and sugar truly pale and fluffy.
Aerating the fat at the beginning is the only way to ensure the cookies don't turn out dense. Finally,, a small microwave safe glass bowl is essential for the ganache glass retains heat better than plastic, which helps the chocolate melt evenly.
step-by-step Baking Guide
Now, let's get into the actual rhythm of the bake. Follow these steps closely, especially the cooling times, to ensure your cups behave exactly how they should.
- Prep the heat. Preheat your oven to 175°C (350°F). Lightly grease a 24 count mini muffin tin with non stick spray. Note: Greasing ensures the delicate edges don't stick and tear.
- Cream the fats. In a large mixing bowl, beat 115g softened butter, 130g peanut butter, 100g white sugar, and 100g brown sugar. Mix 2-3 minutes until pale and fluffy.
- Emulsify the liquids. Add the egg and 5ml vanilla extract to the mixture. Beat until fully incorporated and smooth.
- Sift and fold. Sift the 190g flour, baking soda, and salt directly into the bowl. Mix on low speed just until no white streaks remain.
- Portion the dough. Scoop 1 tablespoon of dough into each muffin cup. Do not flatten the balls.
- Bake the bases. Slide them into the oven for 9-11 minutes. Bake until edges are set and very light golden.
- Form the wells. Immediately use a tart tamper to press a hole into the center of each hot cookie. Note: You must do this while they are hot or the cookie will crack.
- Simmer the cream. Heat 120ml heavy cream in the microwave until simmering. Pour over 170g chocolate chips and 16g peanut butter.
- Whisk the ganache. Let the chocolate sit for 2 minutes, then stir. Stir until the mixture is glossy and smooth.
- Fill and set. Spoon the ganache into the cookie wells. Cool completely until the chocolate is firm.
Watching the ganache come together is honestly one of the highlights of this recipe. It starts out looking like a mess chunky and separated but as you whisk, it suddenly transforms into this liquid silk.
It’s that contrast between the warm, soft cookie and the cool, setting chocolate that makes the first bite so incredible.
Fixes for Common Baking Hiccups
Even the best of us run into trouble sometimes. The most common issue people have with Peanut Butter Cookie Cups is the "well" collapsing or the cookies sticking to the pan.
Why Your Cookie Cups Crumble
If your cookies are falling apart when you try to remove them, it’s usually a temperature issue. Peanut butter dough is high in fat, which means it’s very soft when warm. If you try to pop them out of the tin before they are completely cool, the structure hasn't had time to set.
Patience is your best friend here.
| Problem | Root Cause | Solution |
|---|---|---|
| Cookies sticking | Insufficient grease | Use a baker's spray with flour or grease more heavily next time. |
| Cracked edges | Pressed too late | Form the wells the second they come out of the oven. |
| Runny ganache | Too much cream | Re melt with a handful of extra chocolate chips to thicken. |
Another thing to watch for is the "greasy" bottom. This happens if your butter was too melted when you started mixing. You want it soft, but it should still hold its shape. If the fat separates before it even hits the oven, you'll end up with a pool of oil at the bottom of each muffin cup.
Common Mistakes Checklist
- ✓ Always use room temperature eggs to prevent the batter from curdling.
- ✓ Don't overmix the flour; stop as soon as you can't see white streaks.
- ✓ Grease the top surface of the muffin tin, not just the holes, in case the cookies puff up.
- ✓ Wipe your tart tamper with a little oil if it starts sticking to the dough.
- ✓ Let the ganache sit for the full 2 minutes before stirring to ensure even melting.
Creative Swaps for Your Batch
Once you've mastered the classic version, there are so many ways to play with the flavors. I’ve seen people use crunchy peanut butter for the base to add a bit of texture, which works surprisingly well if you like a bit of a "shatter" in every bite.
If you're looking for something with a different festive flair, you might enjoy making Peanut Butter Blossoms, which use a similar flavor profile but a different assembly method. For these cups, though, try adding a sprinkle of flaky sea salt on top of the ganache before it sets. That hit of salt against the semi sweet chocolate is absolutely world class.
The Salted Caramel Upgrade
You can swap the peanut butter in the ganache for a tablespoon of salted caramel sauce. This creates a "Snickers" inspired flavor profile that is incredibly indulgent. Just make sure the caramel is thick enough that it doesn't make the ganache too runny.
dairy-free Alternative
You can actually make these dairy-free by using a high-quality vegan butter stick and a thick coconut cream for the ganache. Use dairy-free chocolate chips, and you'll find the results are remarkably close to the original. The coconut adds a subtle depth that pairs beautifully with the peanuts.
| Modification | Ingredient Change | Resulting Texture |
|---|---|---|
| Extra Chewy | Replace white sugar with more brown | Softer, more fudge like base |
| Crispier Edge | Bake for 12 minutes | Crunchier shell with a darker color |
| Nut Free | Use Sunflower Seed Butter | Similar flavor but slightly more earthy |
Storing and Keeping Bites Fresh
These cookies are surprisingly hardy. Because of the high fat content in the peanut butter and the ganache, they don't go stale as quickly as a standard chocolate chip cookie. You can keep them in an airtight container at room temperature for up to 3 days.
If you find your kitchen is quite warm, I’d suggest moving them to the fridge so the ganache stays firm.
In the fridge, they’ll last for a good week. Just let them sit out for about 15 minutes before serving so the cookie base softens back up. For long term storage, these freeze like a dream. Place them in a single layer on a baking sheet to freeze solid, then transfer them to a freezer bag.
They’ll stay fresh for up to 3 months. When the craving hits, you can just pull one out and let it thaw on the counter for half an hour.
Don't throw away any leftover ganache! If you have a little bit left in the bowl, it's incredible drizzled over vanilla ice cream or used as a dip for apple slices. Zero waste and a bonus snack that’s a win in my book.
Serving Suggestions
Presentation is everything with these. Since they are so small and uniform, they look stunning piled onto a white ceramic platter. I love serving them alongside a warm drink to contrast the cool chocolate center. They pair perfectly with a velvety Hot Cocoa during the winter months, or a cold glass of almond milk in the summer.
There is a common myth that you have to use "natural" peanut butter for the best flavor. Honestly? In this specific recipe, that's not true. The stabilizers in standard creamy peanut butter actually help the cookie "cups" hold their shape much better during the bake.
Natural peanut butter can often lead to a greasy or crumbly mess because the oil separation is so unpredictable. Stick to the classic stuff for this one your results will be much more consistent.
Another myth is that the ganache will be rock hard once it sets. Because we use a high ratio of heavy cream to chocolate, the center remains biteable and soft, much like a truffle.
It shouldn't "crack" when you bite it; it should give way easily, mingling with the slightly salty cookie base for that perfect, balanced mouthful. Enjoy every single bite!

Recipe FAQs
How to prevent the cookies from sticking to the muffin tin?
Lightly grease every cavity of your 24-count mini muffin tin with non-stick spray before adding the dough. This simple step ensures the delicate edges release cleanly without tearing after baking.
Is it true I must flatten the dough balls before baking?
No, this is a common misconception. Scoop approximately 1 tablespoon of dough into each cup and leave it as is; you will press the center to create the well immediately after removing them from the oven.
How to achieve the perfect fluffy texture in the cookie base?
Cream the butter, peanut butter, and sugars for a full 2 3 minutes until the mixture looks pale and fluffy. If you enjoyed mastering this creaming technique here, you can apply the same principle for a perfect crumb in our classic buttery shortbread.
How to ensure the ganache center sets correctly?
Pour the ganache into the wells and leave the cookie cups undisturbed until the chocolate is completely firm. Rushing this cooling process can lead to messy, leaking centers when you eventually remove the cups from the tin.
Can I store these in the refrigerator?
Yes, the refrigerator is actually the best place to keep them if your kitchen is warm. They will stay fresh for up to a week, just be sure to let them sit at room temperature for 15 minutes before serving so the base softens properly.
How to tell when the cookie cups are done baking?
Look for edges that are just set and a very light golden brown. It is perfectly normal for the centers to still look slightly under baked when you pull them out of the 350°F oven after 9 11 minutes.
How to create the well for the ganache?
Use a tart tamper or the back of a small measuring spoon to press gently into the center of each cookie. Perform this action immediately after taking the tin out of the oven while the dough is still warm and pliable.
Homemade Peanut Butter Cookie Cups

Ingredients:
Instructions:
Nutrition Facts:
| Calories | 185 kcal |
|---|---|
| Protein | 3.1 g |
| Fat | 11.1 g |
| Carbs | 20.2 g |
| Fiber | 1.1 g |
| Sugar | 14.3 g |
| Sodium | 115 mg |
