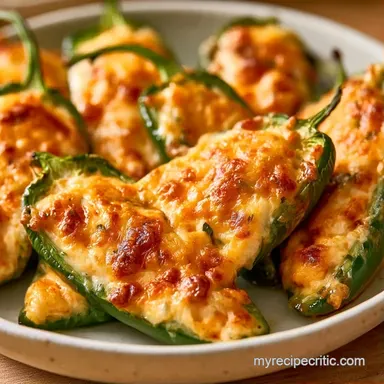
Game Day Jalapeño Poppers: Creamy and Zesty
- Prep & Cook Time: 20 minutes hands-on + 20 minutes baking
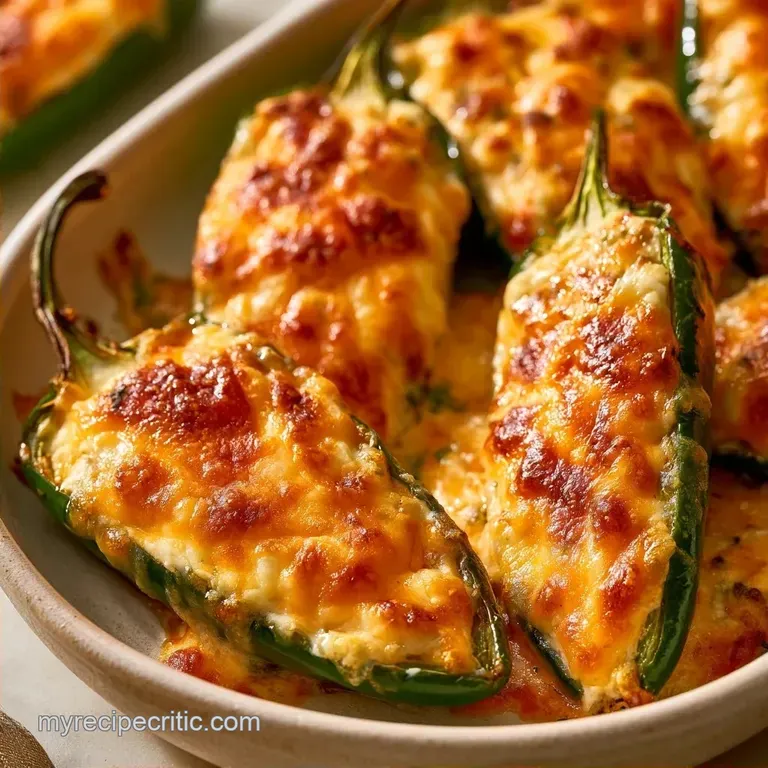
- Key Appeal: Hot peppers topped with a deep golden-brown cheese crust
- Best for: Tailgating or easy-to-make party starters
The aroma of melting cheddar and crisp bacon is a natural crowd-puller. That specific scent signals the start of a celebration before the first guest even arrives. I'll never forget the first time I prepped these for a group; I skipped the gloves when seeding the peppers.
I spent the following few hours discovering the hard way that "jalapeño hand" is a legitimate condition and a stern warning never to touch your eyes after handling chilies.
Since then, I've simplified the recipe. There's no need for pricey mascarpone or extravagant garnishes to make these impressive. We're relying on basic pantry items and a few clever alternatives to keep the cost low.
This snack delivers a complete sensory experience: the crispness of the pepper, the brightness of the yogurt, and the savory crunch of bacon. These Jalapeño Poppers are built for speed and bold taste, meaning you spend less time in the kitchen and more time enjoying the party.
Quick Specs for Jalapeño Poppers
Let's break down the specifics. This recipe prioritizes efficiency, so you won't be stuck in the kitchen for hours. Since it only takes 40 minutes in total, you can easily prepare these while the pre-game show is airing.
The goal here is a lighter filling. By incorporating Greek yogurt and low-fat cream cheese, we maintain the creamy volume but achieve a cleaner taste. It feels less heavy, which is ideal when snacking throughout a long game.
For optimal results, ensure your oven stays at a steady 400°F (200°C). This high heat is the secret to that mahogany-colored cheese. If the temperature is too low, the peppers will turn mushy before the cheese has a chance to brown.
Why the Texture Works
I used to wonder why some poppers turned out soggy while others stayed crisp. The answer is actually pretty simple. It comes down to how you handle the moisture in the pepper and the fat in the cheese.
Greek Yogurt: Adding yogurt provides an acidic lift that cuts through the fat of the cheddar. It also stabilizes the filling so it doesn't oil off in the oven.
Surface Moisture: Patting the inside of the pepper dry stops the filling from sliding out. If there's water on the walls of the pepper, the cheese can't grip the skin, and you end up with a mess on your baking sheet.
| Method | Time | Texture | Best For |
|---|---|---|---|
| Oven | 20 mins | Evenly browned, tender | Large batches |
| Stovetop | 12 mins | Greasier, charred | 2-4 pieces |
Trust me on this, the oven is the way to go for parties. You get that consistent heat that ensures every single pepper is cooked through.
What the Ingredients Do
To keep costs low, every item must be essential. We've avoided fillers, ensuring that every detail, from the touch of paprika to the melted butter, contributes to the final dish.
| Component | Purpose | Substitute Notes |
|---|---|---|
| low-fat Cream Cheese | Base structure | Full fat: Richer but more likely to leak |
| Greek Yogurt | Tang and stability | Sour cream: More fat, less tang |
| Sharp Cheddar | Flavor and browning | Pepper Jack: Adds more heat |
| Lean Bacon | Salty crunch | Smoked paprika extra: For meatless |
This combination is flexible enough to accommodate the ingredients you have on hand. Feel free to use sour cream instead of yogurt; it adds a bit more richness but maintains the integrity of the recipe.
Ingredients & Substitutes
Here is exactly what you'll need. Grab the low-fat versions to keep it light.
- 10 large jalapeño peppers (approx. 1 lb) Why this? Consistent size ensures even cooking
- 4 oz low-fat cream cheese, softened Why this? Creates a stable, spreadable base
- 1/4 cup plain Greek yogurt Why this? Adds tang and reduces overall fat
- 1/2 cup sharp cheddar cheese, shredded Why this? Sharpness cuts through the creamy filling
- 1 clove garlic, minced
- 1/4 tsp smoked paprika
- 1/4 tsp salt
- 4 strips center cut lean bacon, finely diced and pre cooked Why this? Pre cooking prevents raw bacon on top
- 1 tbsp melted butter
If you don't have smoked paprika, a dash of cumin works for an earthy vibe. For the bacon, you can use store-bought real bacon bits, just make sure they aren't the imitation "flavored" bits.
Gear You'll Need
Standard kitchen tools are all you need here. I suggest lining your baking sheet with parchment paper; it keeps the cheese from sticking and simplifies the cleanup process.
A small spoon works best for removing the seeds. For the filling, try using a piping bag or a Ziploc bag with a snipped corner. This method is less messy than using a spoon and ensures the filling reaches every edge.
Lastly, make sure to wear disposable gloves. I've already warned you about "jalapeño hand," but it bears repeating, it's just not worth the risk.
How to Make Them
Let's crack on. Follow these steps and you'll have a tray of hot snacks ready in no time.
- Slice the jalapeños in half lengthwise. Use a small spoon to scrape out the seeds and white membranes. Note: This removes the most intense heat.
- Pat the insides of the peppers completely dry with a paper towel. Note: This keeps the filling from sliding.
- In a medium bowl, combine the softened low-fat cream cheese, Greek yogurt, shredded cheddar, minced garlic, smoked paprika, and salt.
- Stir the mixture until it is completely smooth and velvety.
- Spoon or pipe the filling into each pepper half. Fill them to the brim, but leave a tiny sliver of space at the top.
- Preheat oven to 400°F (200°C). Arrange the stuffed peppers on a parchment lined baking sheet.
- Lightly brush the exterior of the peppers with melted butter.
- Press the pre cooked bacon bits onto the top of the cheese.
- Bake for 18–20 minutes until the peppers are tender and the cheese is bubbling and mahogany colored.
Fixing Common Problems
Even the best home cooks hit a snag now and then. Here is how to handle the usual hiccups when making Jalapeño Poppers.
For Leaking Cheese
If you see puddles of cheese on your tray, you likely overfilled the peppers. The cheese expands as it heats, and if there's no room, it pushes outward. Use a piping bag for precision and leave that small gap at the top.
For Too Much Heat
If the batch is too spicy for your guests, you might have left too many seeds in. To fix this for next time, scrape the membranes until the inside is completely smooth. If they're already baked, serve them with a side of cool ranch or blue cheese dip to neutralize the burn.
For Soft Peppers
Mushy peppers usually happen when you bake them too long or at too low a temperature. Stick to the 400°F mark. You want the cheese to brown quickly before the pepper cell walls completely collapse.
Storing Your Leftovers
Should you have any remaining, store them in a sealed jar or tub in the fridge for no more than 3 days. For the best results, skip the microwave to avoid limp peppers. Instead, heat them in the oven at 350°F for 5-8 minutes.
These are also great for the freezer. Freeze them individually on a tray to keep them from sticking, then store them in a freezer-appropriate bag for up to 2 months. Bake them directly from frozen at 350°F for 15 minutes.
For a zero-waste approach, keep the jalapeño seeds. You can dehydrate and grind them into a powder, or steep them in olive oil in a small jar for several days to make a spicy infusion for meats or pasta.
Tasty Flavor Twists
Feel free to experiment with different flavors once you've mastered the basics. To give these a Mexican twist, check out these Street Corn poppers, which incorporate a corn and lime element.
For a meat-free alternative, omit the bacon and use a sprinkle of Panko breadcrumbs tossed in a little oil. You'll get that same crunch without the pork. To make it even more budget-friendly, swap the sharp cheddar for a generic Monterey Jack.
Another fun variation is the "Double Heat" version. Instead of removing all the seeds, leave a few in every other pepper to create a "Russian Roulette" experience for your guests.
Serving Your Platter
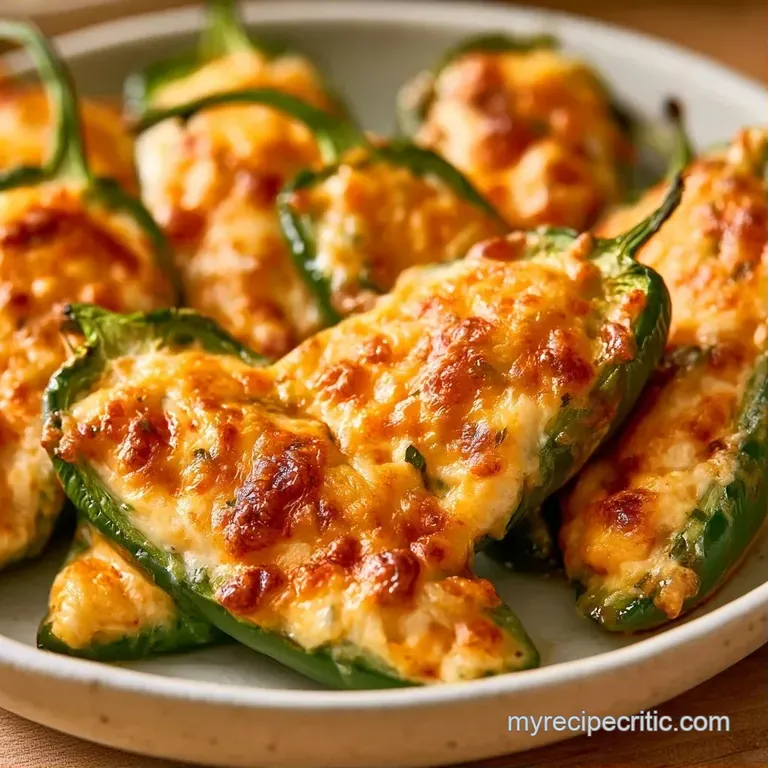
Presentation matters, even for finger food. I like to pile these on a wooden board or a slate platter. It makes the mahogany cheese pop visually.
I love serving these with a side of basil chimichurri to cut through the richness. The acidity of the herbs balances the heavy cream cheese perfectly. Another classic pairing is a simple honey lime dip, which adds a sweet contrast to the heat.
For a full game day spread, pair these with a few other Game Day finger food recipes like wings or sliders. If you find yourself with extra filling, don't let it go to waste. You can spread it into a bowl and bake it as a Game Day Jalapeño Popper Dip.
| Guest Count | Pepper Count | Cheese Amount | Prep Time |
|---|---|---|---|
| 2-4 People | 10-20 pieces | 4-8 oz | 20-40 mins |
| 5-10 People | 20-40 pieces | 8-16 oz | 40-80 mins |
| 11+ People | 50+ pieces | 20+ oz | Work in batches |
When scaling up, just remember not to crowd the pan. If the peppers are touching, they'll steam instead of roast, and you'll lose that crisp exterior. Work in batches if you have to.
Right then, you're all set. These Jalapeño Poppers are a winner because they don't try to be fancy. They just taste like a great party snack should. Get your gloves on and get cooking!
Recipe FAQs
Will a different cheese work for the filling?
Stick to sharp cheddar for the best flavor.
Tip: Use a fine shred for a smoother blend, similar to the filling in stuffed tomatoes.
How do I keep the filling from overflowing?
Leave a tiny sliver of space at the top of each pepper.
Tip: Use a piping bag for more precision and cleaner edges.
Is it true I must remove every single seed to avoid heat?
Not true. Removing the white membrane removes most of the heat.
Tip: Leave a few seeds if you prefer a spicier popper.
Why should I avoid the microwave when reheating?
Microwaving makes the peppers limp.
Tip: Bake them at 350°F for 5 to 8 minutes instead.
Jalapeño Poppers in 40 Minutes