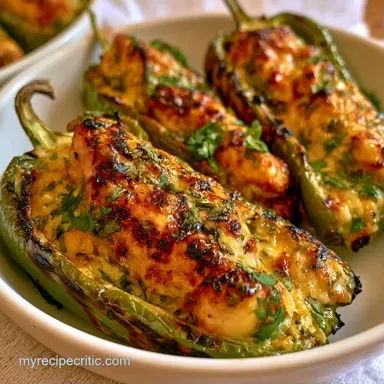
Healthy Oven-Baked Chicken Anaheim Peppers
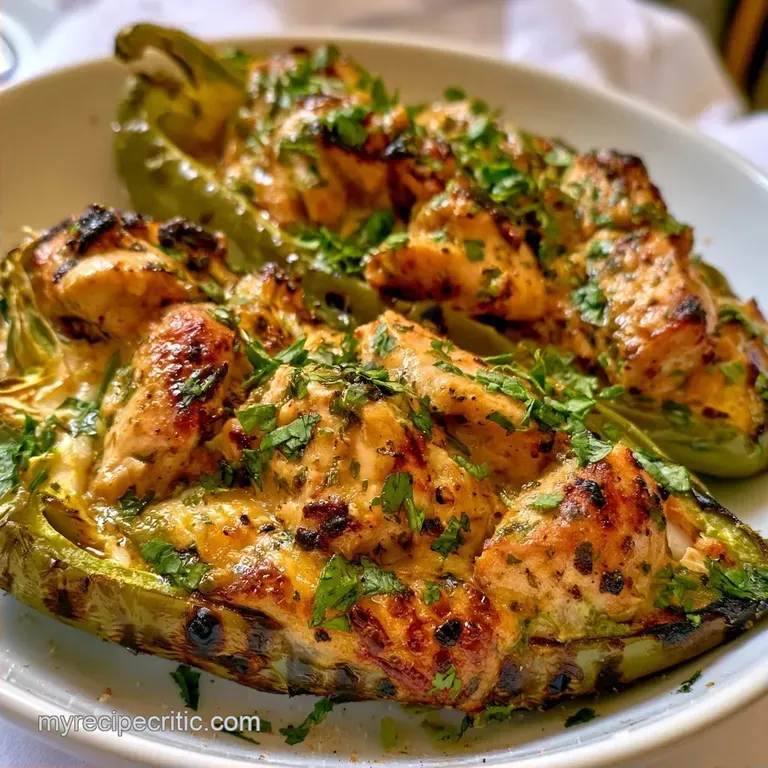
- Time: 15 min active + 25 min cooking
- Flavor/Texture Hook: Smoky, zesty, and cheesy with a tender filling
- Perfect for: High protein weeknight dinner or meal prep
The smell of roasting peppers always hits me first. It's that specific, slightly charred aroma that fills the kitchen and makes everything feel like a backyard feast, even in the middle of January. I used to think that to get a rich flavor in stuffed peppers, I had to lean on heavy creams or loads of butter.
I remember one batch where I used a thick bechamel, and the whole thing just became a heavy, gloppy soup. It wasn't wrong, but it wasn't the bright, punchy meal I wanted.
Then I started playing with Greek yogurt. It provides that same creamy body but adds a tang that cuts right through the richness of the cheese. When you combine that with the mild heat of an Anaheim pepper, you get something that feels light but tastes substantial.
This version of Chicken Anaheim Peppers is all about lean protein and bold spices. We aren't doing the traditional rice heavy filler here. Instead, the chicken stays the star, wrapped in a pepper that blisters just enough to get sweet.
It's a straightforward process that doesn't require a ton of gear, making it a go to for those nights when the sink is already full and you just want a win.
Why This Recipe Works
Lactic Acid Tenderizing: The Greek yogurt acts as a mild marinade. Its acidity breaks down the chicken proteins slightly, ensuring the meat doesn't dry out during the 400°F blast.
Balanced Heat: Anaheim peppers provide a gentle warmth. Pairing them with lime juice and smoked paprika creates a layered flavor that doesn't require a mountain of salt to taste "big."
Over High heat Roasting: Using a 400°F oven ensures the peppers soften and brown before the chicken overcooks. This timing is what keeps the structure of the pepper intact.
| Method | Time | Texture | Best For |
|---|---|---|---|
| Oven Baked | 40 mins | Charred & Bubbly | Meal prep, group dinners |
| Stovetop | 30 mins | Soft & Steamed | Quick single servings |
Right then, let's get into the specifics of the gear and ingredients.
Ingredient Deep Dive
For the base, the Anaheim pepper is the hero. It's milder than a jalapeño but has more personality than a bell pepper. If you use a bell pepper, the dish loses that signature "southwest" vibe. If you go too hot with a serrano, the filling gets drowned out. The Anaheim is just right.
The filling relies on a few key players. Greek yogurt is non negotiable for that specific tang and creamy bind. I prefer non fat or low-fat here because the mozzarella provides plenty of richness on top. The smoked paprika is what gives the Chicken Anaheim Peppers that "grilled" taste without needing an actual grill.
The chicken breast needs to be diced small. If the chunks are too large, they won't integrate with the yogurt, and you'll end up with dry pockets of meat. I've found that a 1/4 inch dice is the sweet spot for consistent cooking and a better mouthfeel.
Recipe Specs
This recipe is built for efficiency. We use a single 9x13 inch baking dish, which means less cleanup. The prep time is a quick 15 minutes, mostly spent seeding the peppers and dicing the meat.
The cooking happens in two stages: a 20 minute roast to set the filling, and a 5 minute finish to brown the cheese.
The internal temperature of the chicken should hit 165°F to be safe. Because the chicken is diced so small and coated in yogurt, it reaches this temperature quickly.
For those watching their macros, this is a powerhouse. You get a massive amount of protein from the chicken and yogurt, but the carbs stay low since we skipped the rice filler. It's a great way to feel full without feeling weighed down.
Equipment Needed
This recipe is straightforward and requires only basic equipment. A regular oven and a few simple tools are all you'll need.
- 9x13 inch baking dish: This size ensures the peppers aren't cramped, facilitating better heat flow.
- Medium mixing bowl: To mix the filling ingredients.
- Spoon: To remove the seeds from the peppers.
- Pastry brush: For brushing olive oil onto the pepper rims.
I recommend skipping the food processor for the chicken; hand dicing provides a superior texture. Using a processor can turn lean breasts into a mushy paste, making these Chicken Anaheim Peppers resemble nuggets rather than a proper meal.
Bringing It Together
Preparing the Peppers
Set your oven to 400°F (200°C). Slice the Anaheim peppers in half lengthwise. Use a spoon to clear out the seeds and white membranes; since these contain the most heat, removing more will make the dish milder. Arrange the halves cut-side up in a 9x13 inch baking dish.
Brush the edges with olive oil and a sprinkle of sea salt to ensure they brown and blister during roasting.
Mixing the Filling
In a medium bowl, combine the diced chicken breast, Greek yogurt, minced garlic, smoked paprika, cumin, and lime juice. Stir the mixture well, then fold in the chopped cilantro. Mix until the chicken is fully coated in a creamy, spiced paste. This layer of yogurt protects the meat, keeping the juices locked inside.
Stuffing and Baking
Spoon the chicken mixture generously into each pepper half, pressing down slightly with the back of a spoon to keep the filling tight. Removing air gaps prevents the stuffing from shrinking or sinking while it bakes.
Place the tray in the oven for 20 minutes, or until the peppers are wilted and the edges are charred.
Finishing the Dish
Remove the tray from the oven and evenly sprinkle the low-fat mozzarella over the filling. Return the dish to the oven for another 5 minutes until the cheese is bubbly and golden brown. Take it out and garnish with sliced green onions.
Let the peppers rest for 5 minutes before serving so the filling can set.
Pro Tips & Pitfalls
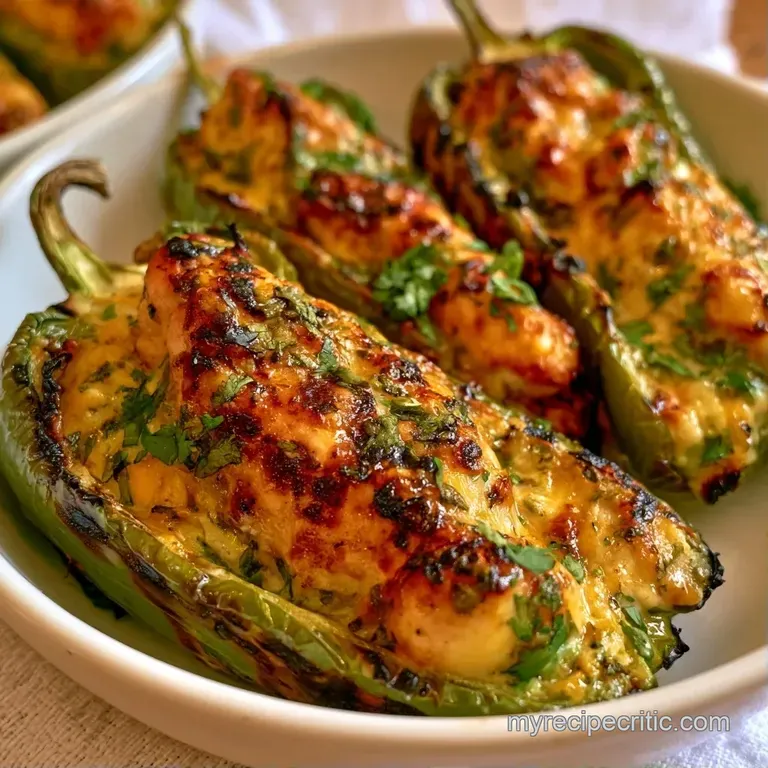
Stopping Watery Peppers
Because peppers have a high water content, they release moisture as they cook, which can lead to pooling at the bottom of the pan. To prevent this, use a paper towel to thoroughly dry the inside of each pepper after removing the seeds.
This avoids the "soup" effect and keeps the base of the pepper from becoming too soggy.
Avoiding Dry Chicken
Lean breast meat has a very short window between being perfectly cooked and becoming dry. While the Greek yogurt helps maintain moisture, be careful not to overbake. Remove the peppers from the oven immediately if the filling begins to crack or pull away from the edges.
Residual carryover heat will finish the cooking process while the dish rests.
Controlling the Spice
Anaheim peppers vary in intensity; some are mild, while others pack a surprising punch. For guests who prefer no heat, ensure every seed and membrane is completely removed. To increase the spiciness, stir extra cayenne pepper into the filling or leave a few seeds in the bottom of the peppers.
Preventing Mushy Texture
If your peppers are too soft, the cause is usually an overcrowded pan or an oven temperature that is too low. Use a 9x13 inch pan to ensure the peppers aren't touching. This allows hot air to circulate around the sides, ensuring they roast instead of steaming.
Freezing and Reheating Guide
Your Chicken Anaheim Peppers will last roughly 3 days in the refrigerator. Use an airtight glass container for storage. For reheating, an air fryer or oven works best; simply heat them on a small baking sheet at 350°F for around 10 minutes.
This method ensures the peppers don't get mushy and the cheese retains its texture.
To freeze these, omit the cheese initially. Fill the peppers and place them on a baking tray in the freezer for 2 hours to set. Once firm, move them into a freezer safe bag where they can be stored for up to 2 months. Thaw them in the refrigerator overnight before cooking.
Finally, top with mozzarella and bake at 400°F for 15-20 minutes.
To reduce waste, save any leftover pepper seeds and stems. You can sauté the seeds in a pan with salt and oil for 2 minutes to create a crispy garnish for your salads.
Serving Suggestions
This dish is quite hearty on its own, but a few sides can really pull the meal together. A simple side of cilantro lime rice is the traditional route. The rice soaks up any leftover juices from the peppers, making sure nothing goes to waste.
If you want something fresher, a crisp cucumber salad with a vinegar dressing provides a great contrast to the smoky, cheesy filling. For those who want a complete low carb experience, serve these over a bed of sautéed spinach or kale.
If you're looking for another high protein option for your weekly rotation, my Chicken Lettuce Wraps are a fantastic, lighter alternative that uses similar zesty flavors.
Flavor Variations to Try
The Zesty Buffalo Twist Swap the smoked paprika and cumin for 2 tablespoons of buffalo sauce and a pinch of garlic powder. Use blue cheese crumbles instead of mozzarella for the topping. It turns the Chicken Anaheim Peppers into a spicy, pub style appetizer.
The Plant Based Swap Replace the chicken with finely diced extra firm tofu or crumbled tempeh. Use a vegan Greek style yogurt and cashew based mozzarella. The Anaheim peppers provide enough flavor that you won't miss the meat.
The Low Carb Crunch Instead of just cheese, top the filling with a mixture of crushed pork rinds and parmesan. This adds a salty, crispy layer that contrasts the softness of the pepper.
Switching to Slow Cooker Chicken with Anaheim Peppers If you prefer a set it and forget it style, you can adapt this. Slow cook the diced chicken with the spices and yogurt for 3 hours on low. Then, spoon the mixture into the peppers and broil them in the oven for 5 minutes just to char the skins and melt the cheese. For other slow cooker ideas, check out my Pulled Chicken recipe for a totally different vibe.
Decision Shortcut
- For a crispier pepper: Broil for 2 minutes at the very end.
- For a creamier center: Increase Greek yogurt by 2 tablespoons.
- For a milder taste: Soak the seeded peppers in cold water for 10 minutes before stuffing.
Common Misconceptions
"Do I really need to roast and peel the peppers first?" Some people spend 20 minutes charring peppers over an open flame and peeling them before stuffing. While that works, it's not necessary for this recipe.
Baking them at 400°F for 20 minutes softens the skins enough that they blend seamlessly into the dish, saving you a lot of work.
"Does adding rice improve the filling's consistency?" Rice is often added as a budget friendly filler, but it can absorb the moisture from the chicken and yogurt, occasionally leaving the meat dry.
By sticking to just protein and yogurt, the filling stays juicy and the flavor of the Chicken Anaheim Peppers remains bold.
"Is lean chicken breast prone to drying out in the oven?" That only happens if the meat is exposed. By coating the chicken in a thick blend of lime juice and Greek yogurt, you establish a barrier that locks in moisture. The yogurt essentially shields the chicken from the direct heat.
That's the entire process. Once you nail the timing, these Chicken Anaheim Peppers become an easy favorite. Just remember to pat the peppers dry, avoid overstuffing them to prevent bursting, and let them rest for a few minutes before serving. Trust me, the wait is worth it for that first smoky, cheesy bite.
Recipe FAQs
Which other meals use Anaheim peppers?
They work well in chiles rellenos or creamy pasta sauces.
Tip: If you enjoy the zesty profile here, see how we build a similar bold base in our smoky base recipe.
Is it true that raw chicken can't be baked inside raw peppers?
No, this is a common misconception. The 400°F oven temperature ensures the chicken reaches a safe internal temperature while the peppers roast.
Tip: Dice the chicken finely to ensure it cooks through in the 20-minute window.
How to substitute Hatch chiles for Anaheim peppers?
Swap them one-for-one since they have a very similar flavor profile and size.
Tip: Be mindful that Hatch chiles can vary more in heat levels than Anaheims.
What makes this chicken taste like a Mexican restaurant?
The combination of smoked paprika, cumin, and fresh lime juice creates that signature savory tart balance.
Tip: Use fresh lime juice rather than bottled for a brighter, more authentic acidity.
Can I use pre-cooked shredded chicken?
Yes, this works well for a faster meal.
Tip: Reduce the initial bake time to 15 minutes since the meat is already cooked.
Why is Greek yogurt used in the filling?
Its lactic acid tenderizes the chicken breast and prevents it from drying out at high heat.
Tip: Use non-fat plain yogurt to keep the filling light and tangy.
Do the peppers need to be pre-roasted to avoid sogginess?
False. Baking them at 400°F with the filling allows the walls to blister without releasing too much moisture.
Tip: Pat the inside of the pepper halves dry after seeding for the best results.
Chicken Anaheim Peppers 2