Chocolate Chip Cookies: Chewy Gooey Perfection
- The Quest for the Ultimate Chewy Chocolate Chip Cookie
- Unlocking the Science of Gooey Cookies: Texture and Flavor Secrets
- Essential Components: Ingredients and Critical Sourcing Notes
- Step-by-Step Method: From Melted Butter to Golden Perfection
- Troubleshooting and Elevating Your Bake: Expert Tips from the Kitchen
- Maximizing Freshness: Storing Your Baked and Unbaked Dough
- Perfect Pairings: Serving Suggestions and Presentation
- Recipe FAQs
- 📝 Recipe Card
The Quest for the Ultimate Chewy Chocolate Chip Cookie
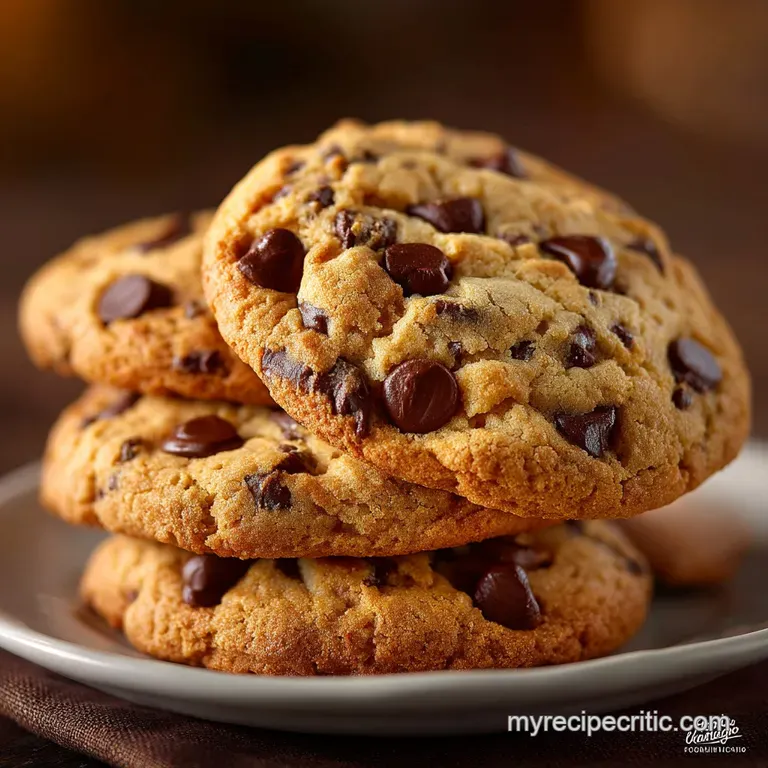
If there is one aroma that can stop me dead in my tracks, it is the smell of warm, vanilla scented butter and melting chocolate wafting from the oven. That perfect balance of sugary sweetness, deep caramelized notes, and a hint of salt is what defines the quintessential chocolate chip cookies .
They are the standard bearer for all baking, the foundation upon which every home kitchen is built. Honestly, who doesn't love the moment you break one open and see that molten, glorious river of chocolate?
Look, life is chaotic, but making these cookies is pure, delicious therapy. This isn't just a recipe; it's a guaranteed win for any emergency dessert situation. They are cheap, they’re fast (if you ignore the essential chilling step, which you shouldn't), and they make everyone happy, whether you’re eight or eighty eight.
Forget complicated tarts or fancy cakes; the simple, humble chocolate chip cookies recipe easy wins every time, especially when you master the texture.
I’ve made every mistake in the book puck like spreads, dry hockey biscuits, and centers that refused to cook. But after years of tweaking, I’ve locked down the exact method that delivers that elusive, perfect chew.
Trust me, ditch the stand mixer and grab a whisk, because we are about to make the absolute best chocolate chip cookies you have ever tasted. Let's crack on!
Unlocking the Science of Gooey Cookies: Texture and Flavor Secrets
Redefining the Classic: Why Melted Butter Matters
Most classic recipes tell you to cream softened butter and sugar together, whipping air into the fat until it’s light and fluffy. That works great for cakes or light, airy cookies, but we aren't chasing fluff today. We are chasing gooey .
To achieve that perfect, fudgy center and intense chew, we melt the butter completely. Melted butter inhibits the creation of strong gluten networks less gluten means less structure, which translates directly to chewy, dense texture instead of cakey crumb.
Using melted butter is the secret sauce for spectacular chocolate chip cookies .
The Undisputed King of Baked Goods: Overview of the Recipe Profile
This recipe maximizes flavor through dehydration and rest. We use a high ratio of brown sugar for moisture and deep molasses flavor. The most critical component is time: a 24 hour dough rest. Why do this? It sounds insane, but this rest allows the flavors to mature dramatically.
The result is a profile that tastes far more complex than just flour and sugar, elevating these simple chocolate chip cookies into a true bakery quality experience.
A Note on Time: Planning for the Essential Dough Chill
I know, I know. Waiting is torture, especially when you’re craving warm chocolate chip cookies . But think of chilling the dough as marinating steak. It's essential. During the chill, the flour absorbs the wet ingredients completely.
This fully hydrated dough spreads much less when baked, keeping your cookies thick. It also allows the butter to re-solidify, ensuring they maintain their shape perfectly. Do not skip this step!
The Maillard Reaction: Achieving Deep Caramel Notes
We’re baking these slightly hotter than usual, and we’re also not afraid of a little brown edge. The Maillard reaction is that glorious process where amino acids and sugars react under heat, creating hundreds of complex flavor compounds the essence of deep caramel and toasted nuts.
When you let the sugars caramelize on the edges, you get that crisp contrast needed for the ultimate chocolate chip cookies chewy . It’s the difference between merely sweet and deeply flavorful.
Controlling the Spread: The Role of Dough Hydration and Chilling
The two biggest enemies of a perfectly thick cookie are too much moisture and too much warmth. Our chilling process fixes both. If your dough spreads too thin, it means your butter was too warm when mixing, or you didn't chill it long enough, or maybe you added too much flour by scooping instead of weighing.
Thickness is key to retaining that gooey center, which is the whole point of making chocolate chip cookies in the first place.
Brown Sugar vs. Granulated: Balancing Moisture and Chew
This recipe uses a heavy bias towards brown sugar (specifically, light brown sugar). Brown sugar contains molasses, which is naturally acidic and hygroscopic (meaning it loves to hold onto water). This acid reacts with the baking soda to create lift, and the moisture keeps the cookies softer for longer.
Granulated white sugar, on the other hand, melts faster and promotes spread and crispness. By using a 2:1 ratio of brown to white sugar, we hit the ideal balance for soft, thick, and wonderfully chewy chocolate chip cookies .
Essential Components: Ingredients and Critical Sourcing Notes
The quality of your ingredients matters intensely when making something as simple as chocolate chip cookies . There are so few components that each one shines. Don't skimp here.
| Ingredient | Role in the Cookie | Critical Note / Substitution |
|---|---|---|
| Melted Butter | Texture (Chewy) | Must be cool. If you forgot, use clarified butter (ghee) for pure fat and superior flavor. |
| Brown Sugar | Moisture/Chew | Use dark brown sugar for even more molasses flavor. No brown sugar? Use granulated sugar + 1 Tbsp molasses. |
| Eggs | Binding/Lift | Must be room temperature for proper emulsification. No eggs? Use commercial egg replacer or mashed banana (1/4 cup per egg). |
| All-Purpose Flour | Structure | Weigh it! Excess flour causes dryness. Substitute with an equal weight of measure for-measure GF blend. |
| Baking Soda | Leavening | Needs the acidity from the brown sugar to activate. If using only white sugar, swap for baking powder. |
Choosing Your Chocolate: Chunk, Chip, or Wafer?
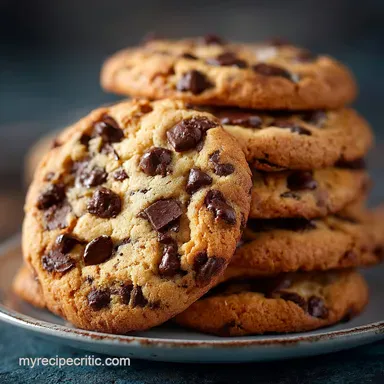
This is where the magic happens. I strongly recommend using a high-quality baking bar (70% dark is my favourite) and chopping it yourself. Why? Because the irregular chunks melt at different rates and give you incredible ribbons of molten goodness.
Standard chips contain stabilizers so they hold their shape, but we want a full-on chocolate melt here. A mix of chunks and chips gives the best visual appeal and flavor complexity. For the best flavor in your chocolate chip cookies , always use quality chocolate.
Salt: The Non-Negotiable Flavor Amplifier (Using Flaky Sea Salt)
If your cookies taste flat or overly sweet, I can guarantee you need more salt. We use fine sea salt in the dough to balance the sweetness, but here is my pro-tip: sprinkle flaky sea salt (like Maldon) on top of the dough balls just before baking.
That burst of salinity right before you bite into the rich sugar and chocolate is transformative. It’s a trick I learned that instantly upgraded my simple chocolate chip cookies .
Flour Power: Weighing for Consistency, Not Scooping
Listen, I’ve yelled about this before, but it bears repeating: Your measuring cup is lying to you. Flour settles, and when you scoop it directly out of the bag, you compact it, adding 20 30% more volume than intended.
That extra flour is the quickest way to end up with dry, cakey chocolate chip cookies . Invest in a kitchen scale. It’s about $20 and it will change your baking life forever. We need precision here.
Dairy Swaps: Clarifying Butter and Alternative Fats
If you are sensitive to milk solids but still want the richness of butter, try using clarified butter (ghee). You can melt it and cool it just like traditional butter. If you need a completely non-dairy option, chilled, melted coconut oil works surprisingly well, although it tends to spread a little more aggressively.
For those making large batches of chocolate chip cookies , remember that changing the fat changes the behavior, so monitor your bake time closely.
step-by-step Method: From Melted Butter to Golden Perfection

This process is slightly different from the old 'cream together' method, so pay attention, especially to the temperature control. This recipe makes the most decadent chocolate chip cookies you can imagine.
Phase 1: Mixing and Hydrating the Dough Base
- Prep the Butter: Melt the butter thoroughly, then transfer it to your large mixing bowl immediately. Let it cool for 10- 15 minutes until it is barely warm or room temperature. If it's too hot, you will scramble the eggs and ruin the texture, creating sad, flat chocolate chip cookies .
- Combine Sugars: Add both the brown and granulated sugar to the cooled butter. Whisk until the mixture is uniform and shiny. The granular sugar will start dissolving in the melted butter, aiding the chew factor.
- Eggs and Vanilla: Add the room temperature eggs one at a time, whisking vigorously for about 30 seconds after each addition. You are emulsifying the fat and the liquid here. Stir in the vanilla.
- Dry Ingredients: Whisk the flour, baking soda, and salt together separately. Add the dry mixture to the wet mixture. Switch to a rubber spatula. Fold gently until just combined you should see a few streaks of flour remaining. Do not overmix. Overmixing develops gluten, leading to tough chocolate chip cookies .
- Fold in Chocolate: Fold in the chocolate chunks. I often reserve 1/4 cup to press into the tops of the dough balls later; it looks professional!
Phase 2: The Critical 24 Hour Dough Chill
You've heard me preach, but here is the action item: cover the dough tightly and place it in the fridge. For acceptable results, chill for at least 30 minutes. For transcendent, bakery worthy chocolate chip cookies , chill for 24- 48 hours.
The dough will become firm and the flavors will meld beautifully. If you love that rich, deep flavor profile, the wait is worth it.
Chef’s Note: If you want to make these chocolate chip cookies ahead of time, this dough stores brilliantly. It’s actually better on day three!
Phase 3: Scooping, Salting, and Preparing for the Oven
- Preheat and Line: Preheat your oven to 375°F (190°C). Line two sturdy baking sheets with parchment paper or silicone mats.
- Scoop Uniformly: Use a large ice cream scoop (about 3 tablespoons) to portion the dough. Uniform size ensures uniform baking time. Roll the scoops briefly between your palms to smooth them, but don't overwork the dough.
- Finishing Touch: Place 6 8 dough balls on each tray. Press those reserved chocolate chunks into the tops of the dough balls for a beautiful, melty appearance. Sprinkle a pinch of flaky sea salt on each scoop. This is your insurance policy for gourmet level chocolate chip cookies .
Phase 4: Achieving the Perfect Bake and Cool Down Technique
- Bake: Place one tray on the middle rack. Bake for 12– 14 minutes.
- Monitor the Center: The edges should be deeply golden brown, but the center must look pale, puffy, and slightly underdone. If the center looks fully set, you’ve overbaked them and sacrificed the chew.
- The Bang (Optional): Around the 7 minute mark, open the oven and gently bang the tray on the rack 2 3 times. This deflates the center, creating wrinkles and pushing the edges up slightly, resulting in that beautiful crinkled finish.
- The Critical Rest: Once out of the oven, leave the cookies on the hot tray for 5 full minutes. Do not touch them! They are still incredibly fragile, and this resting time allows the residual heat to finish cooking the center and set the structure.
- Transfer: Carefully slide the parchment paper onto a wire rack to cool completely. Enjoy these incredible chocolate chip cookies once they are slightly warm or fully cooled.
Troubleshooting and Elevating Your Bake: Expert Tips from the Kitchen
Why Your Cookies Are Too Cakey (And How to Fix It)
This is usually a result of over aeration or too much flour. If you used a mixer or whisked the dough too long after adding the flour, you developed too much gluten, which traps air and causes a cakey lift. Solution? Hand mix only, and remember to measure your flour by weight!
Also, check your baking soda if you mistakenly used baking powder, your chocolate chip cookies will be puffier than intended.
Preventing Excessive Spreading (The Ice Cream Scoop Trick)
The best defense against spreading is chilling the dough until solid. But if you're in a hurry and they start spreading prematurely, you have two secret weapons: The ice cream scoop trick (ensuring tall, thick dough balls) and the freezer trick.
If they start spreading too fast in the oven, carefully open the oven, remove the tray, and stick it in the freezer for 5 minutes. This rapidly sets the butter and stops the melt. Once the fat is stabilized, return them to the oven.
You've saved your batch of perfect chocolate chip cookies .
Temperature Control: Oven Calibration and Hot Sheets
Ovens lie. They do! If your cookies are consistently under baked or scorched, buy an oven thermometer. Many ovens can be off by 50 degrees or more. Always preheat your oven for at least 30 minutes. Also, never put dough onto a hot baking sheet.
The second you do, the butter melts instantly, and your dough spreads before the flour even has a chance to set, leading to flat, crispy chocolate chip cookies . Always cool your sheets completely between batches.
Long Term Freezing: Preparing Ready-to-Bake Dough Balls
If you want warm, fresh chocolate chip cookies any night of the week, the freezer is your best friend. Scoop the dough balls onto a parchment lined sheet and flash freeze them for one hour until solid. Transfer the frozen balls to a zip-top bag.
When you want a cookie, pull one out and bake directly from frozen, adding 3- 5 minutes to the total bake time.
Maximizing Freshness: Storing Your Baked and Unbaked Dough
Extending the Shelf Life of Baked Cookies
Baked chocolate chip cookies store beautifully at room temperature in an airtight container for up to 5 days. Here is a bizarre but effective trick: place half a slice of plain white bread (or a tortilla) inside the container with them.
The bread sacrifices its moisture to the cookies, keeping them soft and preventing them from hardening. Just replace the bread daily.
Long Term Freezing: Preparing Ready-to-Bake Dough Balls
We covered this above, but I need to stress the ease: Freezing dough balls makes fresh cookies effortless. They last up to 3 months in the freezer. Imagine having the ability to whip up a dozen fresh chocolate chip cookies whenever the mood strikes, without any of the mixing mess!
Perfect Pairings: Serving Suggestions and Presentation
Beverage Complements: Milk, Coffee, and Beyond
The classic pairing, of course, is a cold, tall glass of whole milk. The fat in the milk cuts the sweetness perfectly. For something more sophisticated, pair your warm chocolate chip cookies with a strong espresso or, even better, a homemade rich, decadent mug of Hot Chocolate with Whipped Cream: The Best Rich Velvet Mug Recipe . The bittersweet warmth is divine alongside the chewy sweetness.
Another great option is to crush up a few cookies and use them as a topping for a batch of Banana Pudding with Biscoff Cookies: The Ultimate Custard Perfection . Talk about next level comfort dessert.
These amazing chocolate chip cookies are truly the gold standard, and once you master the melted butter technique and the dough chill, you’ll never look back. Enjoy baking, and enjoy the perfect chew!

Recipe FAQs
Why did my chocolate chip cookies spread too thin?
Excessive spreading is typically caused by warm dough or an imbalance between flour and fat. Ensure you follow the non-negotiable step of chilling the dough for at least 24 hours, as this solidifies the butter, helping the cookies retain their shape in the oven.
If your kitchen is very warm, try pre-chilling your baking sheets before scooping the dough onto them.
Is chilling the dough really necessary, and if so, for how long?
Yes, chilling is crucial for achieving that superior chewy texture and depth of flavour. Beyond preventing spread, chilling allows the flour to fully hydrate and the flavour components (especially from the brown sugar) to concentrate, resulting in a richer, more complex caramel note.
A minimum of 24 hours is recommended, but you can chill it for up to 72 hours.
My cookies turned out cakey and dry. What went wrong?
A cakey texture is often a sign of over mixing the dough after the flour has been added, which causes gluten to develop excessively. Ensure you stop mixing as soon as the last streaks of dry flour disappear from the bowl.
Alternatively, using too much leavening agent (baking powder) or incorrectly measuring the flour can also contribute to a dry, cake like rise.
Can I substitute vegan butter or oil for regular butter in this recipe?
While you can use high-quality, high fat vegan butter substitutes, be aware that the high water content in some alternatives may change the spread dramatically. Oil is not recommended because the unique structure of these cookies relies heavily on the solid state of chilled butter to prevent immediate collapse and create the crisp chewy contrast.
For the best results, stick to unsalted dairy butter.
What is the best type of chocolate to use for gooey centers?
A chef trick is to use chopped high-quality chocolate bars (couverture) instead of standard chips, as the uneven, jagged shards melt more easily and create better pools of gooey chocolate.
We recommend a mix of both bittersweet (60-70% cacao) for intensity and a good quality milk chocolate for sweetness, offering a balanced flavour contrast.
What is the best way to store baked cookies, and can I freeze the dough?
Store fully cooled baked cookies in an airtight container at room temperature for up to four days; adding half a slice of soft bread to the container can help absorb moisture and keep them soft.
Cookie dough freezes perfectly: scoop individual portions onto a sheet tray, flash freeze until solid, then transfer the dough balls to a freezer bag for up to 3 months. Bake straight from frozen, adding a minute or two to the bake time.
Why is using a kitchen scale for measuring flour so important?
Accuracy is paramount in baking, and cup measurements can vary wildly depending on how densely the flour is scooped and packed. Using a kitchen scale to measure flour by weight (grams) ensures the ratio of dry to wet ingredients is perfect every time.
This precision prevents unintentional over flouring, which is the most common cause of dry, crumbly cookies.
Ultimate Chewy Chocolate Chip Cookies
Ingredients:
Instructions:
Nutrition Facts:
| Calories | 139 kcal |
|---|---|
| Protein | 2.0 g |
| Fat | 7.0 g |
| Carbs | 20.0 g |
