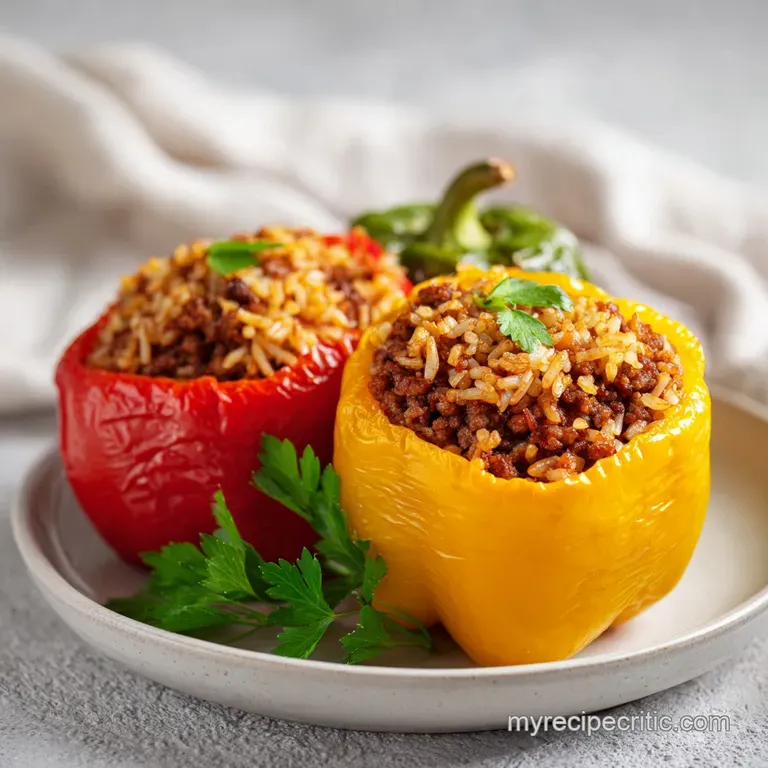
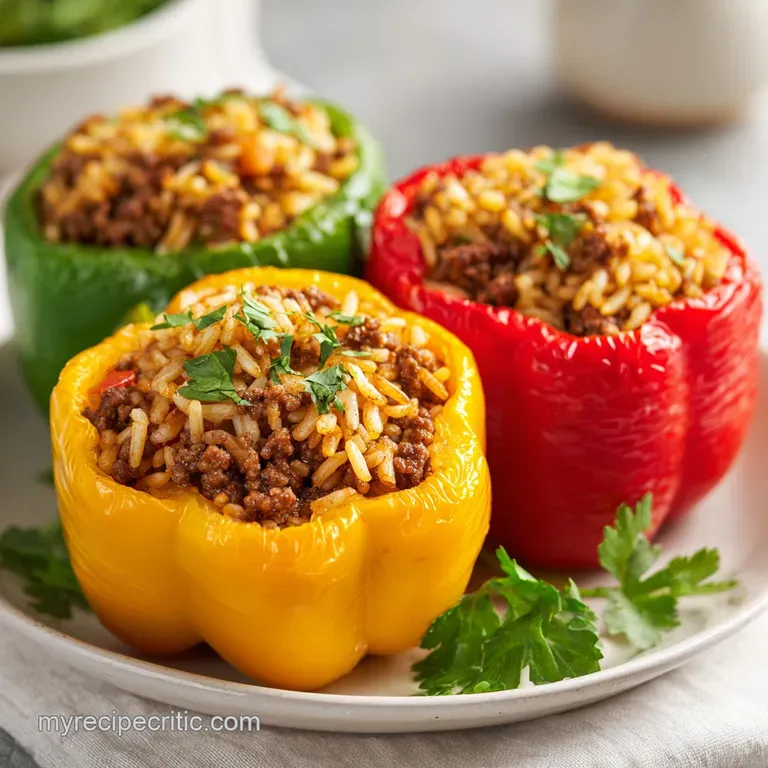
Stuffed Peppers with Rice and Tomato Sauce
- Time: Active 20 minutes, Passive 45 minutes, Total 1 hours 5 mins
- Flavor/Texture Hook: Tender, fork soft peppers with a velvety, savory beef filling and molten cheese.
- Perfect for: Cozy Sunday family dinners or high protein meal prep that actually tastes better the next day.
- The Ultimate Guide to Classic Stuffed Peppers
- Why This Recipe Always Wins
- Deep Dive into Essential Components
- Tools for a Minimalist Kitchen
- Step by Step Cooking Guide
- Solving Your Common Cooking Hurdles
- Creative Ways to Customize Flavors
- Storing and Freezing Your Leftovers
- Best Sides for This Meal
- Recipe FAQs
- 📝 Recipe Card
The Ultimate Guide to Classic Stuffed Peppers
Picture this: You pull a bubbling tray out of the oven, and the aroma of roasted bell peppers hits you like a warm hug. There's that specific, slightly charred scent mixed with the savory punch of garlic and oregano.
I remember the first time I tried making these I thought I could just throw raw rice and raw meat inside a pepper and hope for the best. Spoiler alert: It was a disaster. The rice was like gravel, and the peppers were still basically raw. I felt like I’d wasted a whole pound of good beef.
But then I started experimenting with the physics of the "steam bath." I realized that if you treat the pepper like a vessel rather than just a container, everything changes. By sautéing the beef first and using pre cooked rice, you aren't just hoping it cooks; you’re layering flavors.
Now, every time I make these Stuffed Peppers, the kitchen fills with that rich, tomato heavy fragrance that brings everyone running. It’s the kind of meal where the sink ends up full of dishes, but your belly is so satisfied you don't even mind the scrubbing.
We’re going for that specific texture where the pepper gives way to a fork with almost no resistance, yet it still holds its shape. We want the cheese on top to have those little brown polka dots of flavor, and the sauce at the bottom to be thick enough to swish your crusty bread through.
This isn’t just about filling a vegetable; it’s about creating a harmonious, one dish wonder that works every single time. Let's get into how we make that happen without losing our minds in the process.
Why This Recipe Always Wins
- The Steam Factor: Pre steaming the peppers in the oven with a splash of water ensures they reach a fork tender consistency without turning into mush.
- Starch Stability: Using cooked long grain white rice prevents the filling from becoming a gummy, over hydrated mess, keeping the texture distinct.
- Fat to Acid Balance: The 85/15 beef ratio provides enough fat for a silky mouthfeel, which is perfectly cut by the acidity in the tomato sauce and Worcestershire.
- Carryover Heat: Resting the dish for five minutes allows the mozzarella to fully emulsify with the top layer of the sauce, creating a velvety cheese blanket.
Cook Method Comparison
| Method | Time | Texture | Best For |
|---|---|---|---|
| Standard Oven | 45 minutes | Fork tender, soft | Classic family dinner |
| Air Fryer | 20 minutes | Charred, slightly firm | Quick weeknight fix |
| Slow Cooker | 6 hours | Fall apart soft | Set and forget prep |
While the oven is my go to for that specific roasted depth, the air fryer is a total life pro-tip if you're only making two or three peppers. It gives the skins a bit of a "shatter" quality that is honestly addictive.
However, for a full batch of six, the oven's consistent heat and the ability to braise in the tomato sauce is unmatched for flavor development.
Deep Dive into Essential Components
The physics of a great stuffed pepper relies on the interaction between the vegetable wall and the moisture of the filling. If the filling is too dry, it steals moisture from the pepper; if it's too wet, the pepper collapses.
Using beef broth in the sauce creates a pressurized steam environment inside the baking dish that cooks the pepper from the outside in while keeping the beef succulent.
Ingredient Deep Dive
| Ingredient | Science Role | Pro Secret |
|---|---|---|
| Bell Peppers | Structural vessel | Choose flat bottomed peppers so they don't tip over and spill their guts. |
| 85/15 Ground Beef | Flavor & Fat | Don't drain every drop of fat; that liquid gold carries the oregano and garlic flavor. |
| Cooked Rice | Bulk & Texture | Use day old rice if you have it; the drier grains soak up the tomato sauce better. |
| Tomato Sauce | Acidic Braise | Adding beef broth thins the sauce just enough to let it circulate around the peppers. |
For the filling, we’re using a mix of aromatics. The medium yellow onion needs to be diced finely enough that it almost disappears into the beef. If you like a bit more punch, you can try my TexMex Delight Rice recipe for a spicy variation that uses black beans and corn.
Tools for a Minimalist Kitchen
You really don't need a pantry full of gadgets for this. A solid 9x13 inch ceramic or glass baking dish is the MVP here. You want something with high enough sides to hold the sauce without it bubbling over and smoking up your oven.
A large skillet preferably cast iron or a heavy stainless steel is essential for browning that beef properly to get the Maillard reaction (that's the fancy word for "tasty brown bits").
Chef's Tip: If your peppers are wobbly and refuse to stand up, don't panic. Just slice a tiny, thin sliver off the bottom bumps of the pepper to create a flat base. Just don't cut so deep that you make a hole, or your cheese will make a run for it!
Aside from that, a sharp chef's knife is your best friend for de seeding the peppers. I like to cut the tops off and then use a small spoon to scrape out the white ribs. It's much cleaner than trying to hack away at it with a knife. If you’re into clever vegetable shapes, you might get a kick out of my Crescent Roll Carrots Recipe, which uses a similar "vessel and filling" logic but with dough!
step-by-step Cooking Guide
1. Preparing the Pepper Vessels
Start by preheating your oven to 375°F (190°C). Slice the tops off your 6 large bell peppers and remove the seeds and membranes. Note: Save the tops! You can chop them up and throw them into your next morning's omelet.
Place the peppers upright in a 9x13 dish, drizzle with 1 tbsp olive oil and a pinch of salt. Pour about 1/4 cup of water into the bottom of the dish and cover tightly with foil. Bake for 15 minutes until slightly softened but still standing tall.
2. Sautéing the Beef and Aromatics
While the peppers pre steam, heat a large skillet over medium high heat. Add your 1 lb lean ground beef and cook until no longer pink and starting to sizzle. Why this? Browning the meat first develops deep savory flavors that raw meat just can't provide. Add the diced yellow onion and cook for 5 minutes until translucent.
Stir in the 3 minced garlic cloves and 1 tsp dried oregano, cooking for just 60 seconds until the aroma fills the room.
3. Mixing the Savory Core
In a large mixing bowl, combine the browned beef mixture with your 2 cups cooked white rice, 0.5 cup chopped parsley, and half of the 15 oz tomato sauce. Add the 1 tbsp Worcestershire sauce.
Note: This adds a fermented, salty depth that makes the beef taste "beefier." Mix well so every grain of rice is coated in that sauce.
4. Stuffing with Precision
Carefully remove the peppers from the oven and drain any excess water from the dish. Spoon the beef and rice mixture into each pepper, packing it down gently but not squashing it. You want some air pockets for the sauce to migrate into.
5. Baking to Fork Tender Perfection
Whisk the remaining tomato sauce with 0.5 cup beef broth and pour it into the bottom of the baking dish around the peppers. Cover again with foil and bake for 30 minutes.
Remove the foil, top each pepper with a generous portion of the 1 cup shredded mozzarella cheese, and bake for another 10 minutes until the cheese is bubbly and starting to shatter into golden spots.
Solving Your Common Cooking Hurdles
Why Your Peppers Are Soggier Than Expected
If you find a puddle of water inside your pepper, it's usually because the peppers weren't drained well after the pre steam, or the onions released too much moisture. To avoid this, make sure your beef and onion mixture is relatively dry before adding the tomato sauce.
Fixing Crunchy Rice
There is nothing worse than biting into a "cooked" pepper and finding a hard grain of rice. This usually happens if the rice wasn't fully cooked before stuffing or if there wasn't enough liquid in the filling. If you're using leftovers, make sure the rice is fluffy.
| Problem | Root Cause | Solution |
|---|---|---|
| Watery filling | Onions weren't sautéed long enough | Cook onions until they lose their "crunch" and turn golden. |
| Bitter taste | Burnt garlic or green pepper skin | Use red/yellow peppers for sweetness; add garlic last to the pan. |
| Toppling peppers | Uneven bottoms | Slice a thin layer off the bottom or nestle them tightly together. |
Common Mistakes Checklist
- ✓ Always pre steam your peppers; raw peppers take much longer to cook than the filling.
- ✓ Don't use raw rice; it won't hydrate properly inside the pepper and will stay gritty.
- ✓ Season every layer - salt the peppers themselves, not just the meat.
- ✓ Let the dish rest for at least 5 minutes before serving so the sauce thickens.
- ✓ Use full fat mozzarella; low-fat cheese often turns rubbery instead of melting.
Creative Ways to Customize Flavors
If you're looking for a meatless Monday option, crafting stuffed peppers with rice vegetarian is incredibly simple. Swap the ground beef for a mix of black beans and extra sautéed mushrooms to keep that umami hit. You can also use my Rainbow Veggie Healthy recipe as a guide for using quinoa instead of rice for a nutty, high protein alternative.
Utilizing the Stuffed Peppers with Rice Air Fryer Method
For a smaller batch, you can skip the oven entirely. Prep the peppers as usual but don't pre steam. Place the stuffed peppers in the air fryer basket at 360°F (180°C) for 15-20 minutes.
The circulating air creates a beautiful char on the skin that tastes like a backyard grill. Just be sure to top with cheese in the last 2 minutes so it doesn't fly off!
Decision Shortcut
- If you want a sweeter flavor, use red, orange, or yellow bell peppers instead of green.
- If you want it spicy, add a chopped jalapeño to the beef and swap mozzarella for pepper jack.
- If you're in a rush, use a jar of high-quality marinara instead of the tomato sauce/broth mix.
Storing and Freezing Your Leftovers
Storage: These keep beautifully in the fridge for up to 4 days. In fact, I think they taste better on day two because the rice really marries with the tomato sauce. Store them in an airtight container to keep the peppers from drying out.
Freezing: You can freeze these for up to 3 months. I recommend freezing them before the final bake. Wrap each stuffed pepper individually in plastic wrap, then foil.
To reheat, thaw overnight in the fridge and bake at 375°F for 30-40 minutes until piping hot.
Zero Waste Tip: If you have leftover filling but no more peppers, don't toss it! It makes an incredible "unstuffed pepper" bowl. Just chop up any leftover pepper scraps, sauté them, and mix in the remaining beef and rice. It's the perfect desk lunch for the next day.
Best Sides for This Meal
Since this dish is already a powerhouse of protein, carbs, and veggies, I usually keep the sides light. A crisp green salad with a sharp lemon vinaigrette is the perfect counterpoint to the rich, cheesy peppers.
If you want something heartier, a side of garlic bread is essential for mopping up that extra tomato beef sauce at the bottom of the dish.
You could also pair this with a simple roasted vegetable dish if you're trying to clear out the crisper drawer. If you're feeling adventurous with your greens, check out these Deconstructed Cabbage Rolls recipe which share a very similar flavor profile but use cabbage instead of peppers. Honestly, a simple dollop of sour cream or Greek yogurt on top of the pepper right before you eat it adds a cooling, creamy element that is just heavenly.
Myth: Searing Meat Seals Juices
One of the biggest myths in the kitchen is that searing meat "seals in the juices." Science tells us that's not true moisture is lost during the browning process regardless. However, the Maillard reaction (the browning) creates hundreds of new flavor compounds.
So, while you aren't sealing anything in, you are creating a massive amount of flavor that makes the filling much more complex.
Myth: Peppers Must Be Boiled
A lot of old school recipes tell you to boil your peppers in a big pot of water before stuffing. Trust me, don't do it. Boiling makes the peppers waterlogged and bland. The pre steaming method in the oven (with just a little water and foil) keeps the flavor of the pepper concentrated while still getting it tender.
It's less mess and much better results.

Recipe FAQs
Should rice be cooked before adding to stuffed peppers?
Yes, always use pre-cooked rice. Raw rice requires significant moisture and cooking time that will turn your pepper mushy or leave the rice underdone.
Do I have to boil my peppers before stuffing them?
No, boiling is unnecessary and detrimental. Pre-steaming the peppers covered in the oven for 15 minutes is superior as it softens them without leaching out flavor.
What is the best filling to put in a stuffed bell pepper?
A savory mixture of cooked ground meat, pre-cooked rice, aromatics, and cheese. Make sure your beef is browned first to maximize flavor development; if you’re looking for flavor depth in proteins, see how the same browning technique applies to our Cheesy Potato Casserole recipe.
When making stuffed peppers, do you cover them in the oven?
Yes, cover them initially, then uncover for the cheese. Cover tightly with foil for the first 45 minutes to steam the pepper flesh, then remove the foil for the final 10 minutes to brown the cheese topping.
Can I substitute ground turkey for ground beef in this recipe?
Yes, but you must adjust the fat content. Turkey is much leaner, so add 1-2 tablespoons of olive oil or reserved rendered fat when sautéing to prevent the filling from drying out during baking.
How do I prevent the peppers from tipping over while baking?
Create a flat base by trimming the bottom. Slice a thin shaving off the bottom base of the pepper so it sits flat on the baking dish; just ensure you don't cut through the skin or the filling will leak.
Is it true that the filling should be totally cooked before stuffing the peppers?
False, only the meat needs to be fully cooked prior to stuffing. The rice should be pre-cooked, but the binder sauce and other vegetables finish cooking inside the pepper during the long bake, ensuring all components meld together perfectly.
Stuffed Peppers With Rice

Ingredients:
Instructions:
Nutrition Facts:
| Calories | 368 kcal |
|---|---|
| Protein | 19.8 g |
| Fat | 14.2 g |
| Carbs | 27.4 g |
| Fiber | 3.6 g |
| Sugar | 6.8 g |
| Sodium | 425 mg |
