Strawberry Roses: Elegant Fruit Carving
- Time: Active 20 minutes, Passive 0 minutes, Total 20 minutes
- Flavor/Texture Hook: Fragrant, juicy, and velvety
- Perfect for: Romantic dinners, brunch platters, or beginner friendly food art
- Create Elegant Edible Art with Strawberry Roses
- Science Behind the Bloom and Structural Success
- Ingredient Deep Dive and Component Analysis
- Sourcing the Finest Berries and Decorative Elements
- Necessary Tools for Precision Cutting and Styling
- Masterful Carving Techniques for Realistic Floral Layers
- Essential Strategies for Preventing Common Carving Mishaps
- Creative Ways to Personalize Your Floral Fruit Display
- Proper Methods for Freshness and Using Every Scrap
- Ideal Pairings to Complete Your Elegant Dessert Presentation
- Recipe FAQs
- 📝 Recipe Card
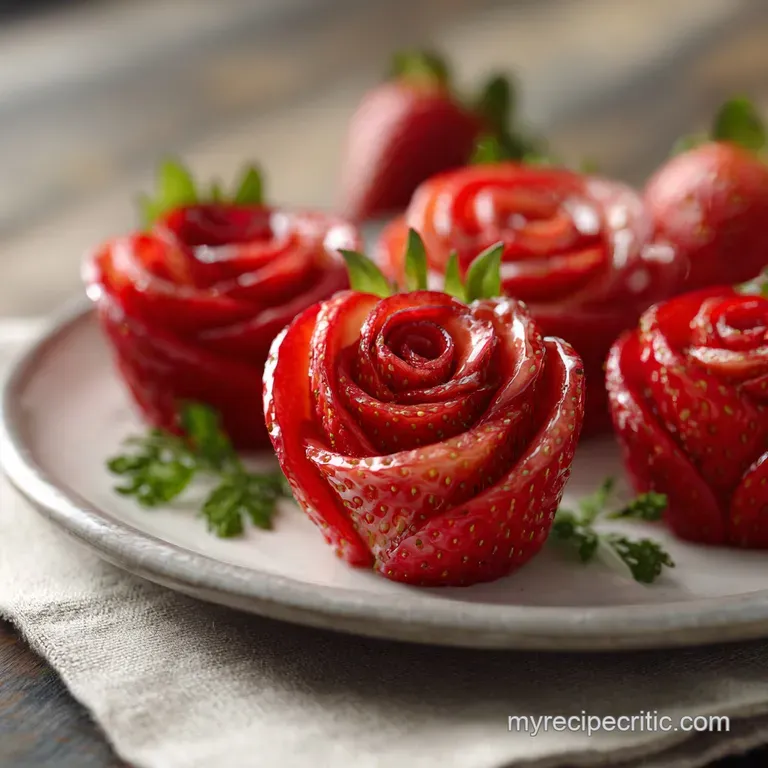
Create Elegant Edible Art with Strawberry Roses
The second you bring a flat of sun warmed strawberries into the kitchen, that heavy, perfumed aroma just takes over. It is the scent of early summer and promise. I remember the first time I tried to make these for a brunch party.
I used a dull steak knife and ended up with something that looked more like a squashed tomato than a flower. It was a mess, but the room still smelled incredible.
We are going to skip my early mistakes and get right to the technique that actually behaves. This isn't just about cutting fruit; it is about understanding how the berry reacts to the blade.
When you get that first petal to curl back just right, revealing the pale interior against the vivid red skin, it is genuinely satisfying. You'll feel like a pro before you even finish the first dozen.
This strawberry roses recipe is designed to be approachable and repeatable. We are going to use the natural taper of the berry to our advantage. Whether you're putting these strawberry roses on cake or assembling a full strawberry roses bouquet, the secret lies in the temperature of the fruit and the angle of your wrist.
Let's get into the details so your kitchen can smell like a florist shop and a fruit market all at once.
Science Behind the Bloom and Structural Success
- Cellular Tension: Keeping the berries at exactly 4°C ensures the cells remain turgid, providing the firm resistance needed for paper thin slices without tearing.
- Enzymatic Oxidation Control: Applying lemon juice acts as a pH buffer, preventing the internal white fibers from browning when exposed to oxygen.
- Pectin Support: The dense core of the strawberry acts as a structural anchor, holding the weight of the "petals" as they are flared outward.
- Capillary Action: A sharp blade allows the juices to remain within the fruit's cells rather than being squeezed out, maintaining the velvety mouthfeel.
| Method | Execution Time | Visual Result | Skill Level |
|---|---|---|---|
| Fast Petal Cut | 45 seconds per berry | Stylized, geometric bloom | Beginner |
| Classic Layered Bloom | 90 seconds per berry | Realistic, deep set petals | Intermediate |
| Chocolate Tipped | 120 seconds per berry | Dramatic, high contrast edges | Intermediate |
The difference between a "fast" cut and the "classic" layered method usually comes down to how many tiers of petals you manage to fit. For a simple strawberry roses homemade display, the fast method is brilliant.
However, if you want that shattering snap of chocolate on the tips, taking the extra minute for layers is worth the effort.
Ingredient Deep Dive and Component Analysis
| Component | Science Role | Pro Secret |
|---|---|---|
| Large Strawberries (450g) | Primary structural base | Select berries with a "broad shoulder" for more petal surface. |
| Lemon Juice (5ml) | Antioxidant barrier | Use a soft pastry brush to apply without bruising the delicate cuts. |
| Dark Chocolate (115g) | Texture contrast | Melt to exactly 32°C to ensure a glossy finish that snaps. |
Sourcing the Finest Berries and Decorative Elements
For this project, you need berries that are firm to the touch. If they feel soft or "leathery," they won't hold the petal shape and will likely turn into a puddle on the plate. Look for a deep, consistent red color right up to the green cap.
- 450g large strawberries: Choose berries with a conical shape. Why this? The taper mimics a rosebud perfectly.
- 5ml lemon juice: Freshly squeezed is non negotiable here. Why this? Prevents browning while adding a bright, acidic zing.
- 115g dark chocolate: Aim for at least 70% cocoa solids. Why this? Provides a bitter balance to the sweet fruit.
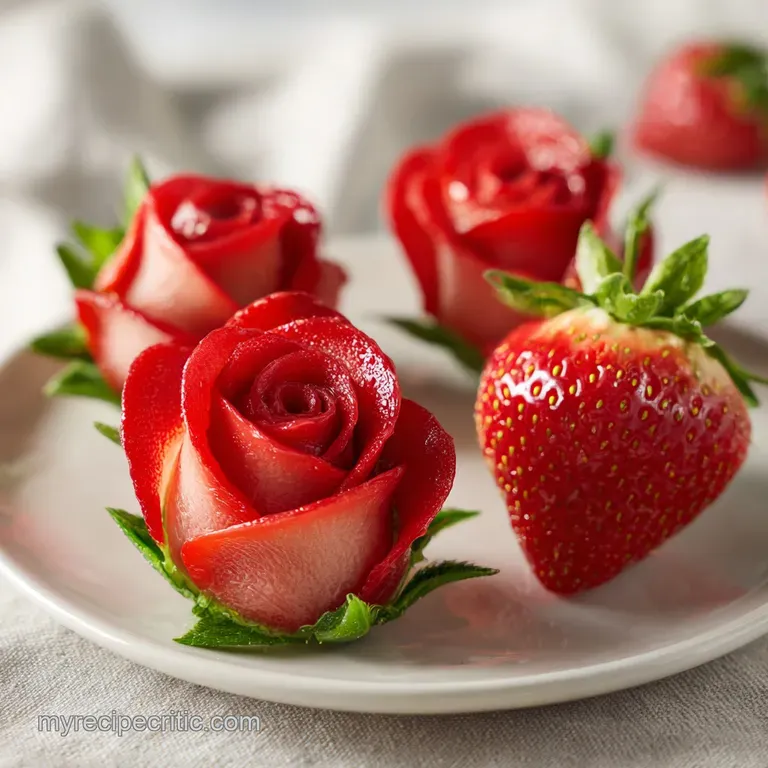
- 12 fresh mint leaves: Large, vibrant green leaves. Why this? They act as the "sepal" or foliage for the rose.
Necessary Tools for Precision Cutting and Styling
You don't need a whole kit of carving tools, but a sharp paring knife is your best friend here. I once tried using a chef's knife, and it was far too bulky for the fine movements needed for the inner petals. You want something light that feels like an extension of your fingers.
A small bamboo skewer or even a toothpick is also helpful for gently "fluffing" the petals once they are cut. If you're planning on making an easy strawberry roses bouquet, you'll also need long wooden skewers to act as the stems. For the chocolate element, a small microwave safe glass bowl is best for even melting.
Chef Tip: Place your paring knife in the freezer for 10 minutes before starting. The cold steel slices through the fruit skin much cleaner, preventing that annoying "snag" that can tear a petal.
Masterful Carving Techniques for Realistic Floral Layers
- Stabilize the base. Wash and thoroughly dry 450g of strawberries. Keep the green hulls on as a handle, or slice a tiny sliver off the bottom to make them stand upright.
- Initialize the first tier. Hold the berry by the stem. Position your knife about 1 cm from the base.
- Execute the outer cut. Slice downward toward the base, stopping just before you cut through. Note: Aim for a depth of about 3 mm.
- Flare the petal. Use the flat of the blade to gently push the slice outward until it stays in place.
- Complete the bottom row. Repeat this 3 or 4 times around the base of the berry until the bottom tier is fully flared.
- Stagger the second tier. Start the next row of cuts slightly higher, positioning them between the gaps of the first row. This creates a realistic, natural look.
- Carve the heart. For the very top, make two perpendicular cuts straight down into the center.
- Apply the preservative. Lightly brush the interior of the cuts with 5ml lemon juice until the fruit looks glistening and bright.
- Prepare the garnish. Dip the tips into 115g melted chocolate if you want that extra snap.
- Final assembly. Tuck one of the 12 mint leaves under the base of each rose for a finished look.
Essential Strategies for Preventing Common Carving Mishaps
Knife Resistance and Tearing
If you find the knife is "dragging" through the skin, the blade is either too dull or the berry is too warm. When the skin tears, it ruins the clean line of the petal. Always use a freshly sharpened blade and work with fruit straight from the fridge.
Petal Collapse or Drooping
This usually happens if the cuts are made too deep into the core. The core is the skeleton of your rose. If you slice too far in, the petal loses its "hinge" and will just fall off. Keep your cuts shallow and angled slightly outward.
| Problem | Root Cause | Solution |
|---|---|---|
| Petals won't stay open | Knife angle was too vertical | Re cut at a 45 degree angle to create a natural "curl" |
| Berry is leaking juice | Dull blade or over ripe fruit | Use a razor sharp paring knife and firmer berries |
| Chocolate is streaky | Overheated chocolate | Melt in 15 second intervals and stir until smooth |
Common Mistakes Checklist
- ✓ Skipping the drying step (wet berries mean slippery knives and sliding chocolate).
- ✓ Cutting all the way to the bottom (the petal will detach completely).
- ✓ Using small berries (these are much harder for beginners to practice on).
- ✓ Forgetting the lemon juice (the white centers will turn a dull beige within 30 minutes).
Similar to the technique I use in my Valentine Strawberries recipe, keeping the fruit bone dry is the most important rule for success.
Creative Ways to Personalize Your Floral Fruit Display
If you want to vary the look, try a "white rose" version by using white chocolate for the tips. You can even sprinkle a tiny bit of gold dust or sparkling sugar on the edges while the chocolate is still wet.
For a more rustic look, skip the chocolate and just dust the finished roses with a tiny bit of powdered sugar right before serving. This looks like a light frost on the petals.
- If you want a romantic vibe, dip the base in chocolate and set them on a platter of rose petals.
- If you want a party centerpiece, skewer the roses and arrange them in a vase filled with kale or parsley to look like a real bouquet.
- If you want a kid friendly version, use larger cuts to make "tulips" instead of intricate roses.
If you are looking for more strawberry roses dipping ideas, you can try dipping the tips in crushed pistachios or freeze dried raspberry powder for a pop of texture. This is a fun variation of the Valentines Chocolate Covered Strawberry recipe that adds a bit of "crunch" to the "velvety" fruit.
| Feature | Single Serving (12) | Party Tray (24) | Large Display (48) |
|---|---|---|---|
| Berries | 450g | 900g | 1.8kg |
| Prep Time | 20 minutes | 35 minutes | 1 hour |
| Best Container | Small plate | 30cm platter | Tiered stand |
Proper Methods for Freshness and Using Every Scrap
These roses are best eaten within 2 to 3 hours of carving. Because you have increased the surface area of the fruit, it will begin to lose moisture faster than a whole berry. Keep them in a cool, draft free spot.
If you must make them ahead of time, place them in a single layer in an airtight container and refrigerate, but don't add the mint until the very last second.
Don't you dare throw away the tops or any "mistake" berries! I toss all my scraps the green tops with a bit of fruit attached and the berries that didn't carve perfectly into a freezer bag. They are the base for my next smoothie or a quick strawberry sauce.
You can also simmer the tops with a bit of sugar and water to make a pink simple syrup for cocktails or lemonade. It's a great way to ensure zero waste in the kitchen.
Ideal Pairings to Complete Your Elegant Dessert Presentation
These roses are the ultimate "final touch" for a decadent dessert spread. They look stunning perched on the edge of a glass of champagne or as a garnish for a rich chocolate torte. If you are hosting a tea party, these are the perfect sidekick to a Classic Strawberry Shortcake recipe.
Myth: You need a special "V shaped" carving tool to make these. Truth: A standard paring knife is actually more versatile because it allows you to control the thickness and "flare" of each individual petal based on the berry's unique shape.
Myth: Strawberry roses will last for days in the fridge. Truth: While they are safe to eat, the petals will start to wilt and lose their crisp edges after about 6 hours. They are definitely a "day of" project for the best visual impact.
Scaling this recipe is simple. If you're doing a big batch for a wedding, work in sets of 10 to keep the fruit from sitting out too long. If you're just making a couple for a Tuesday night treat, you can easily halve the chocolate and just use a few berries.
Just remember to keep that knife sharp and your berries cold, and you'll have a bouquet of strawberry roses homemade and ready to impress in no time.

Recipe FAQs
Are strawberry roses hard to make?
No, they are approachable once you master the technique. The difficulty lies in using a very sharp knife and keeping the fruit cold so the skin doesn't tear when you flare the petals.
How long do strawberry roses last after being cut?
They are best consumed within 3 hours for peak visual appeal. While technically safe to eat longer, the cut petals start to wilt and lose their firm, crisp structure after about 6 hours.
What type of rose is a strawberry?
There is no botanical rose that is a strawberry. This term refers to an edible garnish made by precisely cutting a fresh strawberry to resemble a blooming rose shape.
What occasions are strawberry roses good for?
They are perfect for any occasion needing an elegant, quick garnish. They look stunning on brunches, romantic desserts, or as a beautiful topping for treats like our Chocolate Covered Strawberry recipe.
How do I prevent the white parts of the cut strawberry from browning?
Lightly brush the carved interior surfaces with fresh lemon juice. The acid acts as an antioxidant, preventing enzymatic browning and keeping your roses looking vibrant white against the red skin.
Should I use large or small strawberries for this technique?
Definitely use large, firm strawberries. Larger berries give you more surface area to carve multiple layers of petals before reaching the core, which is essential for a realistic bloom.
How can I keep the petals from detaching entirely during the carving process?
Ensure your knife cuts are shallow and angled slightly outward. You must leave a solid hinge of fruit intact at the base so the petal can flare without separating from the main body of the berry.
Strawberry Roses Technique Guide

Ingredients:
Instructions:
Nutrition Facts:
| Calories | 69 kcal |
|---|---|
| Protein | 1.0 g |
| Fat | 4.1 g |
| Carbs | 7.2 g |
| Fiber | 1.8 g |
| Sugar | 4.6 g |
| Sodium | 2 mg |
