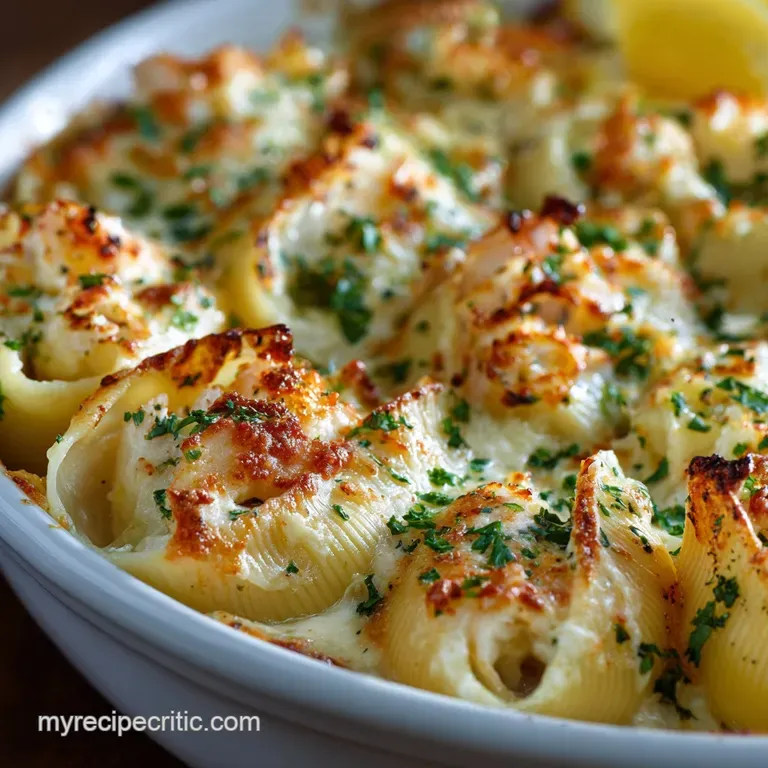
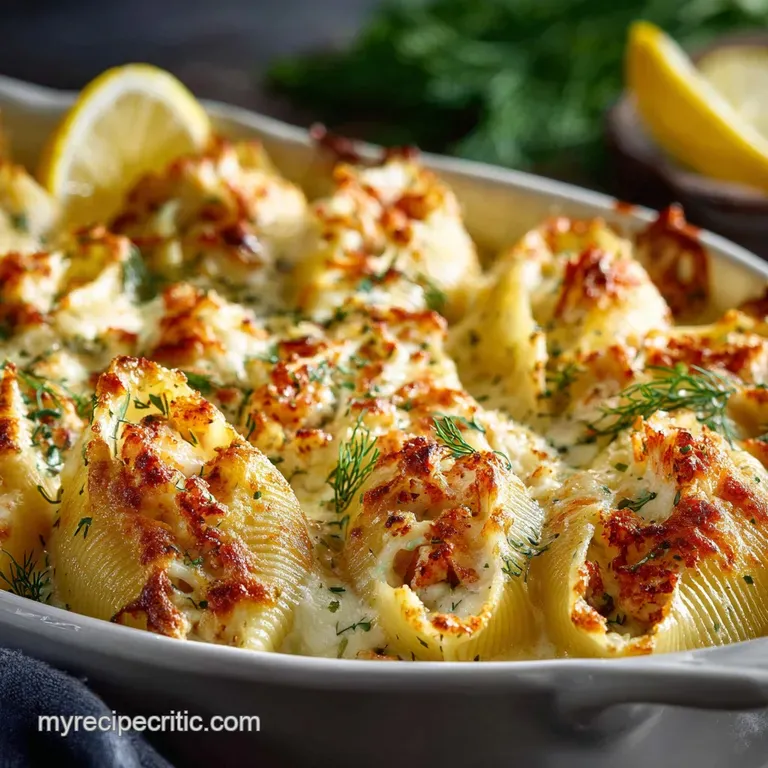
Seafood Stuffed Shells with Creamy Lemondill Sauce Coastal Comfort
- Why Our Seafood Stuffed Shells Recipe Shines
- Sourcing the Key Components for the Filling and Sauce
- Crafting the Bright, Unctuous Lemon and Dill Sauce Base
- Step and by-Step Mastery: Assembling Your Jumbo Seafood Stuffed Shells
- The Art of Stuffing and Preparing for the Oven
- Expert Tips for Flawless Pasta Baking
- Customizing Your Coastal Pasta Creation
- Storage and Reheating Guidelines for Leftover Seafood Stuffed Shells
- Recipe FAQs
- 📝 Recipe Card
Why Our Seafood Stuffed Shells Recipe Shines
Okay, listen up. We’ve all been there with baked pasta. You start with this glorious idea of creamy, comforting shells, and what do you end up with? A heavy, gloopy mess where the delicate filling has leaked out and the sauce tastes like it’s been cooking since 1985. It’s sad, frankly.
We are not doing that today. This is the seafood stuffed shells recipe that actually delivers sophistication and comfort, without requiring you to hire a pastry chef.
Escaping the Heavy Tomato Trap
The absolute core of this recipe is saying no to red sauce. Seriously. When you bake seafood with a standard marinara, you crush the sweetness of the crab and the texture of the shrimp.
Plus, tomato sauces, unless they are intensely reduced, always add too much moisture to the casserole dish, leading to sogginess. We need something bright. We need something that hugs the shells without smothering them.
The Brilliance of Lemon and Dill Cream
This sauce, my friends, is the hero we deserve. It's a creamy white sauce base (a light Béchamel) infused with fresh lemon and dill. The citrus cuts through the richness of the ricotta and the cream, making the dish feel light and coastal instead of dense and Midwestern.
It’s a trick I learned years ago: if you are dealing with rich cheeses and delicate seafood, you need acid. That little burst of lemon juice at the end of the sauce and making process changes everything. It’s brilliant.
Defining the Perfect Pasta and to-Filling Ratio
Choosing the shells matters a lot. We use jumbo conchiglioni, but here’s the secret: you must undercook them slightly. Boil them until they are truly al dente firm to the touch because they are going to spend 25 minutes swimming in hot sauce in the oven.
If they are soft when they go in, they’ll be mush by the time they come out. The ratio should be: pasta sturdy enough to hold its shape, but soft enough to yield to a fork. Get this wrong, and your meal is over before it begins.
Sourcing the Key Components for the Filling and Sauce
Right then, ingredients. Don’t skimp here. This is a celebratory dish, and the quality of your dairy and seafood is going to shine through. My biggest piece of advice? Go for whole milk ricotta, every time. Trying to save calories with low and fat dairy in a baked pasta dish is a fast track to disappointment.
Crafting the Bright, Unctuous Lemon and Dill Sauce Base
This sauce starts like any good cream sauce: a roux. Melt the butter, whisk in the flour, cook it for just a minute or two until it smells nutty (not burnt!), and then introduce your liquids slowly. People rush this part. Don’t rush it! That slow incorporation prevents lumps.
Selecting Succulent Crab and Shrimp
I know lump crabmeat is pricey, but for this specific seafood stuffed shells creamy cheesy texture, you need that sweet, tender flake. If you are watching your wallet, use half high and quality canned crab (drained well) and half fresh and cooked shrimp.
For the shrimp, buy medium and sized ones, peel and dice them small, and flash sauté them first. Why? Because raw shrimp releases too much water into the filling when baking, resulting in a runny filling. Cooking them quickly beforehand seals in the flavour and prevents the mush.
The Ricotta Foundation: Achieving Optimal Creaminess
The number one mistake I used to make was skipping the draining step. Ricotta is often holding onto excess whey, and if you mix that into your filling, it will break down in the oven and weep all over your beautiful shells.
CRUCIAL WARNING: After you open the tub of whole milk ricotta, spoon it into a fine and mesh sieve lined with cheesecloth (or a coffee filter) and let it drain for at least 30 minutes. You’ll be shocked at how much liquid comes out.
That liquid is the enemy of creamy seafood shells.
We also add a blob of softened cream cheese to the mix. It acts like glue and adds a necessary, subtle tanginess that keeps the texture incredibly creamy cheesy, even after baking.
Must and Have Tools for Shell Preparation
You could stand there with a teaspoon and manually fill each shell. That's fine. But if you value your sanity and want uniform shells, please trust me on this hack:
- Piping Bag: Use a sturdy freezer and safe Ziploc bag. Cut off one corner (about a half and inch opening).
- Speed: Scoop your entire ricotta and seafood filling into this bag.
- Fill: Squeeze the filling directly into the shell cavity. It’s fast. It’s clean. It’s a total game and changer.
- Spares: Always boil 2 or 3 extra shells, just in case some break during handling.
Fresh Herbs vs. Dried: Making the Right Choice
For the filling, dried garlic powder is fine, but for the sauce, you absolutely must use fresh dill. Dried dill is a pale imitation of the bright, clean flavour fresh dill provides. It’s the star ingredient that pairs beautifully with the lemon.
Don't cheap out on the herbs when they are the flavour backbone of your white sauce.
Essential Dairy and Aromatics
Always use whole milk for the Béchamel. Skim milk is watery and won't thicken properly without adding excessive amounts of flour, which makes the sauce taste pasty. The hint of minced garlic goes into the roux after the butter and flour have cooked slightly this ensures the garlic doesn't burn instantly but has enough time to release its flavour before the liquid goes in.
Step and by-Step Mastery: Assembling Your Jumbo Seafood Stuffed Shells
We’re putting this together like an expert chef, but without the yelling. The goal is efficiency. Have your shells cooked and cooling, your shrimp sautéed, and your sauce resting slightly before you start mixing the filling. Multitasking saves time and means you can eat sooner.
Related Recipes Worth Trying
- Rainbow Veggie Healthy Stuffed Peppers Recipe Mediterranean — Sunshine on a plate This healthy stuffed peppers recipe is bursting with Mediterranean flavors Quinoa colorful veggies and feta optional make it a star Get...
- Spinach Feta Stuffed Peppers My GreekInspired Delight — Spinach and Feta Stuffed Peppers like a Greek holiday on a plate This healthy vegetarian recipe is easy delicious and perfect for any occasion Get the...
- TexMex Delight Rice Bean Stuffed Bell Peppers — Spice up dinner with these vibrant Stuffed Bell Peppers with Rice A TexMex twist on home cooking easy to customize packed with flavour Get the recipe
The Art of Stuffing and Preparing for the Oven
This is where the magic happens. We need layers of protection and flavour.
Prepping the Shells and Seafood Duo
As mentioned, toss those al dente shells lightly with olive oil. This prevents them from gluing themselves together into a large, useless pasta clump. The cooked, diced shrimp should be completely cooled before mixing into the filling. Warm shrimp will melt the cheese prematurely, making the filling too slack.
Building the Flavourful Ricotta Mixture
Once the ricotta is drained and the cream cheese is softened, whisk them together until completely smooth. Then, fold in your precious crab and shrimp. Folding is important; you want to distribute the seafood without mashing it into a paste. We want chunks of texture!
Layering the Cream Sauce in the Baking Dish
Remember that first third of the sauce? That goes on the bottom of the dish. It creates a creamy, protective layer and generates steam, which helps the shells cook evenly without drying out on the bottom. If you skip this, you will have baked and on pasta cement.
How to Securely Fill the Conchiglioni
Whether you use the piping bag or a spoon, fill the shell generously . These are jumbo shells, and they can take it. You want the filling to mound slightly, holding its shape. Arrange the shells in the pan so they are snug but not completely overlapping, giving the sauce room to bubble up around them.
Temperature and Timing Considerations
Baking at 375°F (190°C) is ideal. It’s hot enough to thoroughly heat the filling and melt the cheese without burning the top too quickly. We bake covered first (to cook the pasta through using the steam from the sauce) and then uncovered for the final 5- 10 minutes (to get that desirable, golden Parmesan crust).
Expert Tips for Flawless Pasta Baking
- Warm Milk for the Sauce: Always use warm or room and temperature milk when making the Béchamel. Adding cold milk to a hot roux can seize up the sauce and guarantee lumps. A quick 30 seconds in the microwave does the trick.
- Resting is Non and Negotiable: When the timer goes off, pull the dish out, but step away for 10 minutes. Resting allows the baked seafood stuffed shells to redistribute moisture and heat, firming up the sauce and filling. If you plate immediately, you'll end up with a puddle of sauce. Patience is a virtue here.
- Use White Pepper: I suggest white pepper for the sauce instead of black pepper. It provides the necessary heat without leaving little black specks, keeping the sauce colour perfectly clean and bright white.
Customizing Your Coastal Pasta Creation
Want to make this dish even more luxurious? Swap out some of the Parmesan for high and quality Gruyère or Fontina cheeses that melt beautifully and provide a fantastic nutty depth.
| Coastal Customization | Flavour Profile Change | Ingredient Swap/Addition |
|---|---|---|
| Spicy Kick | Subtle lingering heat | Add 1/2 tsp crushed red pepper flakes to the ricotta filling. |
| Smoked Depth | Savoury, deeper flavour | Replace half the butter with smoked butter (if available) or add 1/4 tsp smoked paprika to the roux. |
| Crunchy Top | Added texture | Mix panko breadcrumbs with melted butter and sprinkle over the cheese topping before the final uncovered bake. |
Storage and Reheating Guidelines for Leftover Seafood Stuffed Shells
If you are lucky enough to have leftovers (a rare event, honestly), this dish keeps beautifully. Cover the baking dish tightly with foil or transfer the cooled shells to an airtight container. They are good in the fridge for up to 3 days.
Troubleshooting Common Stuffed Shell Mistakes
- Filling is too watery: Did you drain the ricotta? If the filling seems too loose before baking, stir in 1 2 teaspoons of flour or fine breadcrumbs to absorb the excess moisture.
- Shells are dry/hard: This usually means the dish wasn't adequately covered with sauce before baking, or you didn't cover the pan with foil initially. Next time, ensure the sauce level is high enough to almost submerge the pasta.
Make and Ahead Strategies for Effortless Entertaining
This is a phenomenal party dish because it handles make and ahead prep like a champion. You can assemble the entire dish shells stuffed, sauced, and topped with cheese up to 24 hours in advance. Cover it tightly and store it in the refrigerator.
When you are ready to bake, pull it out 30 minutes before baking to take the chill off, then bake as directed, perhaps adding 5– 10 minutes to the covered cook time since it's starting cold.
Seafood Substitutions and Dietary Swaps
If crab isn't your thing, try firm white fish (like cod or haddock) that has been quickly pan and seared and flaked. Just keep the total amount of seafood the same (about 1 pound). For a meat and based twist (though obviously not seafood stuffed shells!), shredded chicken works perfectly with the lemon and dill sauce.
For a vegetarian option, substitute the seafood with sautéed mushrooms (cremini and shiitake) and spinach just make sure you squeeze all the water out of the spinach!

Recipe FAQs
Can I make these Seafood stuffed shells ahead of time for a proper knees-up?
Absolutely! This dish is a fantastic make-ahead option; assemble the entire casserole, cover it tightly, and store it in the fridge for up to 24 hours. Just add 10-15 minutes to your initial covered baking time to account for the chill.
I can't find lump crabmeat easily. Can I use a different kind of seafood instead?
This recipe is rather accommodating! For a cheaper alternative, swap the crab for high-quality flaked cooked salmon or firm white fish like cod; just ensure the seafood is fully cooked and gently folded in, keeping the filling texture light.
My lemon dill cream sauce seems too thin. How do I sort that out?
Easy peasy! If your sauce isn't thickening up, mix a teaspoon of cornflour with a splash of cold water to make a slurry, add it to the simmering sauce, and whisk for 30 seconds until it reaches that perfect consistency like double cream.
Why do I have to pre-cook the shrimp before adding it to the filling?
We pre-cook the shrimp to firm up the texture and prevent the filling from weeping. This crucial little step stops the ricotta mixture from becoming watery during the bake, ensuring your shells are neat and perfectly creamy inside.
Are these Seafood stuffed shells suitable for freezing?
Yes, they freeze beautifully! Assemble the dish fully, wrap it tightly in foil, and freeze for up to three months. To cook, bake covered from frozen, allowing about 45 minutes to an hour until the centre is piping hot, then remove the foil to brown the topping.
Seafood Stuffed Shells With Cream Sauce

Ingredients:
Instructions:
Nutrition Facts:
| Calories | 1032 kcal |
|---|---|
| Protein | 71.1 g |
| Fat | 65.2 g |
| Carbs | 40.4 g |
