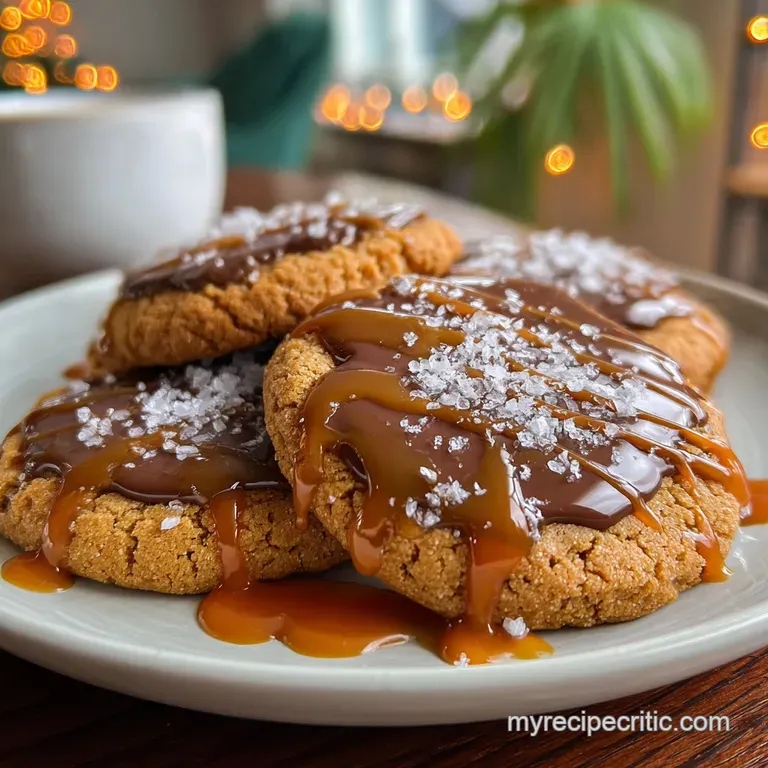
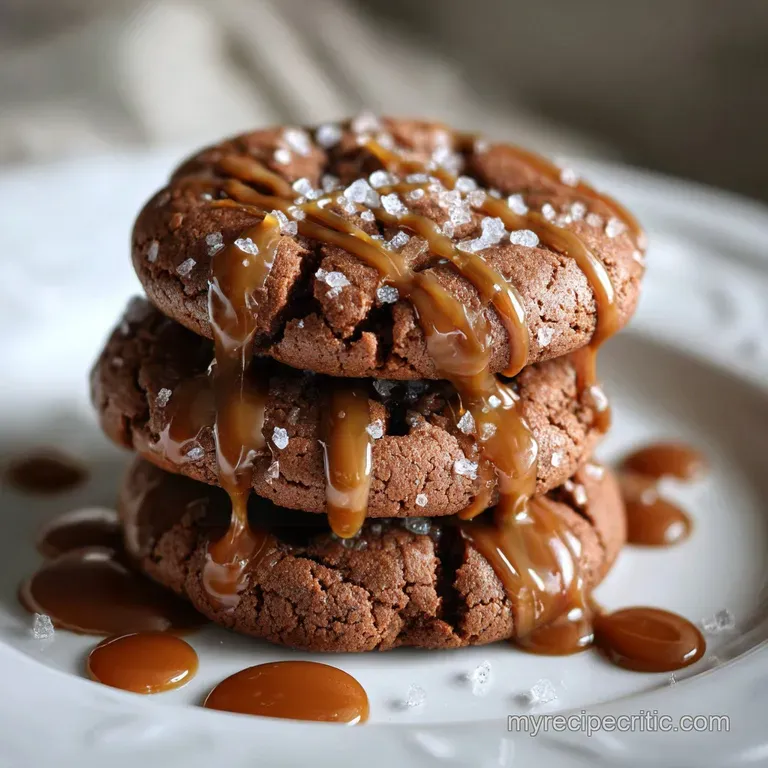
Salted Caramel Chocolate Cookies
- Time: Active 15 minutes, Passive 10 minutes, Total 25 minutes
- Flavor/Texture Hook: Fudgy cocoa with a molten, stretchy caramel core
- Perfect for: Holiday gift boxes, weekend indulgence, or impression making potlucks
- The Best Salted Caramel Chocolate Cookies
- Key Specs For Fudgy Results
- Essential Elements For Dark Cocoa
- Top Tools For Successful Baking
- Achieving The Fudgy Cookie Texture
- Solving Common Sticky Caramel Issues
- Customizing Your Batch Of Cookies
- Storing And Saving Your Leftovers
- Visual Styling For Impressive Platters
- Kitchen Myths Debunked
- Recipe FAQs
- 📝 Recipe Card
The Best Salted Caramel Chocolate Cookies
The first time I tried stuffing a caramel into a chocolate cookie, it was a total disaster. I ended up with a burnt sugar puddle on my baking sheet and a smoke alarm that wouldn't stop screaming because the sugar had escaped and charred on the oven floor.
It was a messy lesson in structural integrity, but it led me to the specific folding technique I use now to keep that molten gold right where it belongs.
We've all had those bakery cookies that look beautiful but taste like flavorless sand once they cool down. These Salted Caramel Chocolate Cookies are different because we focus on the moisture levels in the dough itself.
The aroma of dark Dutch cocoa hitting the warm butter in your mixer is enough to make anyone impatient, but the real magic happens when you crack one open to find that velvety, stretchy center. Trust me, once you see that first ribbon of caramel pull away from the dark dough, you'll never go back to plain chips.
Key Specs For Fudgy Results
The Maillard Enhancement: Dutch process cocoa is alkalized, which allows the chocolate notes to bloom without being suppressed by the natural acidity found in regular cocoa powder. This creates a darker, more intense flavor profile that contrasts sharply with the sweet caramel.
Starch Structural Support: Adding a small amount of cornstarch interferes with gluten formation, ensuring the crumb remains tender and prevents the dough from becoming tough or bread like after the bake.
Hygroscopic Moisture Retention: Light brown sugar contains molasses, which naturally attracts water molecules from the air, keeping the cookies soft and chewy for days.
| Thickness | Internal Finish | Visual Cue | Rest Time |
|---|---|---|---|
| 1.5 cm | Molten Center | Edges set, center soft | 10 minutes |
| 2 cm | Fudgy/Dense | Crackled surface | 15 minutes |
| 1 cm | Chewy/Firm | Fully matte finish | 5 minutes |
Choosing the right thickness matters because it dictates how the caramel will behave inside the dough. A thicker cookie provides a better "insulation" layer for the candy, preventing it from melting through the bottom and sticking to your parchment paper.
If you prefer a flatter, crispier edge, you can press them down slightly, but be prepared for a more integrated caramel texture rather than a distinct molten pocket.
Essential Elements For Dark Cocoa
Selecting high-quality components is the difference between a standard snack and a gourmet dessert. For the base, we use 250g of all purpose flour and 30g of Dutch process cocoa powder. The cocoa is vital here; if you use natural cocoa, the cookies will be paler and more acidic.
We also incorporate 1 tsp of cornstarch for that specific "bakery" bite and 1 tsp of baking soda for the necessary lift.
The fat and sugar ratio is where the fudginess lives. You'll need 170g of unsalted butter, softened to room temperature, which we cream with 150g of light brown sugar and 100g of granulated white sugar. A single large egg at room temperature provides the binding power without making the dough too cakey.
Finally, the "fillings" include 150g of semi sweet chocolate chunks and 18 soft caramel candies. Don't forget the 1 tbsp of flaky sea salt for that final, sharp crunch on top.
| Component | Science Role | Pro Secret |
|---|---|---|
| Unsalted Butter | Fat & Aeration | Use room temperature butter to trap air bubbles during creaming |
| Brown Sugar | Moisture & Chew | Pack it firmly to ensure the molasses content is consistent |
| Dutch Cocoa | Flavor Depth | Sift it with the flour to prevent stubborn "cocoa clumps" in the dough |
| Baking Soda | Leavening | Ensure it is fresh so the cookies rise and then "slump" into cracks |
Using room temperature ingredients is a non negotiable step for me. If your egg is cold, it will seize the softened butter, creating a curdled dough texture that won't spread correctly in the oven. If you're in a rush, just pop the egg in a bowl of warm water for five minutes while you prep your dry ingredients.
Top Tools For Successful Baking
You don't need a professional kitchen, but a few specific tools make this process much cleaner. A stand mixer or a sturdy hand mixer is essential for properly aerating the butter and sugars. If you try to do this by hand with a wooden spoon, you likely won't achieve the pale, fluffy texture needed for a light crumb.
I also highly recommend using a mechanical cookie scoop (the 2 tablespoon size) to ensure every cookie is identical in weight, which guarantees they all finish baking at the exact same second.
A heavy duty baking sheet is also a must have. Thin, cheap pans warp in the high heat and often have "hot spots" that will burn the bottoms of your cookies before the centers are set. Look for aluminum half sheet pans. I always line mine with parchment paper or a silicone baking mat.
This isn't just for easy cleanup; it provides a bit of insulation that prevents the sugar in the caramels from scorching if any of it happens to touch the pan.
Achieving The Fudgy Cookie Texture
Prepping The Cocoa Base
Start by whisking your 250g of flour, 30g of cocoa, 1 tsp cornstarch, 1 tsp baking soda, and 0.5 tsp fine sea salt in a medium bowl. Note: Sifting the cocoa here is a lifesaver for avoiding bitter spots. In your main mixer bowl, cream the 170g of room temperature butter with both sugars for at least three minutes until the mixture looks pale and fluffy.
Adding Chunks And Caramels
Add the egg and 2 tsp of vanilla extract to the butter mixture, beating well. Gradually mix in the dry ingredients on low speed. Stop as soon as the last streak of flour disappears to avoid overworking the gluten. Fold in your 150g of chocolate chunks by hand.
This dough texture should feel like thick play dough, not sticky or greasy.
Baking For Optimal Doneness
Scoop a rounded tablespoon of dough and flatten it in your palm. Place one soft caramel candy in the center, then wrap the dough around it, pinching the seams shut. Roll it into a smooth ball. Place them on the tray and bake at 175°C for 10 minutes until the edges are matte and firm. This is the same patience required for my Proper Thick Chewy recipe where the carry over heat finishes the job.
Applying The Sea Salt
Immediately after removing the tray from the oven, sprinkle a generous pinch of the 1 tbsp of flaky sea salt over each warm cookie. Note: The heat helps the salt crystals adhere to the surface. Let them sit on the hot pan for at least five minutes before moving them to a wire rack.
This allows the internal caramel to "set" slightly so it doesn't just run out when you pick them up.
| Reheat Method | Time | Texture Result | Best For |
|---|---|---|---|
| Microwave | 15 seconds | Very soft & molten | Immediate eating |
| Toaster Oven | 3 minutes | Crispy edges | Restoring "day two" crunch |
| Conventional Oven | 5 minutes | Evenly warmed | Large batches |
When reheating, be careful with the microwave. The caramel heats up much faster than the dough and can easily become hot enough to burn your tongue. I usually prefer the toaster oven at 150°C for a few minutes; it makes the chocolate chunks velvety again while keeping the cookie's structure intact.
Solving Common Sticky Caramel Issues
Preventing Sticky Caramel Leaks
If you find that your caramel is exploding out of the sides, it's usually a "seam" issue. When you wrap the dough around the candy, you have to ensure there are no thin spots. If the caramel is too close to the surface, the steam will find the path of least resistance and blow a hole right through the dough.
Always roll the ball between your palms after pinching it shut to create a uniform "shield" of chocolate dough.
Fixing Flat Greasy Cookies
Cookies that spread into thin puddles usually suffer from butter that was too warm or over creaming. When you beat butter and sugar for too long, you incorporate too much air, which collapses in the oven.
If your kitchen is particularly warm, try chilling the rolled dough balls in the fridge for 20 minutes before baking. This solidifies the fat, ensuring it melts slowly and maintains the cookie's height.
| Problem | Root Cause | Solution |
|---|---|---|
| Hard Caramel | Overbaked | Reduce oven time by 2 minutes; check with a timer |
| Crumbly Dough | Too much flour | Weigh your flour instead of using cups |
| Bitter Aftertaste | Natural Cocoa used | Swap for Dutch process cocoa as called for |
Common Mistakes Checklist
- ✓ Use room temperature eggs to prevent the butter from seizing and clumping.
- ✓ Sift the cocoa powder to remove the tiny hard pellets that don't dissolve during mixing.
- ✓ Ensure the caramel is completely encased in dough with no visible "gold" showing.
- ✓ Avoid opening the oven door frequently, as the temperature drop can cause uneven baking.
- ✓ Let the cookies rest on the baking sheet for 5 minutes to allow the structure to stabilize.
Customizing Your Batch Of Cookies
If you want a different profile, try swapping the semi sweet chunks for white chocolate. The creamy sweetness of white chocolate provides a beautiful visual contrast against the dark dough and works surprisingly well with the salty caramel. You could even use this dough base as a starting point for my Salted Caramel Mini recipe if you're looking for a variety of textures on a dessert table.
Using Homemade Caramel Sauce
While this recipe calls for soft candies, you can use a very thick homemade caramel sauce. The trick is to freeze small dollops of the sauce on a tray for 2 hours until they are rock hard.
You then wrap the dough around the frozen "plugs." This results in a much more liquid center, similar to a lava cake, which is absolutely stunning but much harder to handle.
Salted Caramel Turtle Variant
To make a "turtle" version, press a whole pecan half into the top of each dough ball before baking. The nut toasts in the oven as the cookie bakes, adding a woody, earthy crunch that cuts through the richness of the sugar.
You can also add chopped pecans directly into the dough alongside the chocolate chunks for texture in every bite.
gluten-free Dough Adaptations
You can successfully make these gluten-free by swapping the all purpose flour for a high-quality 1:1 gluten-free flour blend. Since this recipe relies on cocoa and sugar for most of its structure and flavor, the difference is minimal.
Just be sure to let the dough rest for 30 minutes before scooping; this allows the alternative flours to hydrate, preventing a gritty mouthfeel.
Storing And Saving Your Leftovers
Keeping these cookies fresh is all about air control. Store them in an airtight container at room temperature for up to 4 days. I like to put a small piece of white bread in the container with them; the cookies will actually pull moisture from the bread, keeping the dough texture soft and preventing the caramel from hardening.
If the bread gets hard, just replace it!
For long term storage, these cookies freeze beautifully. You can freeze the baked cookies for up to 3 months in a freezer safe bag. When you're ready for a treat, just let one thaw at room temperature or give it a quick zap in the microwave. You can also freeze the unbaked dough balls (with the caramel inside).
Bake them straight from the freezer at 160°C for 13-14 minutes for a fresh from the oven experience whenever the craving hits.
Visual Styling For Impressive Platters
For a professional look, I always save a few extra chocolate chunks to press into the tops of the cookies immediately after they come out of the oven. This makes them look "loaded" and gourmet. If you want a really dramatic effect, drizzle a little bit of melted caramel over the finished cookies in a zig zag pattern before adding the sea salt. It looks just as vibrant as my Caramel Apple Slices recipe presentation.
Beverage And Snack Pairings
These are quite rich, so they pair best with drinks that have a bit of bitterness or acidity to cleanse the palate. A cold glass of whole milk is the classic choice, but a dark roast coffee or a double shot of espresso is my personal favorite.
The bitterness of the coffee highlights the floral notes in the vanilla and the deep earthiness of the Dutch cocoa.
Styling For Special Events
If you're serving these at a party, try stacking them on a wooden board or a slate platter rather than a standard white plate. The dark colors of the cookies pop against natural textures.
I also like to scatter a few extra caramel candies and some raw cocoa nibs around the base of the pile to give guests a visual hint of the flavor layers waiting inside.
Kitchen Myths Debunked
One common misconception is that you must chill this dough for 24 hours to get a good flavor. While chilling helps with hydration, the high cocoa content and brown sugar in this recipe provide enough depth that you can bake them immediately with fantastic results.
The fats in the cocoa actually help stabilize the dough much faster than a standard vanilla cookie dough would.
Another myth is that "salted" caramel means you should put salt inside the caramel itself. While you can do that, the most effective way to experience the salt sweet contrast is to have the salt on the surface.
When the salt hits your tongue first, it suppresses bitter receptors and enhances the perception of sweetness and chocolate, making the whole experience feel much more intense.

Recipe FAQs
Do chocolate and salted caramel go together?
Yes, absolutely. The deep, rich flavor of chocolate perfectly complements the sweet, slightly bitter notes of salted caramel, creating a complex and satisfying taste contrast.
What are Snoop Dogg cookies?
Snoop Dogg cookies typically refer to cookies associated with the rapper, often implying a more indulgent or "special" treat. While there's no single official recipe, recipes like this one, with their decadent chocolate and caramel combination, fit the spirit of a premium cookie.
What is in cowboy cookies?
Cowboy cookies are known for being hearty and often include a mix of ingredients like oats, chocolate chips, nuts, and sometimes coconut. If you enjoyed mastering the texture control in this recipe, you might like exploring the hearty nature of The Ultimate Chewy Peanut Butter Cowboy Cookies Kitchen Sink Delight.
What are Russian cookies filled with caramel?
Russian cookies can have various fillings, but when caramel is involved, it often refers to a sweet, sometimes cooked filling. Recipes like this demonstrate how to effectively encase a gooey caramel center within a cookie dough for a delightful surprise.
Can I use natural cocoa powder instead of Dutch process?
No, it's not recommended for this recipe. Dutch process cocoa is alkalized, which gives it a darker color and less acidic, more intense chocolate flavor that's crucial for the contrast with caramel. Natural cocoa will result in a paler, tangier cookie.
Why are my cookies spreading too much?
Your butter might be too warm or over creamed. If you enjoyed controlling cookie spread here, see how the same fat ratio logic applies to preventing excessive spread in our My GoTo Oatmeal Chocolate Chip Cookie Recipe.
How do I prevent the caramel from leaking out?
Ensure the caramel is completely encased in dough with no thin spots. Pinch the seams shut tightly and roll the dough ball between your palms to create a uniform "shield" of chocolate dough for optimal containment.
Salted Caramel Chocolate Cookies

Ingredients:
Instructions:
Nutrition Facts:
| Calories | 254 calories |
|---|---|
| Protein | 2.4 grams |
| Fat | 12 grams |
| Carbs | 37 grams |
| Fiber | 1 gram |
| Sugar | 25 grams |
| Sodium | 189 milligrams |
