Peppermint Meltaway Cookies: Velvety & Refreshing
- Time: Active 15 minutes, Passive 10 minutes, Total 25 minutes
- Flavor/Texture Hook: Velvety, buttery crumb with a refreshing peppermint snap
- Perfect for: Holiday cookie swaps, winter gifting, or beginner bakers
- Experience the Magic of Peppermint Meltaway Cookies
- The Architecture of the Vanishing Crumb
- Method Comparison for Optimal Cookie Texture
- Component Analysis of the Meltaway Structure
- Choosing the Right Elements for Your Batch
- Tools for Achieving a Velvety Finish
- A Sensory Guided Path to Baking Success
- Avoiding Pitfalls and Solving Baking Blunders
- Adapting the Dough for Every Palate
- Preserving the Freshness and Avoiding Waste
- Presentation Ideas for Your Cookie Tray
- Recipe FAQs
- 📝 Recipe Card
Experience the Magic of Peppermint Meltaway Cookies
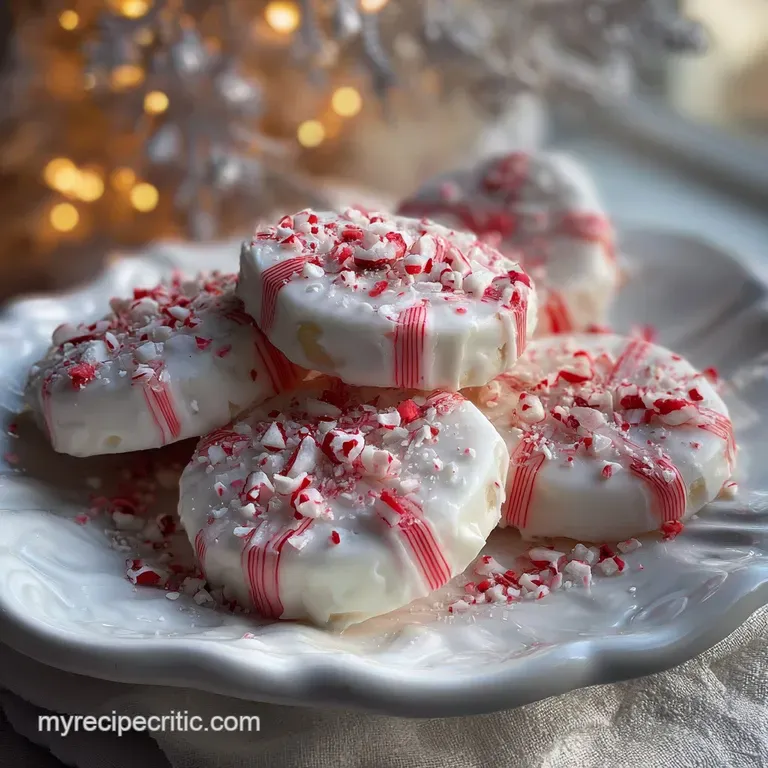
The first time I pulled a tray of these out of the oven, the kitchen smelled like a winter wonderland. It wasn't just the sugar, it was that sharp, clean scent of peppermint extract hitting the warm air.
I remember standing by the counter, waiting just long enough so I wouldn't burn my tongue, and taking that first bite. It didn't crunch like a standard sugar cookie, it simply dissolved.
I've made plenty of mistakes with shortbread in the past, often ending up with something more like a sweet brick than a delicate treat. But this recipe? It's the one I send to my friends when they say they aren't "natural" bakers.
There is something so satisfying about watching the red food coloring swirl into the white glaze, creating that candy cane aesthetic that looks far more difficult than it actually is.
We've all been there, staring at a tray of flat, greasy cookies. I promise you, once you see how this dough behaves under your hands, you'll never go back to store-bought versions.
It's about that specific dough texture, which should feel like soft, pliable clay, and the way the aroma of the peppermint glaze fills the house while you're decorating.
The Architecture of the Vanishing Crumb
- Starch Interference: The 64g of cornstarch physically gets in the way of gluten strands forming, which ensures the cookie remains tender and never develops a tough chew.
- Sugar Aeration: Sifting the 90g of powdered sugar into the 226g of softened butter creates tiny air pockets that expand during baking, resulting in a lighter, aerated structure.
- Moisture Control: Using heavy cream in the glaze rather than water provides a higher fat content, which keeps the topping velvety rather than brittle and dry.
- Fat Suspension: The high ratio of unsalted butter creates a "short" dough, meaning the flour particles are coated in fat, preventing them from absorbing too much liquid and becoming rubbery.
Method Comparison for Optimal Cookie Texture
| Method | Time | Texture | Best For |
|---|---|---|---|
| Standard Oven | 10 minutes | Pale, tender, melt in-mouth | Traditional meltaway finish |
| Stovetop (Skillet) | 15 minutes | Toasted bottom, slightly denser | Small batches without an oven |
| Air Fryer | 7 minutes | Firmer edges, soft center | Quick cravings or single servings |
When choosing your method, keep in mind that the oven is the gold standard here. The consistent, circulating heat allows the cookies to set without browning too much. If you're looking for something with a bit more of a snap, you might enjoy my Classic Butter Spritz recipe, which uses a different fat to flour ratio for a more defined shape.
Component Analysis of the Meltaway Structure
| Ingredient | Science Role | Pro Secret |
|---|---|---|
| Unsalted Butter (226g) | Primary fat source for tenderness | Ensure it is truly softened, not melted, to prevent spreading. |
| Cornstarch (64g) | Weakens gluten for "melt" effect | Always weigh this ingredient, as it packs down easily in measuring cups. |
| Powdered Sugar (90g) | Fine texture and easy dissolution | Sift it twice to remove any lumps that could cause air gaps. |
| Peppermint Extract | Volatile aromatic compound | Add it last to the creamed butter to trap the scent in the fat. |
The interaction between the butter and the cornstarch is what gives this recipe its name. Unlike a traditional cookie that relies on eggs for structure, these stay delicate because they lack that protein binding. If you enjoy this flavor profile but want something a bit more decadent, you should try my Chocolate Peppermint Cupcakes recipe for a richer, cake like experience.
Choosing the Right Elements for Your Batch
- 1 cup (226g) unsalted butter, softened: Why this? Provides the essential fat base for the short, tender crumb.
- Substitute: Salted butter (reduce added salt to a tiny pinch).
- 3/4 cup (90g) powdered sugar, sifted: Why this? Dissolves faster than granulated sugar for a smoother texture.
- Substitute: Granulated sugar pulsed in a blender (though texture will be slightly grainier).
- 1/2 tsp peppermint extract: Why this? Delivers that classic, cooling winter flavor profile.
- Substitute: Vanilla extract for a plain buttery meltaway.
- 1 1/4 cups (155g) all purpose flour: Why this? Provides just enough structure to hold the cookie's shape.
- Substitute: Pastry flour for an even more delicate, fragile crumb.
- 1/2 cup (64g) cornstarch: Why this? The "secret" ingredient that creates the signature vanishing texture.
- Substitute: Arrowroot powder (use same weight for similar results).
- 1/4 tsp salt: Why this? Sharpens the sweetness and cuts through the richness of the butter.
- Substitute: Sea salt flakes (crush them finely before adding).
- 1 1/2 cups (180g) powdered sugar (for glaze): Why this? Creates a snowy, sweet base for the peppermint topping.
- 2 tbsp (28g) unsalted butter, melted (for glaze): Why this? Adds shine and a rich mouthfeel to the icing.
- 3 tbsp heavy cream: Why this? Thins the glaze while maintaining a velvety, opaque appearance.
- Substitute: Whole milk (glaze will be slightly more translucent).
- 1/4 tsp peppermint extract (for glaze): Why this? Reinforces the minty aroma in every single bite.
- 1 drop red food coloring: Why this? Gives that festive, pink candy cane aesthetic.
- 1/4 cup (28g) candy canes, crushed: Why this? Adds a necessary crunch to contrast the soft cookie.
Tools for Achieving a Velvety Finish

You don't need a professional kitchen, but a few specific tools make this much easier. A stand mixer, such as a KitchenAid, is your best friend for getting the butter and sugar truly aerated. If you don't have one, a handheld electric mixer works just as well, though you might need an extra minute of whipping time.
I also highly recommend using a small cookie scoop. The dough is quite soft, and handling it too much with warm hands can melt the butter prematurely. A scoop ensures every cookie is the same size, which means they'll all be done at the same time. Finally,, a fine mesh sieve is non negotiable for the powdered sugar.
Lumps are the enemy of a smooth glaze.
A Sensory Guided Path to Baking Success
- Cream the fats. Beat the 226g of softened unsalted butter with 90g of sifted powdered sugar until the mixture is pale and fluffy. Note: This usually takes 3 full minutes on medium speed.
- Add aromatics. Mix in the 1/2 tsp peppermint extract until you smell a clear, cooling scent.
- Sift dry ingredients. In a separate bowl, whisk 155g of flour, 64g of cornstarch, and 1/4 tsp salt.
- Combine slowly. Add the dry mixture to the butter until the dough texture resembles soft clay. Note: Do not overmix or the cookies will become tough.
- Chill the dough. Wrap the dough in plastic and refrigerate for 30 minutes until firm enough to handle.
- Portion the cookies. Roll the dough into 1 inch balls and place them on a parchment lined sheet.
- Bake the base. Bake at 350°F for 10 minutes until the edges are set but still pale. Note: They should not turn brown at all.
- Cool completely. Transfer to a wire rack and wait until the cookies feel cool to the touch.
- Prepare the glaze. Whisk 180g of powdered sugar, 28g of melted butter, 3 tbsp heavy cream, 1/4 tsp peppermint extract, and a drop of red food coloring until smooth and glossy.
- Final garnish. Dip each cookie into the glaze and immediately sprinkle with 28g of crushed candy canes until they stick to the wet icing.
Chef's Tip: If your kitchen is warm, put your baking sheets in the fridge for 5 minutes before putting the dough on them. This stops the butter from weeping before it even hits the oven.
Avoiding Pitfalls and Solving Baking Blunders
Why Your Cookies Spread Too Much
If your cookies come out looking like thin pancakes rather than little domes, the culprit is usually the butter temperature. If the butter was too warm (greasy) when you creamed it, or if you didn't chill the dough long enough, the fat will melt faster than the flour can set.
| Problem | Root Cause | Solution |
|---|---|---|
| Flat Cookies | Butter was too soft or dough wasn't chilled | Chill dough for an extra 20 minutes before baking. |
| Gritty Texture | Sugar wasn't sifted or wasn't creamed long enough | Sift powdered sugar twice and cream for a full 3 minutes. |
| Dry/Crumbly Dough | Too much flour or not enough butter | Measure flour by weight (155g) to ensure accuracy. |
Maintaining the integrity of the dough is the most important part of this process. If you notice the dough sticking to your palms while rolling, stop and put it back in the fridge.
Common Mistakes Checklist
- ✓ Use room temperature butter (it should dent when pressed but not be shiny)
- ✓ Weigh your dry ingredients rather than using cups for consistency
- ✓ Avoid browning the cookies; they should stay ghost white for the best texture
- ✓ Let the cookies cool entirely before glazing or the icing will slide right off
- ✓ Sift the cornstarch and flour together to prevent "starch pockets" in the dough
Adapting the Dough for Every Palate
Making it Vegan Friendly
You can easily swap the butter for a high-quality vegan butter stick (look for one with a high fat content like Miyoko’s). For the heavy cream in the glaze, use a full fat oat milk or coconut cream. The texture will be slightly more fragile, but the flavor remains excellent.
Infusing a Chocolate Element
If you want to lean into the "thin mint" vibe, replace 2 tablespoons of the all purpose flour with dark cocoa powder. This creates a deep, chocolatey base that looks stunning under the pink peppermint glaze. For a similar flavor profile in a different format, my Peppermint Pattys Mini recipe is another fan favorite during the holidays.
| Original Ingredient | Substitute | Why It Works |
|---|---|---|
| Heavy Cream | Full fat Coconut Milk | Similar fat content. Note: Adds a very subtle tropical note. |
| All Purpose Flour | gluten-free 1:1 Blend | Works well here due to high cornstarch content. Note: May feel slightly grainier. |
| Peppermint Extract | Vanilla Bean Paste | Swaps the mint for a warm, floral sweetness. |
Preserving the Freshness and Avoiding Waste
These cookies are surprisingly hardy once the glaze has set. You can store them in an airtight container at room temperature for up to 5 days. If you want them to last longer, they freeze beautifully. Place them in a single layer on a tray to freeze the glaze, then stack them with parchment paper in between.
They'll stay fresh for up to 3 months.
Don't throw away those leftover candy cane crumbs! I love stirring them into hot cocoa or folding them into a batch of brownie batter. If you have extra glaze, it's fantastic drizzled over a simple pound cake or even used as a dip for apple slices.
To reheat frozen cookies, just let them sit at room temperature for 20 minutes; don't put them in the microwave or the glaze will melt into a puddle.
Presentation Ideas for Your Cookie Tray
When it comes to serving, these cookies are the star of any platter. Because they are so pale and delicate, they provide a beautiful contrast to darker treats like gingerbread or fudge.
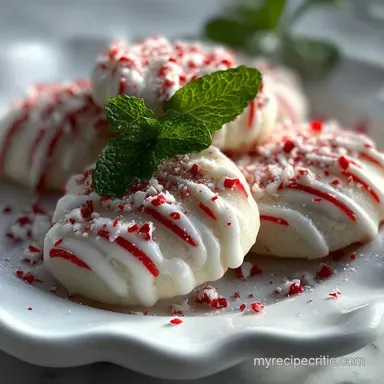
I like to arrange them in a circle with the glazed tops facing up to show off that pink swirl and the sparkle of the crushed candy canes.
If you're gifting them, use a decorative tin lined with tissue paper. Since they are meltaways, they are fragile, so try not to stack them more than two layers deep. If you want to go all out, serve them alongside a warm mug of cocoa.
The way the peppermint glaze starts to soften slightly from the steam of the drink is honestly one of the best parts of the whole experience. Trust me, once you see your friends' faces when these literally disappear on their tongues, you'll be making them every single year.

Recipe FAQs
Can I substitute other extracts for peppermint?
Yes, but peppermint is the signature flavor. You can substitute vanilla extract for a classic buttery meltaway, or almond extract for a different nutty profile. However, these cookies are best known for their distinct peppermint taste.
Why are my cookies spreading too much?
The butter was likely too warm or the dough wasn't chilled enough. Ensure your butter is softened, not melted, and chill the dough for at least 30 minutes until it's firm enough to handle easily. This prevents the fat from melting too quickly in the oven.
What is the secret to the "melt away" texture?
It's the high ratio of cornstarch to flour. The cornstarch interferes with gluten development, creating a tender crumb that literally dissolves on your tongue. If you enjoyed controlling cookie spread here, the same fat ratio logic applies to our Sugar Cookie recipe.
How do I get the glaze to set properly?
Ensure your cookies are completely cool before glazing. The glaze is made with butter and cream, which will melt if applied to warm cookies, preventing it from setting. Let them cool to room temperature before dipping.
Can I make these cookies vegan?
Yes, with a few substitutions. Swap the butter for a high-quality vegan butter stick and use full fat oat milk or coconut cream for the glaze. The texture might be slightly more fragile, but the flavor remains excellent.
How should I store leftover peppermint meltaway cookies?
Store in an airtight container at room temperature for up to 5 days. For longer storage, freeze them with parchment paper between layers for up to 3 months. Avoid microwaving them to reheat as the glaze will melt.
Can I add chocolate to these cookies?
Yes, try replacing some flour with cocoa powder. Swap 2 tablespoons of all-purpose flour with dark cocoa powder for a chocolatey base that pairs beautifully with the peppermint glaze. For a similar flavor in a different form, check out our Chocolate Chip Cookies: Ultimate Chewy Easy Recipe.
Peppermint Meltaway Cookies
Ingredients:
Instructions:
Nutrition Facts:
| Calories | 159 kcal |
|---|---|
| Protein | 0.8 g |
| Fat | 8.6 g |
| Carbs | 19.8 g |
| Fiber | 0.2 g |
| Sugar | 12.4 g |
| Sodium | 25 mg |
