Scallops: Golden Goddess Pan Sear with Bright Lemon-Garlic Butter
- Achieving the Golden Goddess Scallops: A Restaurant Sear at Home
- The Science of the Sear: Why Technique Dictates Texture
- Selecting and Preparing Premium Scallops and Pantry Staples
- Step and by-Step Method: How to Pan and Sear Scallops Flawlessly
- Mastering the Technique: Chef's Tips and Avoiding Common Scallop Mistakes
- What to Serve With Seared Scallops: Optimized Pairings
- Leftovers and Longevity: Storage Guidelines for Cooked Scallops
- Recipe FAQs
- 📝 Recipe Card
Achieving the Golden Goddess Scallops: A Restaurant Sear at Home
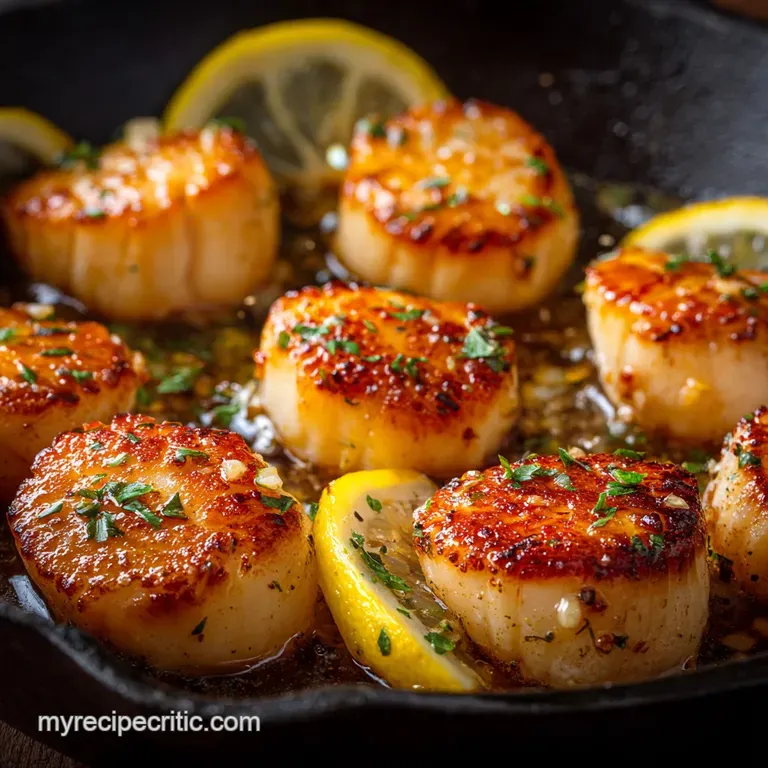
There is no sound in the kitchen quite like the sizzle of a perfect sea scallop hitting a screaming hot pan. When that nutty, caramelized crust forms, releasing the smell of browned butter and sweet ocean air, I swear I feel like a culinary genius.
This is the moment we live for, where over high heat magic meets delicate flavour.
For a long time, I was terrified of cooking them. I thought they were expensive, fussy, and destined to turn into rubbery, grey puddles. Now? They are my go and to panic button dinner when I need something fast, fancy, and infinitely satisfying. We are talking 15 minutes from fridge to plate.
This recipe is simple, but we are going to treat technique like a religion. Forget everything you thought you knew about gentle cooking; we need heat, we need dryness, and we need my signature bright, punchy lemon and garlic butter to pull it all together. Let’s make some scallops that absolutely sing.
The Science of the Sear: Why Technique Dictates Texture
Why Home Cooks Fail (And How We Fix It)
Most people fail because they treat the scallop like a piece of fish. They fear the heat, so they start too cool, or they forget to dry the outside completely. When the scallop hits the pan damp, all that external moisture instantly turns to steam.
Steaming makes the edges curl, prevents the Maillard reaction from happening, and results in that dreaded rubbery texture. We want a sear, not a sauna. A perfect sear starts with a dry surface.
Overview: The Bright Finish of Lemon and Garlic Butter
We are using a two and pronged fat strategy here: a over high heat oil to achieve the crust, and then we finish the cooking by basting with butter. Once the scallops are removed, we use the residual heat and the flavourful fond (the browned bits) to create an instant emulsified sauce.
The lemon juice is non and negotiable. Its acidity cuts through the richness of the butter and enhances the natural sweetness of the scallops, making every bite feel light and exhilarating. It’s brilliant.
Difficulty and Time Commitment (15 Minute Luxury)
Honestly, this is a medium difficulty recipe only because the timing is strict. You can't wander off to check Instagram. But the actual steps are minimal, and if you follow the "Don't Touch" rule, the result is effortless luxury.
Maillard Reaction Magic: Achieving the Caramelized Crust
The Maillard Reaction is just a fancy term for what happens when proteins and sugars brown under high heat. This is what creates that complex, savory, golden crust that provides all the texture contrast.
To make this reaction happen fast and beautifully, two things must be true: the temperature must be high (like, really high), and there can be zero surface moisture. If the scallops are perfectly dry, the exterior can caramelize before the interior overcooks.
Controlling Moisture: The Secret to a Dry Scallop Surface
This is the single most important step. If you buy 'wet and packed' scallops (which are treated with phosphates to absorb water), you need to work extra hard.
Place them on paper towels and press down firmly to wick away the liquid. I usually let them sit, uncovered, in the fridge for 10 minutes after the aggressive pat and down it’s a quick hack that guarantees a bone and dry exterior ready for searing.
The Role of Fat: High and Smoke Point vs. Finishing Butter
We start with high and smoke point oil (like grapeseed) because we need the pan scorching hot, hotter than butter can handle without burning. This oil is just the vehicle for the sear.
Once the scallops are flipped, we introduce unsalted butter. It melts fast, browns slightly (adding that wonderful nutty aroma), and its low smoke point means we use it strictly for flavour and basting, right at the end.
Selecting and Preparing Premium Scallops and Pantry Staples
Wet vs. Dry Scallops: Why Source Matters
This sounds like a weird distinction, but it matters deeply for pan and searing. Dry and packed scallops haven’t been chemically treated and are naturally less watery. They cost more, but they sear perfectly every time.
Wet and packed scallops are common and cheaper, but they are plumped with liquid. You can still use them, but you must rinse them well and dry them aggressively, otherwise, you’re just paying for water.
Look for the little side muscle (the abductor); always peel that off before cooking, as it gets tough.
Essentials for the Lemon and Garlic Butter Sauce
This sauce requires fresh ingredients, full stop. Don't use garlic powder; we need minced fresh garlic sautéed lightly until fragrant.
| Ingredient | Substitute/Note |
|---|---|
| Fresh Lemon Juice | Fresh Lime Juice (sharper acid profile) or 1 Tbsp White Wine Vinegar (use sparingly) |
| Garlic | Shallots (finely minced) for a milder, sweeter onion flavour. |
| Fresh Parsley | Finely chopped Chives or Tarragon. |
Optimized Fats for Searing: Clarified Butter vs. over High heat Oil
I recommend refined grapeseed or avocado oil for their neutral flavour and high smoke point. If you want pure butter flavor right from the start, use clarified butter (ghee) . Ghee has the milk solids removed, giving it the high smoke point needed for searing.
Substitutions for a Dairy and Free Finish
Want the richness without the dairy? You can absolutely use a good quality plant and based butter (like Miyoko's or Earth Balance) for both the searing and the finishing sauce. It performs surprisingly well in the pan and basting phase! Just make sure your oil is neutral.
Step and by-Step Method: How to Pan and Sear Scallops Flawlessly

Preparation Phase: Drying and Seasoning the Scallops
- Drying: Remove the abductor muscle. Place the scallops on paper towels. Pat the tops hard . Flip them, pat the other side. You want them to look matte, not glossy. Season them generously with Kosher salt and pepper right before they go in the pan. Don't season too early , or the salt will draw moisture out and sabotage your efforts.
- Pan Prep: Get a heavy stainless steel or cast iron skillet on medium and high heat. Wait 2 minutes. Add the oil. Wait until it shimmers and you see the slightest wisp of smoke.
Chef's Note: If you place a drop of water in the pan and it instantly sizzles and evaporates, you are ready. Too low, and they will steam.
The over High heat Sear: Timing and Flipping Strategy
- Sear: Place the seasoned scallops into the pan in a clock pattern, ensuring they don't touch. If you have more than 6 scallops, work in two batches. Trust me.
- Hands Off: Sear for 2 to 3 minutes, completely undisturbed. Use tongs to gently lift one edge to check the colour; it should be deep mahogany.
- Flip and Butter: Flip all the scallops. Immediately drop in the 2 Tbsp of cold butter next to the scallops. As the butter melts, tilt the pan towards you and use a spoon to scoop up the foaming butter, basting it continuously over the tops for the final 60 to 90 seconds.
- Remove: Take the scallops out and place them on a clean, warm plate. They should be firm to the touch, opaque throughout, but still slightly bouncy.
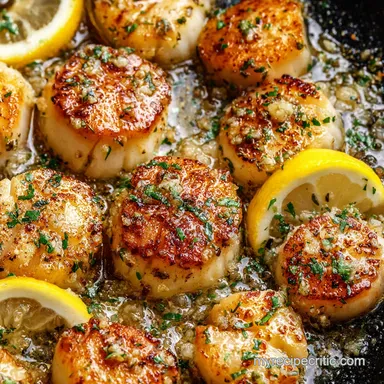
Building and Basting with the Lemon and Garlic Finishing Butter
- Sauté: Wipe out any burnt bits from the pan (if necessary). Reduce the heat to low. Add the minced garlic to the pan and cook for 30 seconds just until you smell it. Do not let it turn brown!
- Mount the Butter: Turn the heat OFF. Add the 4 Tbsp of cold, cubed butter one piece at a time, swirling or whisking constantly. This is called monter au beurre , and it makes the sauce incredibly glossy and thick.
- Finish: Whisk in the lemon juice and sprinkle in the fresh parsley. Taste for seasoning.
The Crucial Resting Period (And Plating)
Scallops are not like steaks; they don't need a long rest, but giving them 60 seconds allows the residual heat to finish cooking them perfectly. Spoon the luxurious Lemon and Garlic Butter over the scallops right before serving. Garnish with a final, generous pinch of flaky sea salt for texture.
Mastering the Technique: Chef's Tips and Avoiding Common Scallop Mistakes
Mistake 1: Overcrowding the Pan (The Temperature Killer)
I learned this the hard way when I tried to rush eight scallops into one pan. I thought I was saving time; I was actually guaranteeing a soggy result. When you crowd the pan, the temperature drops instantly, and the water released by the cooking scallops has nowhere to go but back onto the surface of the other scallops.
Always sear in batches.
How to Tell When Scallops Are Truly Done (The Poke Test)
If you have an instant and read thermometer, aim for 130 135°F (54 57°C). If you don't, use the poke test. Raw scallops feel very squishy, like raw fish. Perfectly cooked scallops should feel firm but still spring back slightly when you press on them.
If they feel hard and resist your touch, they are overcooked (the dreaded rubber).
Rescuing a Broken Finishing Sauce
If your finishing butter sauce looks oily or split (because the temperature was too high or you added the butter too fast), don't panic. Take the pan off the heat, add a tablespoon of cold water, and whisk aggressively. The cold liquid should help re and emulsify the sauce back into a smooth, thick consistency.
What to Serve With Seared Scallops: Optimized Pairings
Light Side Dishes That Complement the Lemon and Garlic Finish
Since the scallops and sauce are rich and bright, you want sides that are clean and simple. I love a peppery salad of arugula tossed in a simple lemon vinaigrette.
Another winner? Some quick asparagus spears flash sautéed with a touch of olive oil and finished with sea salt. You need that little bit of green bitterness to balance the sweetness of the sea.
Wine Pairings: Enhancing the Sweetness of Scallops
You need a dry, crisp wine that doesn't overpower the delicacy of the scallop meat. Skip the big, oaked reds and go for a classic Sauvignon Blanc, Sancerre, or a dry, mineral and forward Pinot Grigio. If you like something richer, try an un and oaked Chardonnay.
Transforming Scallops into a Full Dinner Plate
While scallops are divine on their own, turning them into a full meal is easy. Serve them over a bed of creamy, saffron and infused risotto (the classic pairing), or toss them directly into pasta. If you want a complete, elegant meal ready in minutes, you absolutely need to try my recipe for Scallops and Pasta The RestaurantQuality LemonGarlic Recipe . It’s a game and changer.
Leftovers and Longevity: Storage Guidelines for Cooked Scallops
Cooked scallops do not age gracefully, especially if they are reheated aggressively. They are best eaten immediately.
If you must store them, place them in an airtight container in the fridge for up to 2 days. To reheat, don't use the microwave! That's a direct ticket to rubber town. Instead, place them on a sheet pan in a 300°F (150°C) oven for about 5 minutes, just until they are warmed through.
I generally don't recommend freezing cooked scallops, as the thawing process ruins the texture, turning them spongy. If you have raw scallops, check out my notes on preserving their sear and crust in my original post about Scallops The Perfect Pan Seared Scallops with Lemon Brown Butter . They are just too beautiful to ruin with bad leftovers!

Recipe FAQs
What are the main types of scallops used in cooking?
The most common types are Bay scallops, which are small, sweet, and typically used in stews or pasta, and Sea scallops, which are large, thick, and ideal for pan-searing. Sea scallops labeled as "Diver" indicate they were hand harvested, which often ensures minimal environmental impact and excellent quality.
Why did my scallops not form a golden crust during pan-searing?
The primary enemy of a good sear is moisture, often resulting in steaming instead of browning. Ensure you thoroughly pat the scallops bone dry with paper towels before seasoning, and always cook them in a screaming hot pan without overcrowding the surface.
How do I ensure my scallops are fresh and how should I store them?
Fresh scallops should smell sweet and clean, not fishy, and feel firm to the touch. Store them in the coldest part of your refrigerator, preferably covered lightly with a damp cloth or paper towel, and plan to use them within one to two days for optimum flavor and texture.
Can I use frozen scallops for this pan-searing recipe?
Yes, but preparation is crucial for success. Thaw them completely overnight in the refrigerator, then drain off all accumulated liquid. After thawing, treat them like fresh scallops by ensuring they are completely dry before seasoning and placing them in the hot pan.
What is the Spanish term for scallops, and how are they often served regionally?
The general term for scallops is vieiras (especially the larger sea variety), while smaller bay scallops are sometimes called zamburiñas. In regions like Galicia, scallops are frequently baked or grilled in their shell and often served with a savory topping of cured ham, breadcrumbs, and white wine.
Why did my pan-seared scallops turn tough or rubbery?
A rubbery texture is the definitive sign of overcooking, which happens quickly due to their high protein and low-fat content. Scallops usually require only 90 seconds to 2 minutes per side in a very hot pan; they are done immediately once the flesh becomes uniformly opaque.
What is the "catch" or "foot" on a scallop, and should I remove it?
This is the small, crescent shaped piece of tissue sometimes attached to the side, known as the adductor muscle or "foot." While safe to eat, it is significantly tougher and chewier than the main body, so it is best practice to gently peel it off and discard it before cooking.
Pan Seared Scallops With Lemon Butter
Ingredients:
Instructions:
Nutrition Facts:
| Calories | 342 kcal |
|---|---|
| Protein | 17.3 g |
| Fat | 25.1 g |
| Carbs | 5.0 g |
