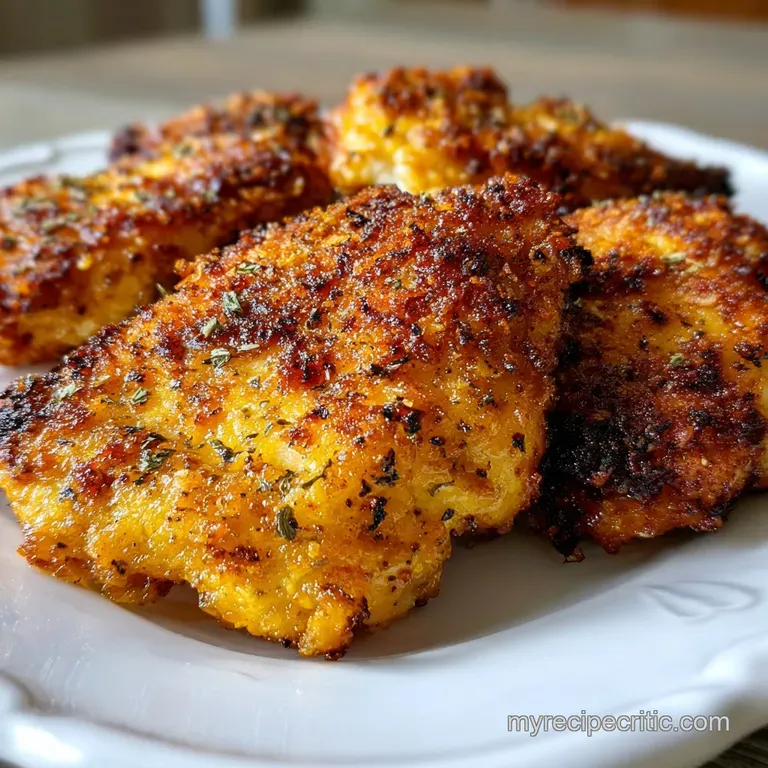
Pan Fried Chicken Recipe
- Time: Active 10 minutes, Passive 0 minutes, Total 20 minutes
- Flavor/Texture Hook: Shattering golden crust with a silky lemon butter finish
- Perfect for: Busy weeknights where you need a high protein win in under half an hour
- Master This Golden Pan Fried Chicken Recipe
- Heat Physics for Juicy Meat
- Efficient Preparation and Cook Specs
- Ingredient Deep Dive and Substitutions
- Essential Tools for Faster Cooking
- Step-by-Step Searing and Sauce Method
- Solving Common Chicken Texture Issues
- Adjusting Yields for Any Crowd
- Debunking Common Chicken Searing Myths
- Storing Leftovers and Reducing Waste
- Professional Plating and Garnish Ideas
- Pan Fried Chicken Recipe FAQs
- 📝 Recipe Card
Master This Golden pan-fried Chicken Recipe
The kitchen fills with that rhythmic, aggressive sizzle the moment the meat hits the oil. You know the one - it sounds like a promise of something crispy. For a long time, I struggled with chicken breasts that turned out either pale and rubbery or as dry as a desert hike.
I tried every "hack" in the book until I realized that the secret isn't a fancy gadget, but rather a few basic rules of physics.
This pan-fried chicken recipe is the result of those messy experiments. We aren't just tossing meat into a pan; we are creating a specific environment where moisture stays locked inside while the outside undergoes a beautiful transformation.
It is the kind of meal that feels fancy enough for a date night but comes together faster than most delivery apps can even find a driver.
We are going to focus on a thin, seasoned flour coating. It isn't a heavy batter like traditional fried chicken, but rather a protective layer that browns beautifully in a mix of avocado oil and butter.
By the time you finish the quick pan sauce at the end, you'll have a restaurant quality dish that looks like it took an hour of work but only took ten minutes at the stove.
Heat Physics for Juicy Meat
Understanding how heat moves through a chicken breast is the difference between a rubbery dinner and a tender one. When we drop cold meat into a hot pan, the surface temperature plummets unless the pan has enough mass to hold onto its energy.
This is why I always reach for my heaviest skillet; it acts as a heat reservoir that keeps the oil hot enough to sear the flour immediately.
- Maillard Reaction: Heat triggers a chemical bond between amino acids and reducing sugars, creating that signature brown crust and savory aroma.
- Protein Denaturation: Gentle heat causes meat proteins to uncoil and bond, but overcooking causes them to tighten like a wrung out sponge, losing all moisture.
- Surface Dehydration: The flour dredge absorbs surface moisture, allowing the oil to crisp the exterior instantly instead of steaming the meat.
Chef's Tip: Take your chicken out of the fridge 15 minutes before cooking. If the meat is ice cold, it will cause the pan temperature to drop too fast, leading to a soggy, grey exterior instead of a golden sear.
Efficient Preparation and Cook Specs
When you are in a rush, every minute counts. This comparison shows why the extra ten minutes of "fresh" prep is worth it compared to pre cooked shortcuts that often sacrifice the very textures we crave.
| Feature | Fresh Chicken Breast | Pre Cooked Shortcut |
|---|---|---|
| Flavor Profile | Deep, buttery, and savory | Flat, salty, and processed |
| Surface Texture | Shattering crispness | Soft and often spongy |
| Moisture Content | High (if not overcooked) | Low and frequently stringy |
To get the most out of your time, prep the side dishes while the chicken rests. Since this dish only takes 10 minutes to cook, having a salad or some quick steamed veggies ready to go is essential.
Ingredient Deep Dive and Substitutions
Selecting the right fat is just as important as the meat itself. We use avocado oil because it has a high smoke point, meaning it won't burn or turn bitter while we are trying to get that deep brown color.
If you've ever had a chicken breast that tasted a bit "burnt" even though it looked okay, your oil likely broke down during the process.
| Ingredient | Science Role | Pro Secret |
|---|---|---|
| All Purpose Flour | Creates a starch barrier | Whisk it with the spices for even distribution |
| Avocado Oil | over High heat conductor | Wait for the "shimmer" before adding meat |
| Chicken Broth | Liquid for deglazing | Use low sodium to control the final saltiness |
The unsalted butter added at the end isn't just for flavor; it’s an emulsifier. It helps bind the lemon juice and chicken broth into a velvety sauce that clings to the meat rather than just pooling at the bottom of the plate. If you are looking for more ways to use these staples, this technique is very similar to the one used in my Chicken Broccoli Casserole recipe.
The Signature pan-fried Chicken Breast Seasoning
For the best results, use the exact quantities below. The smoked paprika adds a subtle earthiness that mimics a charcoal grill, while the garlic powder provides a savory punch that permeates the thin flour coating.
- 2 large chicken breasts: Approx. 1 lb total. Slice them in half horizontally to create four thinner cutlets. Why this? Thinner meat cooks faster and more evenly.
- 0.5 cup all purpose flour: Used for the dredge. (Substitute: Cornstarch for a gluten-free, extra crispy version).
- 2 tbsp avocado oil: Your primary cooking fat. (Substitute: Grapeseed or light olive oil).
- 1 tbsp unsalted butter: For finishing the sauce. (Substitute: Vegan butter or extra oil).
- 1 tsp kosher salt: Enhances all other flavors.
- 0.5 tsp black pepper: Use freshly cracked for a sharper bite.
- 1 tsp garlic powder: Essential for that classic savory profile.
- 0.5 tsp smoked paprika: Adds color and a hint of wood fire flavor.
- 0.5 tsp dried oregano: Provides a subtle herbal note.
- 0.5 cup chicken broth: To deglaze the pan. (Substitute: Dry white wine like Sauvignon Blanc).
- 1 tbsp lemon juice: To cut through the fat.
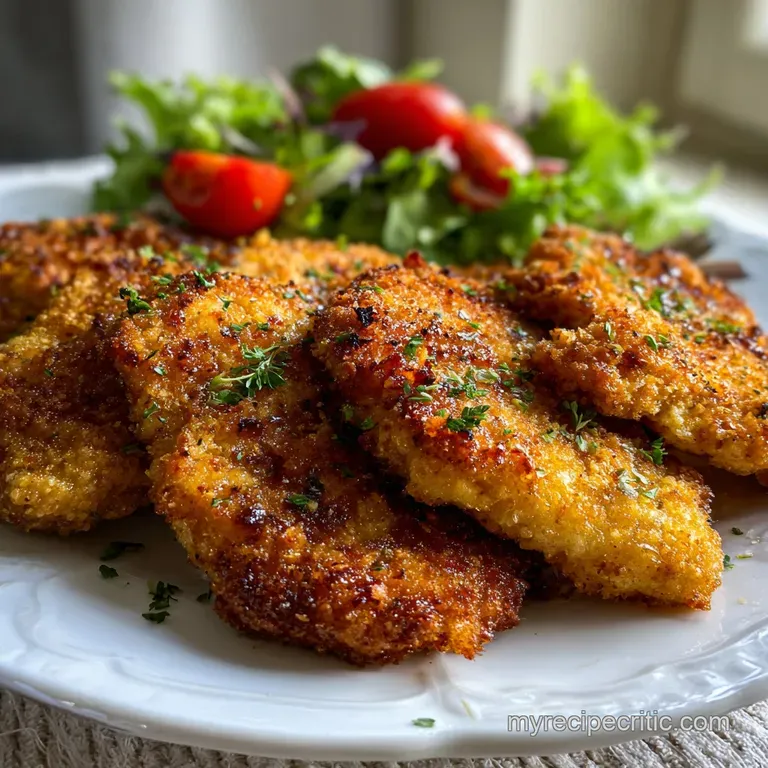
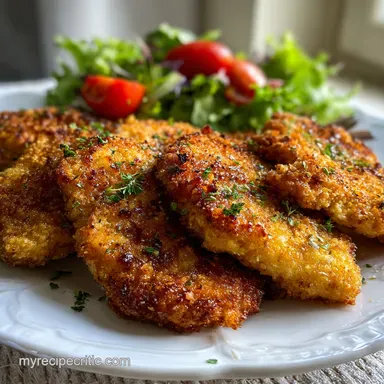
- 1 tbsp fresh parsley: For a bright, clean finish.
Essential Tools for Faster Cooking
You don't need a kitchen full of gadgets for this pan-fried chicken recipe. In fact, fewer tools often mean less cleanup and more focus on the technique. I suggest using a large 12 inch skillet stainless steel or cast iron is best.
Non stick pans are great for eggs, but they don't develop the "fond" (those brown bits stuck to the pan) that we need to make the sauce delicious.
You will also need a meat mallet or even just a heavy rolling pin. We aren't trying to pulverize the meat, just even it out. A pair of sturdy tongs is much better than a fork for flipping, as piercing the meat allows precious juices to escape into the pan.
step-by-step Searing and Sauce Method
- Prep the meat. Slice 2 large chicken breasts in half horizontally to create 4 cutlets. Note: This ensures the center is done at the same time the outside is crisp.
- Flatten for uniformity. Place cutlets between plastic wrap and pound to 0.5 inch thickness.
- Mix the dredge. Combine 0.5 cup flour, 1 tsp salt, 0.5 tsp pepper, 1 tsp garlic powder, 0.5 tsp paprika, and 0.5 tsp oregano in a shallow bowl.
- Coat the chicken. Press each cutlet into the flour mixture until fully covered and dry to the touch, shaking off any excess.
- Heat the skillet. Add 2 tbsp avocado oil to a large pan over medium high heat until the oil shimmers and barely wisps smoke.
- Sear the first side. Place chicken in the pan and cook 3-4 minutes until the edges are deep golden brown and the meat lifts easily.
- Flip and finish. Flip the cutlets and add 1 tbsp butter. Cook another 3-4 minutes until the internal temp hits 165°F.
- Remove and rest. Transfer chicken to a plate. Note: Resting allows the juices to redistribute so they don't run out when you cut it.
- Deglaze the pan. Pour 0.5 cup chicken broth into the hot pan, scraping the bottom with a wooden spoon until the liquid reduces by half.
- Finalize the sauce. Stir in 1 tbsp lemon juice and 1 tbsp parsley. Pour this silky glaze over the chicken and serve immediately.
Solving Common Chicken Texture Issues
Even with the best intentions, things can go sideways. The most common heartbreak is the "slipping coat," where the breading slides right off the meat like a loose sweater. This usually happens because there was a layer of moisture trapped between the chicken and the flour.
Solving the Coating Peeling Issue
If your coating is peeling, it’s a sign the meat was too wet. Next time, use more paper towels than you think you need. Press down firmly on the raw meat to absorb every drop of surface moisture before it ever touches the flour.
| Problem | Root Cause | Solution |
|---|---|---|
| Pale, rubbery crust | Pan was too cold | Wait for the oil to shimmer before adding meat |
| Burnt spices | Heat was too high | Shift to medium high and use high smoke point oil |
| Dry, tough meat | Internal temp exceeded 170°F | Pull the meat at 160°F; carryover heat finishes it |
If you find yourself with extra chicken that you didn't cook yet, it's perfect for a different texture. You can actually use the same seasoning profile for my Shredded Chicken Flautas recipe if you decide to boil or pressure cook the meat instead of pan frying it.
Adjusting Yields for Any Crowd
When scaling this recipe down for one person, it is tempting to just use one breast and hope for the best. However, remember that the pan sauce needs a certain volume of liquid to not evaporate instantly.
I recommend making the full amount of sauce even for half the meat; you can always use the extra sauce over rice or potatoes.
For scaling up, never crowd the pan. If you try to fit four large breasts in a ten inch skillet, the meat will steam instead of fry. Cook in batches, adding a teaspoon of oil between each batch if the pan looks dry.
Keep the first batch warm in a 200°F oven on a wire rack never on a plate, or the bottom will get soggy from its own steam.
Debunking Common Chicken Searing Myths
There is a long standing myth that searing meat "seals in the juices." Science has proven this false many times over. Searing actually creates flavor through the Maillard reaction, but the meat still loses moisture as it cooks.
The real way to keep chicken juicy is to not overcook it and to let it rest for five minutes after it leaves the heat.
Another common misconception is that you need an inch of oil to get a "fried" texture. In reality, a thin layer of fat is all you need if the surface of the meat is properly prepared.
A heavy dredge and high heat will create a shattering crust with surprisingly little oil, making this a much lighter option than deep frying.
Storing Leftovers and Reducing Waste
Leftover pan-fried chicken is a gift for tomorrow's lunch. It stays good in the fridge for up to 3 days when kept in an airtight container. To keep the crust from getting too soft, I usually store the sauce separately and pour it over the meat only after reheating.
- Fridge: Store for 3-4 days. Reheat in a skillet or air fryer at 350°F for 3 minutes to restore the crunch.
- Freezer: You can freeze the cooked cutlets for up to 2 months. Thaw overnight in the fridge before reheating.
- Zero Waste Tip: Don't throw away the lemon rinds! Toss them into a jar of white vinegar to create a natural, grease cutting kitchen cleaner, or use the zest to brighten up a side of steamed broccoli.
If you have a lot of leftovers and want to change the flavor profile entirely, these cutlets can be chopped up and used in an Instant Pot Shredded Chicken recipe style preparation by tossing them into a soup or a hearty salad.
Professional Plating and Garnish Ideas
We eat with our eyes first, and golden chicken can sometimes look a bit "brown and beige." To break that up, I love using high contrast garnishes. A final sprinkle of fresh parsley is classic, but a few thin slices of fresh lemon placed directly on the warm chicken add a visual pop and a fresh scent that hits the table before the first bite.
To Brighten the Plate
Try serving the chicken on a bed of vibrant greens or alongside a bright vegetable like roasted red peppers. When you pour the pan sauce, don't just dump it over the top. Spoon it carefully over the center of the meat, letting it drizzle down the sides so some of that crispy flour coating remains visible and dry.
This preserves the textural contrast between the silky sauce and the crunchy crust.
Decision Shortcut for Success
- If you want a thicker sauce, whisk in an extra half tablespoon of cold butter right before serving to create a "beurre monté" effect.
- If you want a deeper crust, add one tablespoon of cornstarch to your flour mixture for extra crunch.
- If you want more tang, swap half the chicken broth for a dry white wine like Pinot Grigio.

pan-fried Chicken Recipe FAQs
What is the best way to pan fry chicken?
Pat it completely dry first. Surface moisture causes steaming instead of searing. Use medium high heat and don't overcrowd the pan for a golden, crispy crust.
What's the secret to good fried chicken?
It's all about temperature and dryness. Ensure your chicken is bone dry, use a heavy skillet that holds heat well, and don't lower the heat too much once the searing begins. This allows for proper Maillard reaction and a shattering crust.
What is the best seasoning for pan-fried chicken?
A simple blend of salt, pepper, garlic powder, and smoked paprika works wonders. These ingredients enhance the natural chicken flavor and contribute to a beautiful golden brown color. If you enjoyed the savory depth here, see how we build flavor in our Chicken Gyros Recipe Authentic AthenianStyle with Tzatziki Sauce.
How long does it take chicken to cook in a frying pan?
Typically 6-8 minutes per side for thinner cutlets. This depends on thickness, but aim for an internal temperature of 165°F. Thicker pieces will require more time, so always check with a thermometer.
Is it okay to pan fry chicken with the skin on?
Yes, and it helps keep the meat moist. Skin-on chicken will render its own fat, contributing to a crispier exterior and juicier interior, much like the crispy texture achieved in our Fried Tofu Achieve the Ultimate Golden Crispy Texture where surface crispness is key.
Can I reuse the pan drippings for a sauce?
Absolutely, this is where much of the flavor comes from. Deglaze the pan with broth or wine after removing the chicken, scraping up the browned bits (fond) to create a rich, savory pan sauce.
How do I prevent my chicken from sticking to the pan?
Ensure the pan is hot and properly oiled before adding the chicken. If your chicken is sticking, it likely means the pan isn't hot enough or you tried to move it too soon. Let it sear undisturbed for a few minutes to develop a crust that will naturally release.
pan-fried Chicken
Ingredients:
Instructions:
Nutrition Facts:
| Calories | 232 kcal |
|---|---|
| Protein | 27.1 g |
| Fat | 10.2 g |
| Carbs | 6.6 g |
| Fiber | 0.4 g |
| Sugar | 0.3 g |
| Sodium | 675 mg |
