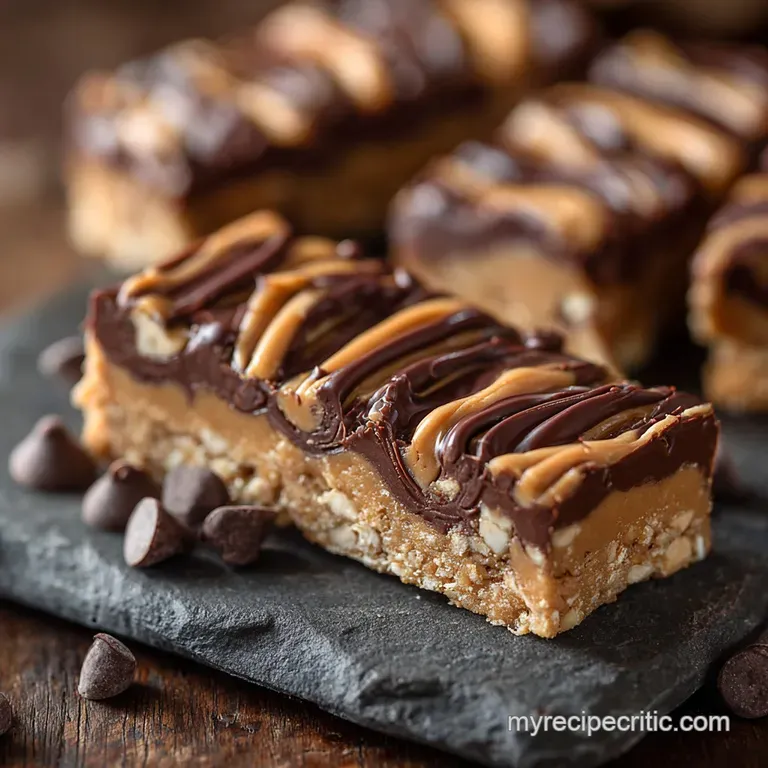
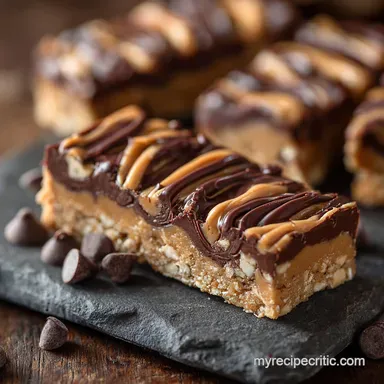
Homemade Protein Bars the Ultimate Nobake Peanut Butter Chocolate Chip Recipe

- Escape the Cardboard: Why You Need These No and Bake Energy Treats
- The Essential Pantry Items for Your Power Snacks
- Mixing Mastery: Simple Steps to Crafting the Ultimate Bar Base
- Elevate Your Bars: Advanced Tips and Flavor Customization
- Troubleshooting and FAQs for Perfect No and Bake Results
- Recipe FAQs
- 📝 Recipe Card
Escape the Cardboard: Why You Need These No and Bake Energy Treats
I’ve been there. You walk out of the gym, famished, and grab a $4 "healthy" protein bar from the checkout aisle. You bite into it, and you realize it tastes suspiciously like sweetened, artificially flavored cement. It’s rough. My friends, we deserve better fuel. We deserve these homemade protein bars.
I first started tinkering with this homemade protein bars recipe because I was trying to save cash, but I stayed for the control. Honestly, the ability to control the sugar and the ingredients is a game and changer for healthy snack recipes.
This specific version is our ultimate no and bake peanut butter chocolate chip bar. It takes 15 minutes of actual work, tastes like dessert, and is built for busy life.
Comparing Cost vs. Quality of Store and Bought Bars
Let’s be real. If you eat one high and quality protein bar every day, you are spending well over a hundred bucks a month. A hundred dollars! Making your own batch of easy homemade protein bars cuts that cost in half, minimum, even using fancy ingredients.
But it’s not just the money. It’s the ingredient deck. If I can't pronounce half the stuff on the label, I'm probably going to pass. When you make homemade protein bars with protein powder yourself, you know exactly what’s going in. Simple. Effective.
The Secret to Fudge and Like Density Without Baking
So, how do we get that satisfying chewiness without baking them into dry bricks? It's a two and part trick.
First, we are leaning heavily on quick and cooking rolled oats and the binding power of natural peanut butter and maple syrup. The ratio here is sacred; it provides that dense, fudgy base. Second, and this is the most crucial step, is the press .
I made a batch once where I just patted the mixture lightly into the pan. It was a disaster. Every bar crumbled into a pile of expensive granola the second I picked it up. You have to press it down with serious effort. Use the bottom of a glass or a measuring cup. Seriously, put your weight into it.
That compression is what gives you that perfect, sturdy homemade protein bar.
Why This Recipe Makes the Best Homemade Protein Bars
This recipe for homemade protein bars no bake is perfect because it’s endlessly adaptable. We are using standard kitchen staples, so you don't need a trip to a specialty health food store. Plus, they hold up beautifully.
They don’t melt instantly if you take them hiking, and they are fantastic for meal prep. Want homemade protein bars low calorie? Adjust the maple syrup down and use sugar and free chocolate chips. You are the boss here.
The Essential Pantry Items for Your Power Snacks
We are keeping this super streamlined. You probably have most of this stuff right now, which is the beauty of it. We’re mostly focused on the oats, the binding liquid, and the powder.
Choosing the Right Protein Powder for Maximum Flavor
This is non and negotiable: the taste of your powder dictates the taste of your bar. If your powder tastes chalky mixed with water, it will taste chalky mixed with peanut butter. Fact.
I always recommend a high and quality vanilla whey (or vanilla plant and based blend).
- Whey: Absorbs liquid fast but sometimes gets sticky. Great texture.
- Casein: Absorbs slowly and makes a beautiful, doughy consistency. A little pricy, but amazing for these types of bars.
- Plant and Based: Usually absorbs the most liquid. If you use pea protein, you might need to increase your liquid binder (maple syrup or water) by a tablespoon or two.
A Quick Look at Required Kitchen Tools (Mixing Bowl and Pan)
You truly only need two things here: a big, sturdy mixing bowl and an 8x8 pan lined with parchment paper. That’s it. No stand mixer required. No oven. We are low and maintenance chefs today. The only other tool you really need is patience while they chill. That’s always the hardest part for me.
Ingredient Swaps and Substitutions for Allergies
One of my favorite things about healthy snack recipes is how flexible they are. If peanuts are a no and go, or you just prefer a different texture, swapping the nut butter is easy.
| If You Need to Swap... | Try This Instead... | Crucial Note |
|---|---|---|
| Peanut Butter | Almond or Cashew Butter | Ensure it is creamy and natural (oil should separate). |
| Maple Syrup | Brown Rice Syrup | This will make the bars significantly firmer/chewier. |
| Oats | Crisped Rice Cereal | For a lighter, crunchier bar (like homemade protein bars for kids). |
Related Recipes Worth Trying
- The Best Homemade Pasta Recipe Fresh Tagliatelle with Brown Butter — Learn how to make fresh pasta from scratch This simple pasta dough transforms into silky tagliatelle tossed in nutty brown butter and crispy sage Pure...
- Foolproof Homemade Caramel Dip Recipe Liquid Gold for Apple Slices — Skip the shopbought jar This easy Caramel Dip uses the French method for rich velvety perfection Its the ultimate Caramel Dipping Sauce for fruit and desserts
- Homemade Caramel Dip The Silky Salted Butter Recipe — Stop buying jars Our ultimate homemade caramel dip recipe is deep buttery and perfectly salted Learn how to make caramel dip without crystallising Perfect...
Mixing Mastery: Simple Steps to Crafting the Ultimate Bar Base
This is where we transition from dry ingredients into that gorgeous, thick dough. Follow the steps, trust the process, and don't panic if it looks too crumbly at first.
Stage One: Melting and Combining Wet Components
The key to seamless mixing is making sure your binders are friendly. If your peanut butter is stiff and cold, you’re going to be fighting it for 10 minutes.
Grab your peanut butter and maple syrup and put them in a microwave and safe bowl. Give them 30 seconds. You don't want them boiling hot, just warm enough to be runny and willing to mix. Stir them together until they are one smooth, shiny liquid, then add the vanilla.
This liquid foundation is what makes our homemade protein bars hold together.
Stage Two: Folding in Dry Ingredients and Chocolate Chips
Now, in your big mixing bowl, you’ve got your oats, protein powder, flaxseed, and salt. Pour the wet mixture right on top.
Start stirring with a wooden spoon or a sturdy spatula. It will look like a dry, crumbly mess at first. Keep folding it over. Eventually, the wet mixture will coat the dry stuff, and you’ll get a thick, heavy dough.
If, after two minutes of intense mixing, the mixture still won't come together and looks like dry sand, add a tablespoon of water or milk. Mix. If it still needs it, add one more. Stop there. You want stiff, not wet.
Once the dough is uniform, fold in those mini chocolate chips. I prefer mini ones because they distribute better in the dough and you get chocolate in every single bite.
Pressing for Perfection: Getting That Uniform Thickness
Transfer the whole batch to your parchment and lined 8x8 pan. Now, for the workout.
Use the bottom of a clean measuring cup and start pressing from the middle outward. You must press and compact the mixture firmly . It should look smooth, even, and almost dense before it even hits the fridge. If you can see gaps or air pockets, you haven't pressed hard enough.
This step is the difference between perfection and crumbles.
Elevate Your Bars: Advanced Tips and Flavor Customization
You’ve mastered the base. Ready to get fancy?
Here are a few quick tips I use to really maximize flavor:
- Salt Flake Finish: Before you stick the pan in the fridge, sprinkle a few pinches of flaky sea salt (like Maldon) over the top. It looks professional and that salt/sweet contrast is heavenly .
- The Glaze Game: Instead of folding the chocolate chips in, melt 1/4 cup of dark chocolate chips with 1 teaspoon of coconut oil, and drizzle it artfully over the compressed bars right before chilling.
- Nutty Crunch: Add 1/4 cup of finely chopped pecans or walnuts to the dry mix for some texture variation. This makes the easy homemade protein bars feel seriously gourmet.
Troubleshooting and FAQs for Perfect No and Bake Results
Every time I share this recipe, I get the same questions. Let’s tackle the common pitfalls right now.
Making Mini Energy Bites vs. Full and Sized Bars
You absolutely can make mini energy bites! If you want small spheres instead of bars, skip the 8x8 pan altogether. Once your mixture is ready (after Stage Two), scoop out tablespoon and sized portions and roll them tightly between your palms. Place them on a lined sheet tray and chill.
They set up faster, usually in about 45 minutes.
Optimizing Shelf Life: Best Storage Practices for Homemade Protein Bars
These keep surprisingly well, but they need to stay cold.
- Fridge: Wrap them individually in plastic wrap (or reusable beeswax wraps, if you're fancy) and store them in an airtight container in the fridge for up to 10 days.
- Freezer: For long and term storage (perfect for prepping lots of healthy snack recipes), wrap them tightly and place them in a freezer bag. They freeze beautifully for up to three months. Just pull one out the night before you need it.
Calculating Nutrition and Calorie Breakdown (Per Bar)
I included an estimated breakdown earlier, but remember that the exact nutritional label for your homemade protein bars with protein powder relies heavily on your specific ingredients. Are you using a low and sugar syrup? Is your peanut butter natural or commercial?
If you are tracking macros closely, take the ingredients and plug them into an online calculator after you’ve cut the batch into 12 bars. It’s the only way to be totally sure.
Solving the ‘Too Sticky’ or ‘Too Crumbly’ Dilemma
If your dough is too sticky, you probably added too much syrup or didn't use enough protein powder/oats. Fix it by adding a tablespoon of extra dry ingredients (oats or powder) until it stiffens.
If it’s too crumbly, you didn't add enough liquid. This is often the case when people try to make homemade protein bars without protein powder (which is a dry binder). Add 1 teaspoon of water or milk at a time until the dough holds when you squeeze it.
Scaling the Recipe: Doubling and Tripling Batches Easily
These measurements scale perfectly. If you want to double the batch, use a 9x13 inch pan instead of the 8x8. Just double all the ingredients. The pressing time will be the same, but the chilling time might need an extra hour to ensure the middle is completely set before cutting.
Can I Use a Different Nut Butter?
Yes, absolutely. But be warned: consistency matters. If you use a very thick, stabilized commercial peanut butter (like Jif or Skippy), you might need to add an extra tablespoon of maple syrup or water, as those types of nut butter don't release their oils as easily as natural varieties.
Stick to natural, well and stirred butter for the smoothest results.

Recipe FAQs
Right, how long do these Homemade Protein Bars actually keep for?
They keep brilliantly! Store them wrapped individually in an airtight container in the fridge for up to 10 days, or pop them in the freezer for up to three months for a proper meal prep stash.
My bars are crumbling to bits! What’s the secret to keeping them solid?
The key is serious compaction you need to press the mixture down very firmly into the pan when shaping it, using muscle! Also, ensure you haven't skimped on the binding agents like the ground flaxseed or chia seeds, as they provide essential structure.
Is there a way to cut down on the maple syrup or sweetener without ruining the texture?
Maple syrup is the primary wet binder, so you can't ditch it entirely, but you can swap half of it for a firmer binder like brown rice syrup to reduce overall stickiness. You can also boost the binding power by adding an extra tablespoon of ground flaxseed instead of relying purely on the syrup.
I only have whey protein; will that still work, or should I use plant based powder?
Absolutely, use whatever powder you prefer, but be mindful of absorption; plant based proteins typically absorb more liquid than whey. If using plant protein, you might need to add a touch more liquid (milk or water) to reach that manageable dough consistency mentioned in the recipe.
I fancy a change from peanut butter and chocolate; what’s another good flavour combination?
Give the "Tropical Coconut" variation a whirl; swap the peanut butter for almond butter and use shredded coconut instead of chocolate chips for a delicious, sunny flavour profile perfect with a mid-morning cuppa.
Nobake Homemade Protein Bars Recipe
Ingredients:
Instructions:
Nutrition Facts:
| Calories | 275 kcal |
|---|---|
| Fat | 13 g |
| Fiber | 3.5 g |
