No Bake Protein Balls with Oats
- Time: Active 15 minutes, Passive 30 minutes, Total 45 minutes
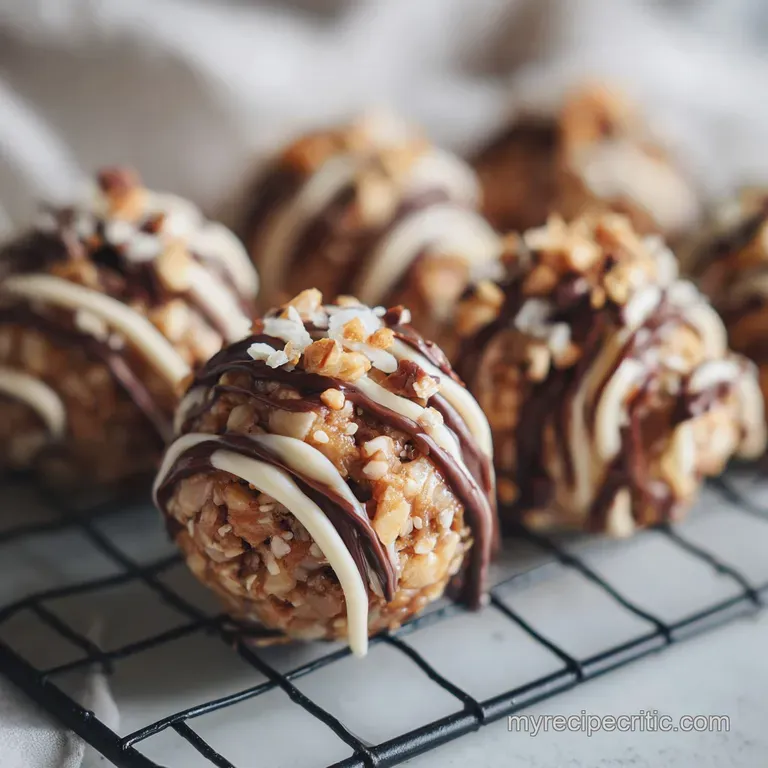
- Flavor/Texture Hook: Chewy rolled oats meet velvety peanut butter and snappy dark chocolate chips.
- Perfect for: Post workout fuel, lunchbox treats, or a quick grab-and-go breakfast for busy mornings.
- Creating Your Perfect Protein Balls
- Critical Recipe Specs and Metrics
- Science Behind Every Ingredient Selection
- Tools Needed for Texture Consistency
- Systematic Steps for Balanced Bites
- Professional Advice for Common Pitfalls
- Variations for Every Craving Type
- Storage and Low Waste Solutions
- Styling for High Impact Visuals
- Solving Your Most Difficult Problems
- Recipe FAQs
- 📝 Recipe Card
You know that feeling when the 3 p.m. slump hits and your brain starts demanding something sweet, but you also need to actually stay awake for the rest of the day? I used to reach for those "healthy" bars at the store, but honestly, they often taste like flavored chalk.
That is why I started making these protein balls at home, and let me tell you, it is a total game in terms of texture and flavor control.
I have spent months tweaking this specific ratio because I am obsessed with getting that perfect "fudgy but not sticky" bite. There was one time I added way too much honey and ended up with a literal puddle of oats, and another time I used too much powder and they were basically edible desert sand.
We are skipping all those mistakes today so you can get a win on the first try.
What you are getting here is a reliable, no fail method for creating protein balls that actually hold together and taste like a treat. We are talking about 126 calories of pure, sustaining energy that feels more like a cookie than a supplement.
Trust me, once you see how easy this is, you will never go back to the pre packaged stuff.
Creating Your Perfect Protein Balls
- Hygroscopic Binding
- The honey acts as a humectant, pulling moisture into the oats to soften them while creating a sticky matrix that prevents crumbling.
- Protein Denaturation
- When the protein powder meets the fats in the nut butter, it creates a stable emulsion that yields a velvety mouthfeel rather than a gritty one.
- Starch Hydration
- The 30 minute rest allows the rolled oats to absorb the liquid components, which is the secret to getting that perfect chew.
Mechanism: Lipid Emulsification. The fats in the creamy peanut butter coat the dry oat fibers, creating a moisture barrier that keeps the snack tender for days in cold storage.
Chef's Tip: To get a deeper, more complex flavor, toss your 1 1/2 cups of Rolled Oats into the air fryer at 350°F for just 3 minutes. Shake the basket halfway through to ensure they toast evenly without burning.
This tiny bit of heat unlocks a nutty aroma that changes everything.
Critical Recipe Specs and Metrics
When we talk about making a great protein balls recipe, precision actually matters more than you might think for a no bake snack. I have found that if the internal temp of your peanut butter is too low (like if it just came out of a cold pantry), it won't emulsify correctly with the honey.
Aim for a "room temp" peanut butter around 70°F for the easiest mixing.
| Feature | Fresh Homemade | store-bought Shortcut |
|---|---|---|
| Texture | Soft and chewy | Often hard or waxy |
| Preservatives | Zero | High (BHT/BHA) |
| Cost | ~$0.35 per ball | ~$1.50+ per ball |
1. The Oat Hydration Window
The 30 minute rest in the refrigeration area is not a suggestion, it is a requirement. Oats are like little sponges; if you roll them immediately, they will feel "pointy" and dry. Giving them time to hydrate ensures a cohesive bite.
2. The Emulsion Equilibrium
Mixing the honey and peanut butter together before adding the dry stuff is the key. You are creating a stable base. If you just dump everything in at once, you will get pockets of dry powder and clumps of honey.
3. Protein Selection Synergy
Not all powders are created equal. Whey tends to be more "sticky" when wet, while plant based proteins (like pea or soy) soak up significantly more liquid. If using a plant based powder, you might need that extra 1 tbsp of Almond Milk sooner than you think.
Science Behind Every Ingredient Selection
Choosing the right components is the difference between a "fine" snack and a "wow" snack. I always reach for Quaker Rolled Oats because they provide the best structural integrity for healthy protein balls. Quick oats tend to turn into mush, which we definitely want to avoid here.
| Ingredient | Science Role | Pro Secret |
|---|---|---|
| Rolled Oats (1 1/2 cups) | Complex Carb Base | Toast them first to deactivate enzymes that cause bitterness. |
| Natural Peanut Butter (1/2 cup) | Fat/Binder | Use "drippy" style for a smoother emulsion with the honey. |
| Honey (1/3 cup) | Liquid Sugars | Microwave for 5 seconds to lower viscosity for easier mixing. |
| Protein Powder (1/2 cup) | Structural Protein | Vanilla powder pairs better with honey than unflavored options. |
1. The Essential Binding Base
We are using Jif Natural Creamy Peanut Butter and Smucker's Honey as our primary glue. The natural oils in the peanut butter keep the balls supple. Similar to the way we balance fats in a Peanut Butter Oatmeal recipe, these two ingredients must be thoroughly whisked.
2. Natural Power Boost Elements
The 2 tbsp of Spectrum Ground Flaxseeds are not just for health. They act as a secondary binder. When flax meets liquid, it creates a "gel" that helps the no bake protein balls stay round and firm.
3. Optimizing Texture and Flavor
A pinch of Maldon Sea Salt (1/8 tsp) is mandatory. It cuts through the density of the protein powder and makes the dark chocolate chips (1/3 cup) pop.
For the liquid, I usually use Silk Unsweetened Almond Milk, but only if the dough feels like it is struggling to come together.
- 1 1/2 cups Rolled OatsWhy this? Provides the essential "chew" and keeps you full longer.
- 1/2 cup Natural Creamy Peanut ButterWhy this? The healthy fats act as the primary binder.
- 1/3 cup Honey or Maple SyrupWhy this? Adds sweetness and the necessary stickiness for shaping.
- 1/2 cup Protein PowderWhy this? Adds the "power" and helps dry out the wet ingredients.
- 2 tbsp Ground Flaxseeds or Chia SeedsWhy this? Adds fiber and helps the balls hold their shape.
- 1/3 cup Dark Chocolate ChipsWhy this? Because every snack needs a bit of chocolate.
- 1 tsp Vanilla ExtractWhy this? rounds out the flavors and adds a bakery style aroma.
- 1/8 tsp Sea SaltWhy this? Balances the sugar and enhances the peanut flavor.
- 1 tbsp Water or Almond MilkWhy this? Adjusts the moisture level if the dough is too crumbly.
Tools Needed for Texture Consistency
You do not need a lot of fancy gear for protein balls with oats, but having the right basics makes the process way less messy. I once tried to mix this with a regular spoon and nearly broke my wrist - the dough gets thick!
1. Two Essential Kitchen Tools
- Lodge Cast Iron Skillet (Optional): If you are toasting the oats on the stove instead of the air fryer, this provides the most even heat.
- KitchenAid Hand Mixer: While you can do this by hand, a quick pulse with a mixer ensures the protein powder is completely integrated without any hidden dry pockets.
Chef's Tip: Use a small cookie scoop (about 1 tbsp size). It ensures every ball is the same size, which is great for tracking calories and also makes them look like they came from a high end cafe.
| Original Ingredient | Substitute | Why It Works |
|---|---|---|
| Peanut Butter (1/2 cup) | Almond Butter (1/2 cup) | Similar fat content but offers a more subtle, nutty flavor. |
| Honey (1/3 cup) | Maple Syrup (1/3 cup) | Provides a vegan friendly stickiness. Note: Slightly thinner than honey. |
| Dark Chocolate Chips | Cacao Nibs | Adds a "crunch" and intense cocoa flavor without the extra sugar. |
Systematic Steps for Balanced Bites
Making easy protein balls is all about the order of operations. If you follow this flow, you will have 17 perfect servings every single time.
- Prep the wet base. In a large Pyrex mixing bowl, whisk together the 1/2 cup Peanut Butter, 1/3 cup Honey, 1 tsp Vanilla, and 1/8 tsp Sea Salt. Note: Whisk until the mixture looks like a smooth, shiny caramel.
- Add the protein. Fold in the 1/2 cup Protein Powder. Note: It will look very dry at first, but keep stirring until the powder is fully absorbed by the fats.
- Incorporate the fiber. Stir in the 2 tbsp Ground Flaxseeds. Note: These will start to absorb moisture immediately, thickening the base.
- Fold in the oats. Add the 1 1/2 cups Rolled Oats. Mix until every oat flake is coated in the peanut butter mixture.
- Check the hydration. If the mixture is too crumbly to hold a shape when squeezed, add the 1 tbsp Water or Almond Milk. Note: Add only a teaspoon at a time to avoid making it too sticky.
- Add the chocolate. Fold in the 1/3 cup Dark Chocolate Chips. Stir gently so they don't melt if your peanut butter was warm.
- Rest the dough. Cover the bowl and place it in the refrigeration area for 30 minutes. Wait until the oats feel softened and the dough feels firm.
- Scoop and roll. Use a cookie scoop to portion out 1 tbsp mounds. Roll between your palms until you hear a slight "suction" sound, indicating a tight, air free ball.
- Final set. Place the finished rounds on a tray lined with parchment paper.
- Store properly. Move them to an airtight container.
1. The Crucial Hydration Rest
Don't skip the rest! This is where the magic happens. The oats need that 30 minutes to pull the moisture from the honey. If you roll them now, they will fall apart tomorrow. It is a similar patience testing step to making a great Homemade Protein Bars recipe.
2. Portioning and Shaping Rounds
If the dough is sticking to your hands, lightly dampen your palms with water. This creates a tiny steam like barrier that prevents the sugars in the honey from clinging to your skin.
Professional Advice for Common Pitfalls
I have seen it all: balls that flatten into pancakes, balls that shatter like glass, and balls that are so sticky you can't get them out of the container. Most of these come down to the "wet to dry" ratio.
| Problem | Cause | Fix |
|---|---|---|
| Balls falling apart | Too many oats/dry powder | Add 1 tsp of water or extra honey and re mix. |
| Too sticky to roll | Too much liquid/honey | Add 2 tbsp of extra protein powder or oats. |
| Gritty texture | Powder didn't dissolve | Whisk the powder into the "wet" base first next time. |
1. Fixing The Crumbly Mess
If your protein balls with peanut butter look like granola, you likely used a very thick, "dry" style of peanut butter. The fix is easy: add 1 tablespoon of melted coconut oil. It adds the necessary lubrication to help the particles slide together and bind.
2. Managing Dough Temperature
If you are working in a hot kitchen, the chocolate chips might start to smear. If this happens, put the whole bowl in the refrigeration area for 10 minutes before you even try to add the chocolate. This keeps the "snap" of the dark chocolate intact.
3. Precision Checkpoints
- The Squeeze Test: When you press a handful of dough, it should hold the fingerprint without cracking.
- The Weight: Each ball should weigh approximately 28-30 grams (about 1 oz) for consistent 126 calorie portions.
- The Surface: A perfectly hydrated ball will have a slight sheen but won't leave a thick residue on your fingers.
Variations for Every Craving Type
Once you master the base energy balls recipe, you can start getting creative. I love making protein balls for kids by swapping the dark chocolate for mini M&Ms or adding a half teaspoon of cinnamon for a "snickerdoodle" vibe.
1. Balls Without Protein Powder
If you are looking for protein balls without protein powder, you can swap the 1/2 cup of powder for an additional 1/2 cup of almond flour or finely ground oats. You will lose about 20g of protein across the whole batch, but the texture remains incredible.
2. Allergen Friendly Ingredient Alternatives
For a nut free version, use Sunflower Seed Butter (SunButter). It has a very similar fat profile to peanut butter, though it might turn a slightly green tint due to the chlorogenic acid reacting with the baking soda (if you were baking them, but here it just adds a unique earthy flavor).
3. The "Kid Friendly" Swap
Try using white chocolate chips and dried cranberries. It tastes exactly like a Thanksgiving cookie but keeps the healthy protein balls status. It is a great way to sneak some flax and oats into a picky eater's diet.
Storage and Low Waste Solutions
These little guys are the kings of meal prep. Because they don't have eggs or dairy (if you use maple and plant based milk), they are very stable.
- Refrigeration: Store in an airtight container for up to 10 days. The texture actually improves after the first 24 hours.
- Freezer: These freeze beautifully! Put them on a tray for 1 hour until hard, then toss them into a freezer bag for up to 3 months. You can eat them straight from the freezer for a "fudge" texture.
- Zero Waste: If you have a few leftover oats at the bottom of the bag that aren't enough for a batch, pulse them in a blender and use them as a "dusting" for the outside of the balls to prevent sticking.
Chef's Note: If you find the last few balls in the container are getting a bit dry, crumble them over a bowl of Greek yogurt. It turns into a high protein granola substitute that is way better than anything in a box.
Styling for High Impact Visuals
If you are bringing these to a gym session or a potluck, you want them to look as good as they taste. A pile of brown balls isn't the most appetizing thing in the world without a little help.
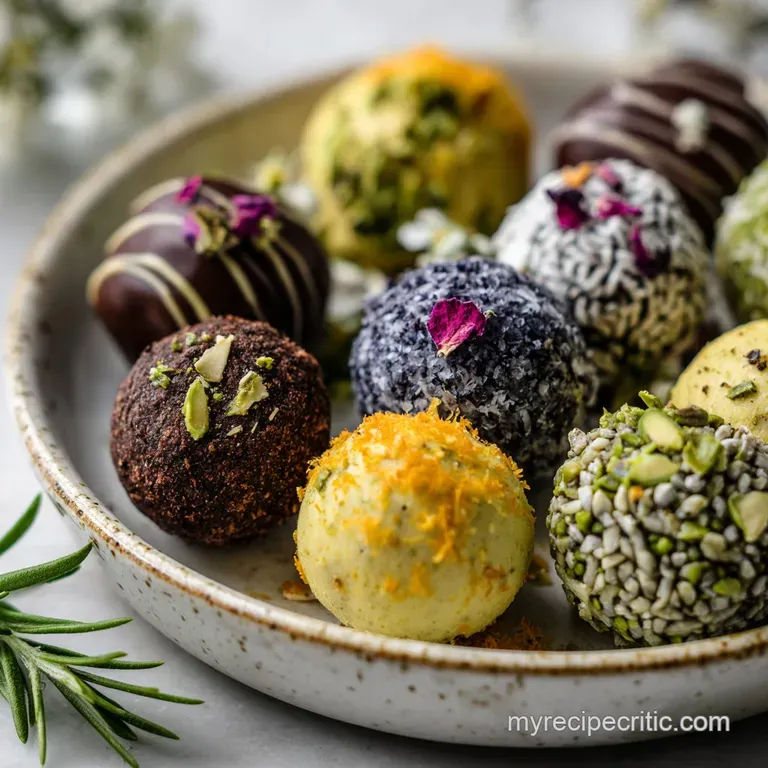
1. The Professional Dusting Technique
Roll the finished protein balls in a shallow bowl of unsweetened cocoa powder or shredded coconut. It provides a beautiful matte finish and prevents them from sticking together in the container.
2. The Uniformity Rule Applied
Use a scale if you have one. If every ball is exactly the same size, they look much more professional. Arrange them in neat rows on a platter rather than a heap. Much like the presentation of a Bread Buns Recipe, the visual appeal starts with consistent shaping.
Solving Your Most Difficult Problems
Let's address the elephant in the room: the myths about no bake protein balls.
Myth 1: "You need a food processor to make these." The Truth: Actually, using a food processor can over process the rolled oats into flour, resulting in a dense, gummy ball. Mixing by hand keeps the oat structure intact for a much better "chew."
Myth 2: "Raw oats are hard to digest." The Truth: The 30 minute hydration period effectively "cold soaks" the oats, breaking down some of the starches and making them much easier on your stomach than eating dry oats.
| Problem | Cause | Fix | Pro Tip |
|---|---|---|---|
| Balls are too hard | Too much protein powder | Add 1 tsp honey | Microwave for 5 secs before eating. |
| Chocolate chips falling out | Dough is too dry | Add 1 tsp almond milk | Use mini chips for better "grip". |
| Odd aftertaste | Low quality powder | Use a different brand | Add extra vanilla or cinnamon. |
If you are looking for a quick decision: If you want them sweeter, use Honey. If you want them softer, add 1 tbsp extra Peanut Butter. If you want them sturdier, add 2 tbsp extra Oats.
At the end of the day, these protein balls are about making your life easier. They are a "clear win" in my kitchen because they require zero oven time and provide a massive payoff in energy.
Give them a shot this week, and don't be afraid to get your hands a little messy during the rolling process - it is part of the fun! Once you have that first bite of chewy oats and dark chocolate, you will see exactly why this is my go to snack. Happy rolling!

Recipe FAQs
How to make protein balls?
Yes, the standard method involves mixing dry ingredients (protein powder, oats) with wet binders (nut butter, honey). Ensure the wet components are thoroughly emulsified before adding the dry materials to guarantee even coating and a stable dough consistency.
How to make protein balls with oats?
Yes, rolled oats are the preferred base ingredient for texture. Use rolled (old-fashioned) oats rather than quick oats, as the latter can become too mushy after resting. Giving the mixture 30 minutes to rest allows the oats to hydrate properly for the perfect chew.
How to make protein balls without peanut butter?
Yes, you can substitute with other nut or seed butters. Almond butter or sunflower seed butter work well as direct 1:1 replacements because they offer similar fat content needed for binding. If you master the fat ratio here, the same principle applies to getting the perfect spread in our Cookie Dough Pretzel Bites The Ultimate Sweet Salty Treat.
How to make protein balls without protein powder?
Yes, but protein content and structure will change. Swap the powder with equal parts of ground nuts (like almond flour) or an extra half cup of finely ground oats. You may need to increase your main binder slightly to compensate for the loss of powder's drying properties.
How to make protein balls less dry?
Yes, dryness usually signals too much powder or not enough liquid binder. Next time, add 1 extra teaspoon of honey or use slightly less protein powder, ensuring you incorporate any added liquid slowly until the dough just passes the "squeeze test."
Can I make these vegan?
Yes, substitution is straightforward. Simply replace the honey with pure maple syrup, which functions as an excellent vegan sticky binder. If you are using whey protein, swap that for a pea or soy isolate to keep the entire batch plant based.
What is the secret to a non-crumbly ball?
The crucial step is the 30-minute rest period in the refrigerator. This allows the oats to fully hydrate and absorb the moisture from the honey, transforming the mixture from crumbly to cohesive.
Mastering this hydration window is similar to the time allowed for doughs to rest before baking for the best texture.
No Bake Protein Balls Recipe

Ingredients:
Instructions:
Nutrition Facts:
| Calories | 126 calories |
|---|---|
| Protein | 5.8 g |
| Fat | 5.8 g |
| Carbs | 14.3 g |
| Fiber | 1.7 g |
| Sugar | 7.2 g |
| Sodium | 48 mg |
