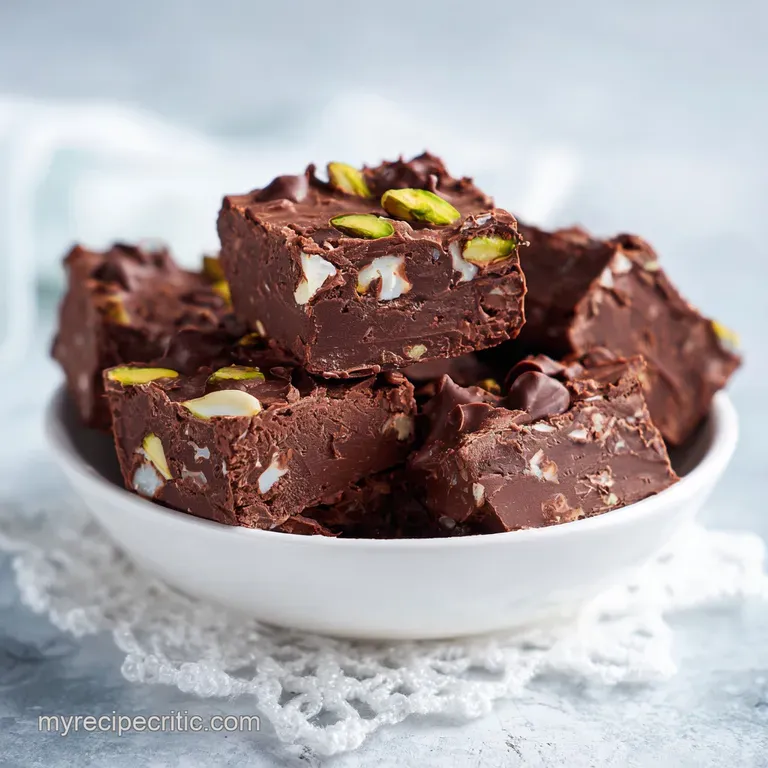
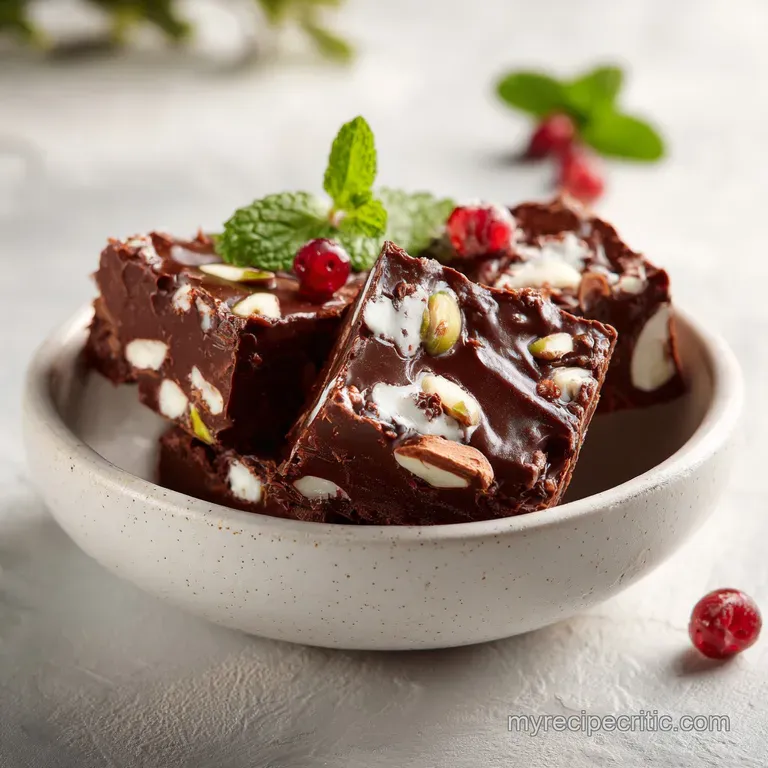
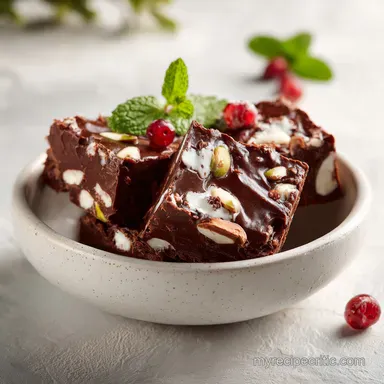
Fudgy Dark Chocolate Rocky Road Squares
- Time: Active 15 minutes, Passive 120 minutes, Total 135 minutes
- Flavor/Texture Hook: Velvety dark chocolate with a salty, nutty crunch
- Perfect for: Last minute gifting, bake sales, or a low effort weekend treat
- Essential Timings and Recipe Specs
- Understanding Each Essential Ingredient Choice
- Simple Tools for This Bake
- Crafting the Batch Step by Step
- Solving Texture and Cutting Problems
- Customizing Your Favorite Mix Ins
- Smart Storage and Freezing Tips
- Creative Ideas for Serving Squares
- Recipe FAQs
- 📝 Recipe Card
You know that feeling when you walk into a kitchen and the air just feels heavy with the scent of deep, dark cocoa? That is exactly what happens the second you start melting down the 400g of dark chocolate for this batch.
It is an earthy, almost toasted aroma that hits you before you even see the glossy pool forming in the bowl. I remember making my first tray of this for a neighbor's housewarming, and the smell was so distracting I almost forgot to grease the pan. Honestly, that scent is half the reason I keep making it.
The payoff here is huge for such a quick win. In just 15 minutes of hands on work, you create something that looks like it came out of a boutique confectionery shop. But the real magic is in the texture.
Instead of a rock hard block that threatens your dental work, this version uses light sweetened condensed milk to create a fudge like matrix. It holds everything together but has this incredible, velvety give when you bite into it. No more fighting with a knife or having the whole square shatter into a million crumbs.
We are aiming for a specific contrast here. You have the 150g of wholemeal digestive biscuits providing a grainy, wheaty crunch, paired with the 100g of roasted salted almonds that give you that sharp, savory pop. It is all about those layers of sensation.
One minute you are hitting a squishy marshmallow, and the next you have the tart, leathery chew of a dried cranberry. It is balanced, not just sweet, and that is why this particular recipe works so well. Trust me, once you smell those almonds hitting the warm chocolate, you will see why I am obsessed.
How the Fudge Stays Flexible
- Fat Stabilization: The 15g of refined coconut oil prevents the dark chocolate from becoming too brittle once chilled, allowing for a clean slice.
- Sugar Suspension: Sweetened condensed milk acts as an emulsifier, keeping the cocoa solids and fats from separating during the setting phase.
- Moisture Barrier: Letting the chocolate cool to 90°F before adding inclusions prevents the marshmallows from dissolving and the biscuits from absorbing liquid.
- Salty Equilibrium: The 0.5 tsp of sea salt breaks the surface tension of the sugar, making the chocolate flavor feel more intense and less cloying.
| Method | Time | Texture | Best For |
|---|---|---|---|
| No Bake (This Recipe) | 135 minutes | Velvety and fudgy | Daily treats and gifting |
| Boiled Toffee Style | 150 minutes | Hard and brittle | Long term shelf stability |
| White Chocolate Base | 125 minutes | Soft and creamy | Children's parties |
The difference between a fast no bake method and the classic boiled toffee version is all down to the snap. While boiled versions can be teeth shattering, this method focuses on a controlled melt.
This ensures that the 70% cacao retains its complex flavor profile without being scorched by high heat, resulting in a much smoother mouthfeel.
Essential Timings and Recipe Specs
When we talk about making a tray of treats, we usually think about hours in the kitchen, but this is a different beast entirely. You are only actually "cooking" for 15 minutes. The rest of the time is just the fridge doing the heavy lifting while you go about your day.
I usually get the chocolate melting while I am making a cup of coffee, and by the time I have finished my drink, the tray is already tucked away in the fridge to set.
The 120 minutes of cooling time is the one part you cannot rush. I have tried to stick a tray in the freezer to speed things up before, and let me tell you, it is a mistake. The outside gets icy while the middle stays soft, and you lose that beautiful, consistent snap.
Patience is your best friend here. If you give it the full 135 minutes from start to finish, the squares will behave perfectly when the knife hits them.
Component Analysis
| Ingredient | Science Role | Pro Secret |
|---|---|---|
| Dark Chocolate (70%) | Structural Base | Use high-quality bars over chips for a better melt |
| Condensed Milk | Texture Softener | Light versions keep the bars from being too heavy |
| Coconut Oil | Gloss Agent | Refined oil ensures no coconut flavor interferes |
It is fascinating how three simple ingredients chocolate, milk, and oil create such a complex foundation. The 400g of chocolate provides the "backbone," but without the 200g of light sweetened condensed milk, you would just have a giant bar of plain chocolate.
The milk introduces just enough moisture to keep the cocoa fats in a semi solid state at room temperature. This is what gives us that signature "fudge" feel that separates a good treat from a mediocre one.
Understanding Each Essential Ingredient Choice
- 400g dark chocolate (70% cacao): This provides the deep, bitter base that balances the sugar. Why this? High cacao content ensures the bars aren't overly sweet or cloying.
- 200g light sweetened condensed milk: This is our secret weapon for that velvety, biteable texture. Why this? It creates a fudge like consistency that won't shatter when sliced.
- 15g refined coconut oil: Adds a beautiful sheen and helps the chocolate stay smooth. Why this? It lowers the melting point slightly for a better mouthfeel.
- 0.5 tsp sea salt: Essential for waking up the cocoa flavors and balancing the fruit. Why this? Salt cuts through the richness and highlights the nutty notes.
- 100g marshmallows (sugar-free/vegan): These provide the essential "pillowy" contrast in every bite. Why this? They offer a soft texture that offsets the crunchy biscuit chunks.
- 150g wholemeal digestive biscuits: These hold their shape better than standard crackers. Why this? The wheaty flavor pairs perfectly with dark chocolate and sea salt.
- 100g roasted salted almonds: For that sharp, earthy crunch and a hit of extra salt. Why this? Almonds stay crisp longer than softer nuts like walnuts.
- 50g dried cranberries: Adds a necessary tartness to cut through the heavy chocolate. Why this? The chewy texture provides a different sensory experience from the biscuits.
| Original Ingredient | Substitute | Why It Works |
|---|---|---|
| Digestive Biscuits | Graham Crackers | Similar honeyed notes and sturdy, crunchy texture |
| Cranberries | Dried Apricots | Provides the same tartness but with a softer chew |
| Roasted Almonds | Salted Pistachios | Maintains the salt balance with a more buttery flavor |
If you find yourself out of almonds, don't panic. Any roasted nut will do the trick, though I find that pistachios add a gorgeous pop of green that looks stunning against the dark chocolate.
The key is to keep that 100g weight consistent so the ratio of "stuff" to "chocolate" stays exactly where it needs to be for the bars to hold together.
Simple Tools for This Bake
You don't need a high end pastry kitchen to pull this off, which is one of the reasons I love it. An 8 inch square baking tin is the standard here. I once tried using a round cake tin, and while it tasted the same, cutting it into even squares was a nightmare.
Stick to the square tin if you can; it makes the final presentation much cleaner.
The only other big requirement is a good heat proof glass bowl. You want something that can sit over a pot of simmering water without touching the liquid. This "double boiler" method is the safest way to melt your 400g of chocolate. If you go the microwave route, just be careful.
Chocolate can go from silky to burnt in about five seconds, and once it's scorched, there is no coming back from that bitter, grainy mess.
Chef's Tip: Use a silicone spatula to fold in your inclusions. Unlike a wooden spoon, the silicone won't stick to the marshmallows or trap bits of biscuit in the grain. It allows you to scrape every last bit of that velvety chocolate base out of the bowl and into the tin.
Finally, make sure you have a sharp chef's knife ready for the end. A dull blade will crush the marshmallows and shatter the biscuits instead of slicing through them. If you want those clean, professional looking edges, the knife is your best friend.
Some people like to warm the blade under hot water before slicing, which can help glide through the 200g of condensed milk fudge base even more smoothly.
Crafting the Batch step-by-step
- Prepare the tin. Line an 8 inch square baking tin with parchment paper, ensuring an overhang on two sides for easy lifting later. Note: This prevents the base from sticking to the metal.
- Melt the base. Combine the 400g dark chocolate, 200g condensed milk, and 15g coconut oil in a glass bowl over a double boiler. Stir until the mixture is glossy and silky.
- Season the chocolate. Remove the bowl from the heat and stir in the 0.5 tsp sea salt. Note: Adding salt now ensures it dissolves evenly throughout the warm mixture.
- Cool the mixture. Allow the chocolate to sit until it reaches 90°F (32°C). Wait until it feels just barely warm to the touch.
- Prep the crunch. Break the 150g of digestive biscuits into 1cm chunks by hand. Note: Keeping chunks larger prevents them from turning into dust and getting lost.
- Fold in inclusions. Add the biscuits, 100g of marshmallows, 100g of roasted almonds, and 50g of cranberries to the bowl. Fold gently until every piece is coated in chocolate.
- Fill the tin. Transfer the mix into the prepared tin and press down firmly with a spatula. Look for air gaps along the edges and fill them in.
- Set the tray. Place the tin in the refrigerator for at least 120 minutes. Wait until the top feels firm and doesn't yield to light pressure.
- Remove and slice. Lift the parchment paper to pull the block out and place it on a cutting board. Slice into 16 large squares using a long, sharp knife.
- Final check. Look for the distinct layers of white marshmallow and golden biscuit. Ensure the edges are clean and the chocolate looks matte.
Solving Texture and Cutting Problems
The most common issue I hear about is the chocolate "seizing" or turning into a gritty paste. This usually happens if a single drop of water gets into your bowl while the 400g of chocolate is melting. Water and chocolate are mortal enemies.
If this happens, you can sometimes save it by whisking in a teaspoon of boiling water, but it's much easier to just be incredibly careful with your steam.
Another hurdle is the "soggy biscuit" syndrome. If you fold your 150g of digestives into the chocolate while it is still piping hot, they will act like little sponges and soak up the moisture from the 200g of condensed milk. This ruins that satisfying crunch.
By waiting for the chocolate to hit that 90°F sweet spot, you ensure the biscuits stay crisp and the marshmallows keep their shape instead of melting into a pink swirl.
Why the Bars Crumble
If your bars are shattering when you try to slice them, it's usually a temperature issue. Straight out of the fridge, the 15g of coconut oil is very firm. Let the tray sit on the counter for about 10 minutes before you grab the knife.
This gives the fats just enough time to soften, allowing the blade to glide through the marshmallow and biscuit layers without forcing them apart.
| Problem | Root Cause | Solution |
|---|---|---|
| Sticky Surface | Under chilled chocolate | Return to the fridge for another 30 minutes |
| Melted Marshmallows | Chocolate was too hot | Cool base to 90°F before adding inclusions |
| Grainy Texture | Scorched chocolate | Melt slowly over a double boiler, never direct heat |
Common Mistakes Checklist
- ✓ Never let the bottom of your glass bowl touch the simmering water in the double boiler.
- ✓ Ensure the 100g of roasted almonds are completely cooled if you toasted them yourself.
- ✓ Don't use a serrated knife; it will tear the marshmallows and create jagged edges.
- ✓ Pat the 50g of cranberries dry if they seem oily to ensure the chocolate adheres.
- ✓ Use refined coconut oil specifically to avoid a strong tropical flavor profile.
- ✓ Leave a significant parchment overhang to avoid "digging" the bars out of the tin.
Customizing Your Favorite Mix Ins
If you want to scale this recipe down for a smaller household, you can easily halve everything. Just use a smaller loaf pan instead of the 8 inch square tin. You'll still want to keep the 120 minute chilling time, though, as the thickness of the bars remains the same even if the total volume is less.
For halving the 0.5 tsp of salt, just use a generous pinch it's more about the flavor balance than a precise chemical reaction.
When scaling up for a big party, you can double the 400g of chocolate and the 200g of condensed milk, but be careful with the mix ins. If you add too many biscuits or nuts, there won't be enough chocolate "glue" to hold everything together.
I find that increasing the inclusions by 1.5x while doubling the base is the safest way to ensure the bars don't fall apart when handled.
Quick Decision Guide
- If you want a sweeter bar: Swap the dark chocolate for a 50/50 mix of dark and milk chocolate.
- If you want a nut free version: Replace the 100g of almonds with pumpkin seeds or extra biscuits.
- If you want it extra fruity: Double the 50g of cranberries and add some zest from half an orange.
Debunking Chocolate Myths
One thing people often get wrong is thinking they need to use "baking chocolate." In reality, those 400g of chocolate can be any high-quality bar you enjoy eating. In fact, standard eating chocolate often melts better because it has a higher cocoa butter content.
Just avoid very cheap compound chocolate, which uses vegetable fats instead of cocoa butter and will result in a waxy, flavorless finish.
Another myth is that you have to use tiny marshmallows. While the 100g of marshmallows look cute when they are small, you can absolutely use jumbo ones. Just snip them into quarters with a pair of kitchen shears.
The irregular shapes actually make the cross section of the sliced bars look more "rustic" and interesting, which I personally prefer for a homemade look.
Smart Storage and Freezing Tips
Because of the 200g of condensed milk and the 15g of coconut oil, these bars stay fresh much longer than a standard brownie. You can keep them in an airtight container in the fridge for up to 7 days.
I actually think they taste better on day two once the salt has had time to really penetrate the chocolate base and the flavors have fully melded together.
If you are a zero waste fan, don't throw away the biscuit crumbs at the bottom of the bag! Those 150g of digestives always leave behind some dust. Save those crumbs and sprinkle them over the top of the tray before it sets. It adds an extra layer of texture and ensures nothing goes to waste.
You can do the same with any leftover almond fragments or cranberry bits.
- Fridge: Store in a sealed container for 7 days.
- Freezer: Wrap individual squares in parchment and freeze for up to 2 months.
- Reheating: Don't! These are designed to be eaten cold or at room temperature.
- Scraps: Pulse any "ugly" edge pieces in a blender to use as a decadent ice cream topper.
Creative Ideas for Serving Squares
When it comes to serving these, I love leaning into the "sweet and salty" vibe. A tiny extra sprinkle of flaky sea salt on top of each square right before serving can really make the 70% cacao pop. If you are feeling fancy, you can even drizzle a little extra melted chocolate over the top in a zig zag pattern.
It makes the 16 servings look like they came straight from a high end bakery.
If you are gifting these, I highly recommend wrapping them in small squares of wax paper tied with kitchen twine. It prevents the 100g of marshmallows from sticking to the packaging and looks incredibly charming.
Because they are so rich, one square is usually plenty for one person, so a box of four makes a really substantial and thoughtful gift for a friend or a teacher.
What Pairs with Chocolate?
- Coffee: A sharp, acidic espresso cuts through the richness of the 200g of condensed milk beautifully.
- Wine: Try a glass of heavy, dark red like a Syrah to complement the 50g of dried cranberries.
- Fruit: Fresh raspberries on the side provide a bright, juicy contrast to the heavy fudge texture.
- Dairy: A cold glass of whole milk is the classic partner for any chocolate tray bake.
One final trick I've learned is to serve these on a cold platter if you're having a summer party. Since the 15g of coconut oil has a lower melting point, the bars can get a bit soft if they sit out in the sun for too long.
Keeping them on a chilled marble board or even just a plate that's been in the freezer for ten minutes will keep that perfect snap alive until the very last bite is gone. Enjoy the crunch!

Recipe FAQs
What are the essential rocky road ingredients?
The core base consists of 400g dark chocolate, 200g light sweetened condensed milk, and 15g refined coconut oil. These are combined with 150g digestive biscuits, 100g roasted nuts, 100g marshmallows, 50g dried fruit, and a pinch of sea salt for balance.
What is traditionally in rocky road?
Traditionally, this recipe focuses on a rich chocolate ganache style base mixed with crunchy and chewy textures. It relies on the pairing of dark chocolate with sweetened condensed milk and coconut oil to create a set, fudge like consistency that holds the biscuits, nuts, marshmallows, and dried fruit
together.
Is it necessary to use a double boiler for the chocolate?
No, this is a common misconception. You can use a microwave at 30-second intervals to melt the chocolate, condensed milk, and coconut oil, provided you stir frequently to maintain an even temperature.
How to ensure the inclusions stay intact without melting?
Cool the melted chocolate mixture to 90°F (32°C) before adding your biscuits, nuts, marshmallows, and fruit. Adding ingredients to hot chocolate will cause the marshmallows to dissolve and ruin the texture of the finished squares.
How to get clean, smooth slices when serving?
Use a sharp chef's knife instead of a serrated blade to slice the block after its 2-hour chill. A serrated knife will tear through the marshmallows and create jagged, uneven edges, whereas a smooth, sharp edge ensures clean, professional looking squares.
How to prepare the baking tin for removal?
Line your 8 inch square tin with parchment paper so that it hangs over two of the sides. This creates a handle that allows you to lift the entire set block out of the tin easily once it has fully refrigerated.
Is it true I should use virgin coconut oil for better flavor?
No, this is a common misconception. You should use refined coconut oil specifically to ensure the chocolate flavor remains the focus without a strong or unwanted tropical coconut taste.
Fudgy Dark Chocolate Rocky Road
Ingredients:
Instructions:
Nutrition Facts:
| Calories | 293 kcal |
|---|---|
| Protein | 4.8 g |
| Fat | 14.7 g |
| Carbs | 33.3 g |
| Fiber | 2.5 g |
| Sugar | 17.8 g |
| Sodium | 105 mg |
