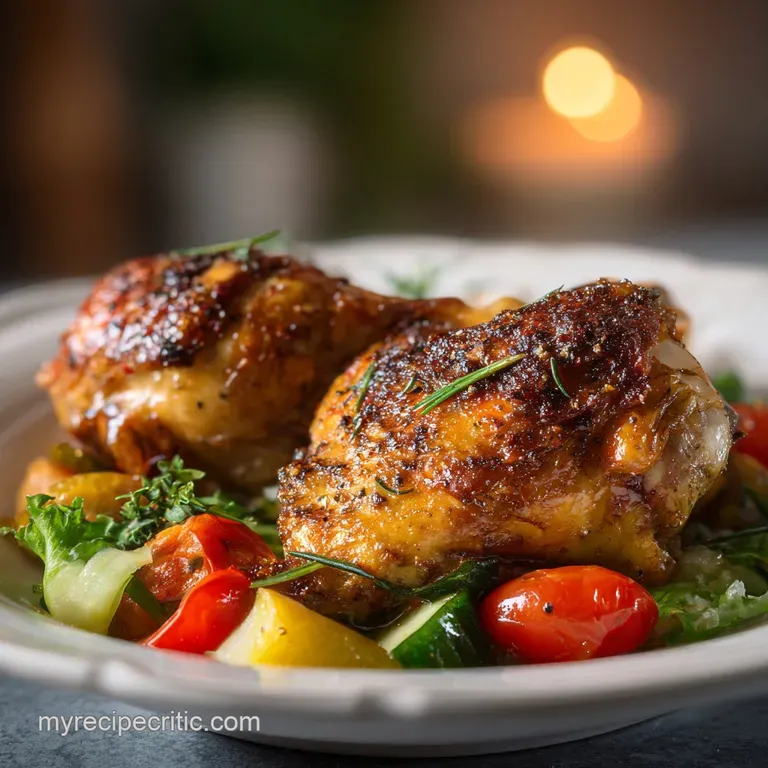
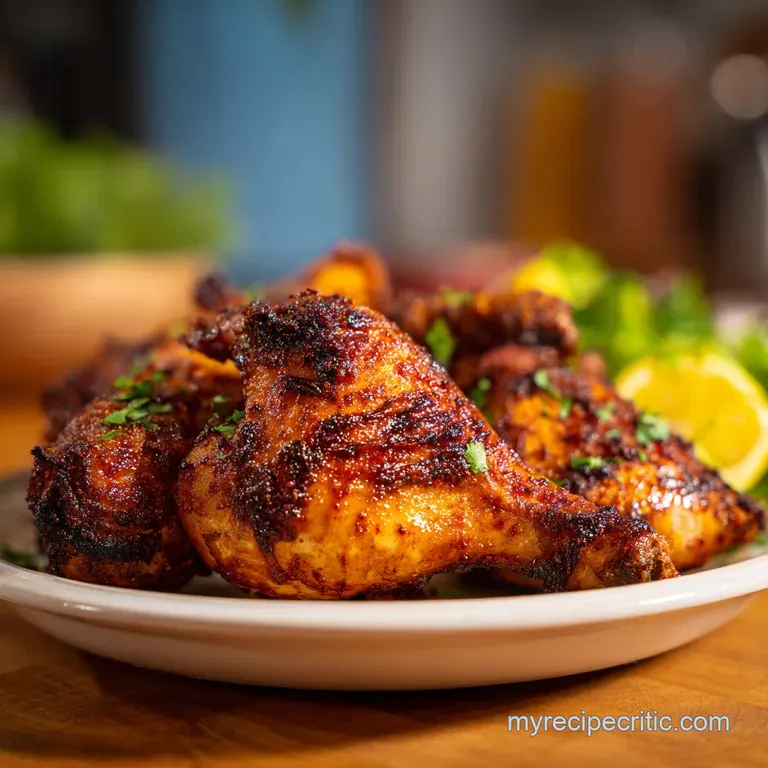
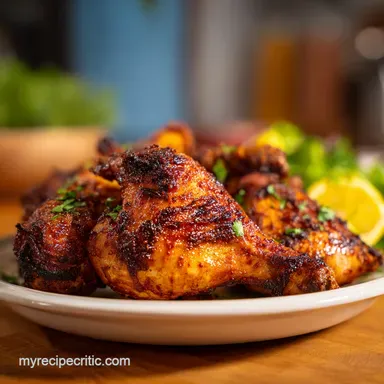
Easy Baked Chicken Leg Quarters: Crispy and Golden
- Time:10 minutes active + 45 minutes bake = 55 minutes total
- Flavor/Texture Hook: Shatteringly crispy skin with velvety, juice heavy dark meat
- Perfect for: Budget conscious weeknight dinners and meal prep enthusiasts
- Making Easy Baked Chicken Leg Quarters Right
- Secrets to Achieving Shatteringly Crispy Skin
- Essential Component Analysis and Ingredient Specs
- Necessary Kitchen Tools for Perfect Roasting
- Step by Step Guide to Success
- Solving Common Chicken Roasting Problems
- Scaling for Larger Family Meals
- Dietary Adaptations and Flavorful Variations
- Practical Storage and Food Waste Tips
- Perfect Side Dishes for Roasted Chicken
- Summary Table of Outcomes
- Recipe FAQs
- 📝 Recipe Card
Making Easy Baked Chicken Leg Quarters Right
There is a specific sound that happens about forty minutes into roasting chicken at high heat. It is that rhythmic, frantic bubbling of fat rendering out from under the skin, hitting the hot pan with a sharp hiss.
It fills the whole house with a deep, savory aroma that practically pulls people into the kitchen by their noses. Honestly, the first time I got this right, I stood by the oven just listening to that sizzle, watching the skin turn from a pale, translucent pink to a deep, lacquered mahogany.
It felt like a massive victory after a long week of uninspired microwave meals and bland salads.
We are diving into a method that treats chicken leg quarters with the respect they deserve. This is the most economical cut at the butcher counter, but it carries the most flavor because of the higher fat content and bone in structure. You get that rich, silky texture that chicken breasts simply cannot replicate.
We are going to pair them with baby potatoes that sit directly underneath the meat, acting as a sponge for all those rendered drippings. The result is a one pan meal where the chicken is crispy, the potatoes are creamy on the inside, and your sink is not overflowing with dishes.
You should expect a straightforward process that rewards patience and dry skin. This is not about complex marinades that soak the meat for days. Instead, we are using a concentrated dry rub and precise temperature control to achieve a professional grade crust.
Whether you are feeding a family of four or looking to prep high-quality protein for your weekday lunches, this technique delivers every single time without requiring you to be a classically trained chef.
Secrets to Achieving Shatteringly Crispy Skin
The success of this dish comes down to how we manage moisture and airflow during the 45 minutes of cooking.
- Surface Dehydration: Moisture is the enemy of a crisp crust. By patting the skin bone dry and using salt to draw out internal liquid, we allow the skin to fry in its own fat rather than steaming in the oven.
- Thermal Velocity: Roasting at 400°F (200°C) triggers rapid fat rendering. This high temperature ensures the skin crisps up before the internal meat has a chance to overcook and become stringy.
- Elevated Convection: Using a wire rack allows hot air to circulate under the chicken. This 360 degree heat exposure prevents the bottom of the leg from becoming soggy, which is the most common mistake in home roasting.
| Method | Time | Texture | Best For |
|---|---|---|---|
| Stovetop Sear | 25 minutes | Very crispy but uneven | Small batches of 1-2 legs |
| Casserole Dish | 60 minutes | Soft skin, very tender | Comfort food with heavy gravy |
| Elevated Rack | 45 minutes | Uniformly crispy and juicy | The ultimate family dinner |
The interaction between the dry rub and the rendering fat is where the magic happens. Smoked paprika contains natural sugars and oils that bloom when they hit that 400°F threshold, creating a savory crust that tastes like it spent hours in a professional smoker.
| Ingredient | Science Role | Pro Secret |
|---|---|---|
| Sea Salt | Protein denaturation | Use coarse grains to create tiny pockets of crunch |
| Smoked Paprika | Maillard enhancement | Rub it under the skin to flavor the meat directly |
| Olive Oil | Heat conductor | Brush it thinly; too much oil leads to greasy skin |
| Baby Potatoes | Fat absorption | Cut them in half to maximize the surface area for drippings |
The potatoes are more than just a side dish. As the chicken roasts, the salt and garlic infused fat drips down, effectively confit ing the potatoes in real time. If you love these big, bold flavors, you should definitely try my Authentic Chicken Gyros for your next weekend project.
Essential Component Analysis and Ingredient Specs
Building a great meal starts with choosing the right versions of simple ingredients. Here is exactly what you need to gather for this recipe.
- 4 chicken leg quarters (approx. 3 lbs): Look for skin that is intact and not torn. Why this? Bone in dark meat stays juicy at high temperatures unlike leaner white meat.
- 1 tbsp olive oil: A standard extra virgin or light olive oil works. Why this? It acts as the glue for our spices and initiates the browning process.
- 1 tsp sea salt: I prefer a flaky sea salt or kosher salt. Why this? Coarser grains provide a better texture than fine table salt.
- 1/2 tsp cracked black pepper: Freshly cracked is non negotiable here. Why this? The volatile oils in fresh pepper provide a sharp bite that cuts through the fat.
- 1 tsp smoked paprika: Ensure it is labeled "smoked" and not just "sweet." Why this? It provides that deep, sunset color and a hint of backyard barbecue flavor.
- 1 tsp garlic powder: Do not use garlic salt, as it will make the dish too salty. Why this? Powder distributes more evenly than fresh cloves, which might burn at 400°F.
- 1/2 tsp dried oregano: This adds an earthy, floral note. Why this? It balances the heavy richness of the chicken and the smokiness of the paprika.
- 1 lb baby potatoes: Red or Yukon Gold varieties work best. Why this? Their thin skins crisp up beautifully without needing to be peeled.
| Original Ingredient | Substitute | Why It Works |
|---|---|---|
| Smoked Paprika | Chili Powder | Adds heat and color. Note: Lacks the signature smoky depth of paprika |
| Baby Potatoes | Carrots and Onions | Similar roasting time. Note: Results in a sweeter, less starchy base |
| Olive Oil | Ghee (Clarified Butter) | High smoke point. Note: Adds a rich, nutty flavor to the chicken skin |
If you are out of olive oil, avocado oil is a fantastic swap because it handles high heat exceptionally well. Avoid using butter for the initial rub, as the milk solids will burn and turn bitter during the 45 minutes bake time.
Necessary Kitchen Tools for Perfect Roasting
You do not need an arsenal of professional gadgets, but two specific items will change your results from "okay" to "incredible." First, a rimmed baking sheet (often called a half sheet pan) is vital. It provides enough surface area for the potatoes to sit in a single layer so they roast rather than steam.
The second essential tool is an oven safe wire cooling rack. By placing this over the potatoes, you create a two story cooking environment. The chicken sits on the "top floor," receiving hot air from all sides, while the potatoes sit on the "bottom floor," catching all the flavor.
If you do not have a rack, you can nestle the chicken directly on the potatoes, but be aware the skin on the bottom of the chicken will be soft.
step-by-step Guide to Success
Follow these steps carefully to ensure your easy baked chicken leg quarters come out with that signature crunch.
- Preheat the oven to 400°F (200°C). Position your oven rack in the center. Note: This ensures the heat is balanced between the top and bottom of the pan.
- Dry the chicken thoroughly. Use paper towels to pat every inch of the skin until it feels tacky and bone dry. Note: Any lingering moisture will turn into steam, preventing the skin from crisping.
- Mix the dry rub. In a small bowl, whisk together the sea salt, black pepper, smoked paprika, garlic powder, and dried oregano.
- Season the meat. Brush the chicken with 1 tablespoon of olive oil, then rub the spice blend generously under the skin and all over the exterior.
- Prepare the potatoes. Toss the halved baby potatoes with 1 tablespoon of olive oil and a pinch of salt and pepper in a medium bowl.
- Arrange the pan. Spread the potatoes across the bottom of a rimmed baking sheet in a single layer.
- Set the rack. Place the wire cooling rack directly over the potatoes and arrange the chicken quarters on top, skin side up.
- Roast the chicken. Slide the tray into the oven and bake for 45 to 50 minutes until the skin is golden, dark, and crackling.
- Check the temperature. Use a meat thermometer to ensure the internal temp has reached 175°F (79°C). Note: Dark meat is best at this higher temp as it allows the connective tissue to fully break down.
- Rest the meat. Let the chicken sit for 5 minutes before serving. This allows the juices to redistribute so they do not run out when you cut into it.
Solving Common Chicken Roasting Problems
Even with a simple recipe, things can go sideways if the oven temperature is off or the chicken is particularly large.
Troubleshooting Rubbery Chicken Skin
If your chicken comes out with soft, chewy skin instead of a crisp crust, the most likely culprit is moisture. This often happens if the chicken was still slightly frozen in the center or if you skipped the paper towel step.
Another cause could be overcrowding the pan; if the chicken pieces are touching, they will trap steam between them.
| Problem | Root Cause | Solution |
|---|---|---|
| Spices Burning | Rack is too high in oven | Move tray to the center or lower third of the oven |
| Soggy Potatoes | Too much oil or water | Pat potatoes dry after washing; use exactly 1 tbsp oil |
| Dry Meat | Overcooking past 185°F | Use a thermometer; pull the chicken at 175°F exactly |
Spices and Heat Control
Sometimes the paprika can darken too quickly, making the chicken look burnt before it is done. If you see the spices turning black at the 30 minute mark, loosely tent a piece of foil over the chicken. This will shield the skin from direct radiant heat while allowing the internal meat to continue cooking.
Common Mistakes Checklist
- ✓ Never skip the dry patting step; it is the difference between soggy and shattered skin.
- ✓ Don't use a deep glass baking dish, as the high sides prevent airflow.
- ✓ Ensure the potatoes are in a single layer so they fry in the fat instead of mushing together.
- ✓ Let the chicken rest for a full 5 minutes to keep the meat velvety and moist.
- ✓ Verify your oven temperature with a secondary thermometer if the chicken takes longer than 55 minutes.
Scaling for Larger Family Meals
If you are feeding a crowd, you can easily double this recipe, but you must be careful with the logistics. Do not try to cram 8 leg quarters onto a single baking sheet. The lack of space will cause the chicken to steam, and you will lose that crispy texture.
- Scaling Up: Use two separate rimmed baking sheets. When using two pans, rotate them from top to bottom and front to back halfway through the 45 minutes cooking time.
- Spice Adjustments: When doubling the recipe, use 1.5x the salt and spices rather than a full 2x. This prevents the rub from becoming overwhelmingly salty. Reduce the total olive oil by about 10% to prevent the pans from becoming too greasy.
- Scaling Down: For 1 or 2 servings, use a smaller quarter sheet pan. Reduce the baking time by about 5 to 8 minutes, but always rely on the internal temperature of 175°F as your guide.
Dietary Adaptations and Flavorful Variations
This recipe is naturally gluten-free and dairy-free, making it a fantastic "safe" meal for diverse groups. However, you can tweak the profile to suit specific diets or cravings.
Mediterranean Style Flavor Twist
Swap the smoked paprika for dried thyme and lemon zest. Serve the finished chicken with a side of tzatziki or a fresh cucumber salad. This lightens the heavy profile of the dark meat and makes it feel like a summer dinner.
Low Carb Potato Alternatives
If you are following a keto or low carb lifestyle, replace the baby potatoes with cauliflower florets or radishes. Radishes, when roasted, lose their sharp peppery bite and take on a texture very similar to potatoes. They also absorb the chicken fat beautifully.
If you find yourself with leftover meat, it works perfectly in my Chicken Noodle Soup. The roasted flavor of the chicken adds a depth to the broth that you just cannot get with poached meat.
Practical Storage and Food Waste Tips
Roasting a batch of leg quarters is one of the smartest things you can do for your weekly food budget.
- Fridge: Store leftovers in an airtight container for up to 4 days. To keep the skin as crisp as possible, reheat in an oven or air fryer at 350°F for 10 minutes rather than using the microwave.
- Freezer: You can freeze the cooked meat (off the bone is easiest) for up to 3 months. It is perfect for adding to quick weeknight stir frys or pastas.
- Zero Waste: Do not throw away the bones! After you have eaten the meat, put the bones in a pot with some veggie scraps and water. Simmer for 2 hours to create a rich, golden bone broth. Even the potato peels (if you peeled them) can be tossed in oil and air-fried for a quick snack.
Perfect Side Dishes for Roasted Chicken
While the potatoes make this a complete meal, adding a bit of acid or green crunch can balance the richness of the chicken fat. A simple arugula salad with a lemon vinaigrette is my go to. The bitterness of the greens cuts right through the savory garlic and paprika.
If you want something heartier, steamed green beans with a bit of garlic and almond slivers work wonders. The goal is to provide a fresh contrast to the deep, roasted flavors of the chicken. Whatever you choose, make sure it is something simple so the star of the show remains that shatteringly crispy chicken skin.
Summary Table of Outcomes
| Goal | Action | Result |
|---|---|---|
| Extra Crunch | Increase oven to 425°F for last 5 mins | Skin becomes glass like |
| More Sauce | Deglaze pan with 1/4 cup chicken stock | Creates a rich potato jus |
| Lower Fat | Remove skin before eating | Reduces calories but loses crunch |
The beauty of this dish is its simplicity. By mastering the 400°F temperature and the use of an elevated rack, you are taking a basic ingredient and turning it into a high end dining experience. Trust the process, dry that skin, and listen for the sizzle.
You'll never look at a chicken leg the same way again.

Recipe FAQs
What is the best way to bake leg quarters?
Use an oven safe wire rack set over a baking sheet. This allows hot air to circulate under the meat, ensuring the skin crisps evenly while the fat renders properly.
Can a diabetic eat baked chicken?
Yes, this recipe is a protein rich option. Since the meal consists of chicken and potatoes seasoned with simple spices, it avoids the refined sugars and processed ingredients found in many creamy pasta sauces.
Should chicken leg quarters be covered when baking?
How long does it take to bake leg quarters at 400 degrees?
Bake for 45 50 minutes. Always verify that the internal temperature reaches 175°F (79°C) before removing them from the oven.
How to ensure the chicken skin is crispy?
Pat the skin thoroughly with paper towels until it is bone dry before seasoning. Any lingering surface moisture creates steam that prevents the fat from rendering into a crisp crust.
Is it true I should wash the chicken before baking to remove bacteria?
No, this is a common misconception. Washing raw chicken in the sink actually splashes bacteria onto your kitchen surfaces and countertops, making it a major safety hazard.
How to tell if the chicken is fully cooked without cutting into it?
Use an instant read meat thermometer inserted into the thickest part of the thigh. Once the internal temperature reads 175°F (79°C), the meat is safely cooked and ready to rest.
Easy Baked Chicken Leg Quarters
Ingredients:
Instructions:
Nutrition Facts:
| Calories | 472 kcal |
|---|---|
| Protein | 27.4 g |
| Fat | 31.8 g |
| Carbs | 19.2 g |
| Fiber | 2.8 g |
| Sugar | 1.1 g |
| Sodium | 648 mg |
