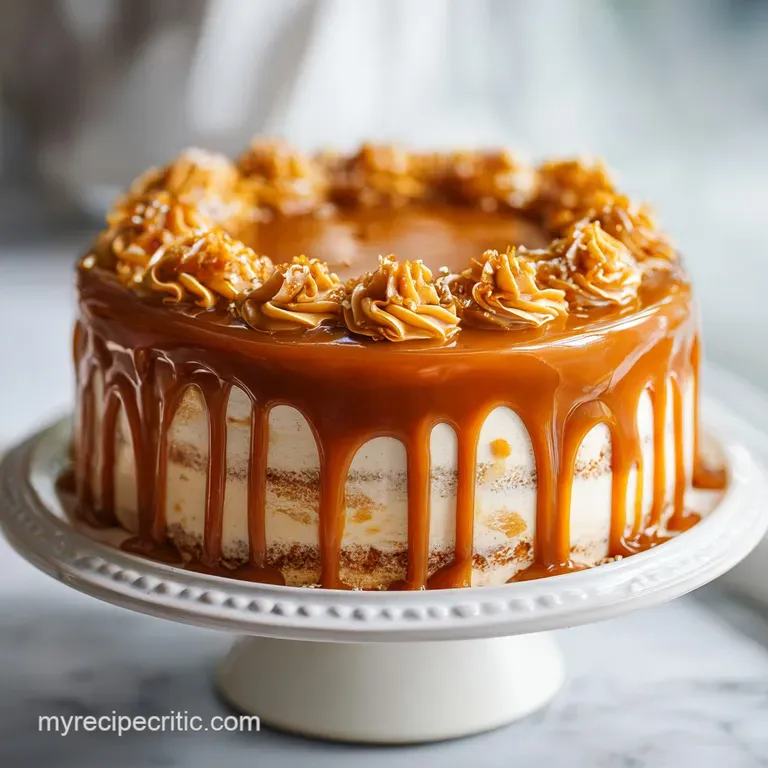
Decadent Caramel Cake: Buttermilk Sponge
- Time: Active 30 minutes, Passive 35 minutes, Total 1 hour 5 mins
- Flavor/Texture Hook: Toasted sugar notes with a buttery, melt in-the mouth crumb
- Perfect for: Milestone birthdays, holiday dinners, or elevated Sunday suppers
- Master the Ultimate Decadent Caramel Cake
- Why This Recipe Truly Works
- Analyzing the Essential Component Science
- Essential Ingredients and Smart Swaps
- Tools for Success
- Step-by-Step Cooking Guide
- Troubleshooting Common Cake Problems
- Creative Recipe Variations
- Scaling the Recipe
- Debunking Common Kitchen Myths
- Storing Your Leftovers
- Best Side Pairings
- Recipe FAQs
- 📝 Recipe Card
Master the Ultimate Decadent Caramel Cake
Imagine the scent of sugar slowly deepening into a dark, nutty amber while butter sizzles softly in a heavy saucepan. That is the exact moment this recipe begins to take over your home.
I remember the first time I tried making a real caramel icing; I was so intimidated by the thought of candy thermometers and "soft ball" stages that I almost gave up. But once that first velvety spoonful hit the cake, I knew there was no going back to store-bought frosting.
This isn't your average fluffy birthday cake. We are talking about a dense, soul satisfying crumb that knows how to hold its own against a thick layer of cooked caramel. It’s the kind of cake that sits on the counter under a glass dome, calling your name every time you walk into the kitchen.
Trust me, the way the buttermilk behaves with the butter in this batter creates a texture that is nothing short of legendary.
We've all had those cakes that look beautiful but taste like sweet air. This is the opposite. It has weight, it has character, and the aroma of the evaporated milk simmering with the sugar will make your neighbors find any excuse to knock on your door.
Let's get the oven preheated and walk through how to make this showstopper without any of the usual stress.
Why This Recipe Truly Works
- Maillard Reaction: Simmering evaporated milk with granulated sugar triggers a chemical reaction that creates deep, complex flavor compounds far beyond simple sweetness.
- Buttermilk Acidity: The natural acid in the buttermilk tenderizes the gluten in the 375g of all purpose flour, ensuring the crumb stays velvety and moist.
- Fat Sugar Bonding: Using both granulated and brown sugar in the batter provides a mix of quick dissolving sweetness and moisture retaining molasses.
- Emulsification Stability: Incorporating the 4 large eggs at room temperature allows them to blend seamlessly into the creamed butter, preventing the batter from breaking.
| Method | Time | Texture | Best For |
|---|---|---|---|
| Traditional Oven | 35 minutes | Velvety and even | Classic tall layers |
| Convection Bake | 28 minutes | Slightly crisper edges | Quick baking |
| Bundt Pan | 45 minutes | Dense and moist | Casual gatherings |
While many modern recipes rely on simple buttercream with a bit of flavoring, this method uses a cooked icing technique. This creates a specific "shatter" on the surface while remaining fudgy underneath. It is a traditional Southern approach that makes the cake feel authentic and incredibly special.
The Physics of the Fudge
The 1 tablespoon of light corn syrup acts as an interfering agent that prevents sugar molecules from bonding into large, gritty crystals. This ensures the icing remains silky and smooth rather than turning into a sandy mess as it cools on the cake.
Analyzing the Essential Component Science
| Ingredient | Science Role | Pro Secret |
|---|---|---|
| 225g Unsalted Butter | Fat & Aeration | Cream for 5 minutes until it looks like pale clouds |
| 240ml Buttermilk | Chemical Leavening | Always use full fat to ensure a tender, rich crumb |
| 350ml Evaporated Milk | Concentration | Its low water content allows for a faster, thicker caramel |
| 1 tbsp Corn Syrup | Crystal Inhibition | Don't skip this; it guarantees a glossy, non grainy finish |
One of the most important things to remember when working with these components is temperature. If your butter is too cold, it won't trap the air needed for a good rise. If your buttermilk is straight from the fridge, it can curdle the fat in your beautifully creamed butter.
Give everything time to sit on the counter before you start.
Essential Ingredients and Smart Swaps
- 225g Unsalted Butter (Softened): The foundation of our crumb. Why this? Provides a neutral, rich fat base that carries the vanilla bean flavor perfectly.
- 300g Granulated Sugar: Provides structure and sweetness.
- 100g Light Brown Sugar (Packed): Adds a hint of molasses.
- 4 Large Eggs (Room Temperature): The primary binder for the sponge.
- 2 tsp Vanilla Bean Paste: Adds those beautiful black flecks and deep aroma.
- 375g All Purpose Flour (Sifted): The structural backbone of the cake.
- 1 tbsp Baking Powder: Ensures a reliable, even lift.
- 1 tsp Fine Sea Salt: Balances the intense sweetness of the caramel.
- 240ml Full Fat Buttermilk: Provides the necessary acidity for tenderness.
- 120ml Sweetened Condensed Milk: Adds a unique "milk jam" depth to the batter.
- 115g Unsalted Butter (For Icing): Creates the creamy fudge base.
- 350ml Evaporated Milk: The liquid base for our cooked caramel icing.
- 400g Granulated Sugar (For Icing): Caramelizes to create the signature flavor.
- 1 tbsp Light Corn Syrup: Prevents the icing from becoming grainy.
- 60ml Heavy Cream: Thins the icing to the perfect spreading consistency.
- 1 tsp Flaky Sea Salt: The essential final touch to cut through the richness.
| Original Ingredient | Substitute | Why It Works |
|---|---|---|
| Full Fat Buttermilk | Whole milk + 1 tbsp lemon juice | Mimics the acidity needed to tenderize the gluten |
| Vanilla Bean Paste | 2 tsp Vanilla Extract | Same flavor profile, though you lose the visual bean flecks |
| Light Corn Syrup | Golden Syrup | Similar viscosity and sugar structure to prevent crystallization |
Tools for Success
You don't need a professional pastry kitchen for this, but a few specific tools make the job much easier. A stand mixer such as a KitchenAid is your best friend for creaming the butter and sugar until they are truly aerated. For the icing, a heavy bottomed saucepan is non negotiable.
Thin pans create hot spots that will scorch your sugar before the rest of the mixture has reached the right temperature.
I also highly recommend using a digital scale for your 375g of flour. Measuring by volume can be wildly inaccurate depending on how packed the flour is, and too much flour is the number one reason for a dry cake.
Finally,, a sturdy silicone spatula will help you scrape every bit of that liquid gold caramel out of the pan.
step-by-step Cooking Guide
- Preheat and Prep. Set your oven to 350°F (175°C) and grease two 9 inch round cake pans. Note: Using parchment paper rounds on the bottom ensures a clean release every time.
- Cream the Fats. Beat the 225g of softened butter with 300g granulated sugar and 100g brown sugar until the mixture looks pale, fluffy, and doubled in volume.
- Incorporate Eggs. Add the 4 eggs one at a time, beating well after each. Note: This builds a strong emulsion for a stable cake structure.
- Mix Wet Bases. Stir in the 2 tsp vanilla bean paste and the 120ml sweetened condensed milk into the creamed mixture.
- Combine Dry Elements. In a separate bowl, whisk the 375g sifted flour, 1 tbsp baking powder, and 1 tsp fine sea salt.
- Alternate Additions. Add the flour mixture and 240ml buttermilk alternately to the batter, starting and ending with flour. Mix only until no white streaks remain.
- Bake the Layers. Divide the batter evenly and bake for 35 minutes until a toothpick comes out clean and the edges pull away slightly.
- Simmer the Icing. In your heavy saucepan, combine 115g butter, 350ml evaporated milk, 400g sugar, and 1 tbsp corn syrup.
- Thicken the Caramel. Cook over medium heat, stirring constantly, until the mixture reaches a deep copper color and coats the back of a spoon.
- Finish and Frost. Remove from heat, whisk in 60ml heavy cream, and let it cool slightly. Pour over the cooled cake layers, letting it drip down the sides, and sprinkle with 1 tsp flaky salt.
Chef's Tip: If you want an even deeper flavor, try browning the 225g of butter for the cake base before letting it solidify again to a room temperature state. It adds a toasted, nutty aroma that perfectly mirrors the caramel icing.
Troubleshooting Common Cake Problems
Why is my caramel icing grainy?
This usually happens if sugar crystals from the side of the pan fall into the mixture or if the mixture is stirred too vigorously at high heat. The sugar molecules find each other and "clump" together.
Using the 1 tablespoon of corn syrup usually prevents this, but you can also use a wet pastry brush to wash down the sides of the pan while simmering.
Why did my cake layers sink?
This often comes down to over mixing the batter after adding the flour or opening the oven door too early. When you over mix, you develop too much gluten and incorporate too much air that the structure can't support. Once the air bubbles collapse, the cake sinks.
| Problem | Root Cause | Solution |
|---|---|---|
| Icing too runny | Not cooked long enough | Simmer for 2-3 more minutes until it reaches 235°F |
| Dry cake crumb | Over baked or too much flour | Use a scale for flour and check doneness 5 mins early |
| Icing sets too fast | Temperature dropped too quickly | Stir in a teaspoon of hot heavy cream to loosen it up |
Common Mistakes Checklist
- ✓ Ensure eggs and buttermilk are at true room temperature to prevent curdling.
- ✓ Sift the 375g of flour to ensure the cake doesn't have dense, floury pockets.
- ✓ Avoid the urge to walk away from the stove while the caramel is simmering.
- ✓ Don't frost the cake while it's still warm, or the icing will slide right off.
- ✓ Use a light colored saucepan so you can accurately judge the color of the caramel.
Creative Recipe Variations
If you want to take this to another level, you can easily turn this into a Decadent Caramel Crunch Cake. Simply fold in 100g of crushed toffee bits or toasted pecans into the batter before baking. The added texture provides a wonderful contrast to the velvety sponge.
For those who want a bit of a salty kick, doubling the flaky sea salt on top is a game changer.
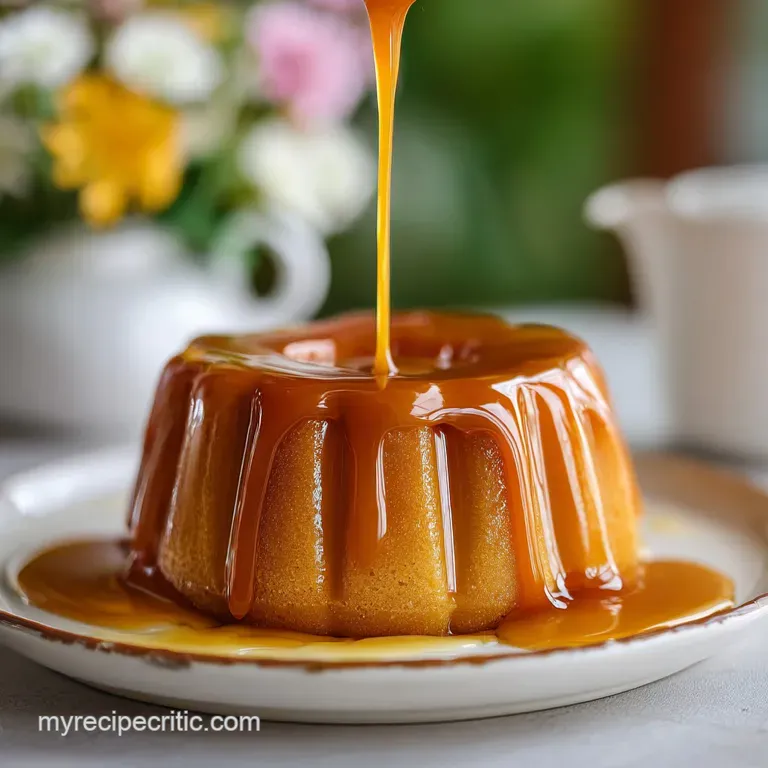
If you are a fan of smaller portions, you might want to try a Salted Caramel Mini recipe for your next gathering. It’s a great way to get that same sugar fix in a bite sized format. Another fun twist is to add a layer of dark chocolate ganache between the cake layers before pouring the caramel over the top. This effectively creates a candy bar-inspired dessert that no one can resist.
Scaling the Recipe
Reducing the Batch
If you are baking for a smaller crowd, you can halve this recipe quite easily. Use a single 9 inch pan or a standard loaf pan. When halving the 4 eggs, simply beat two eggs together and use the whole amount. Reduce the baking time by about 20% and start checking for doneness at the 25 minute mark.
Doubling for a Crowd
To double this for a large party, I recommend baking in two 9x13 inch rectangle pans. Do not double the salt or baking powder exactly; use 1.5x the amount to avoid a metallic taste or an over leavened cake that collapses.
You will likely need to simmer the caramel icing in two separate batches to ensure even heat distribution and prevent burning.
Debunking Common Kitchen Myths
One common myth is that you must use a candy thermometer to make a "real" caramel cake. While a thermometer helps with precision, our grandmothers did this for decades just by looking at the color and the way the bubbles behave.
When the bubbles become large, slow, and "lazy," and the scent is deeply toasted, your icing is ready.
Another misconception is that more baking powder equals a fluffier cake. In reality, too much leavening agent causes the cake to rise too fast and then fail, resulting in a dense, gummy texture. Stick to the 1 tablespoon of baking powder specified in the ingredients for the best results.
Storing Your Leftovers
This Decadent Caramel Cake actually tastes better on the second day once the caramel has had time to slightly soak into the top layer of the sponge. Store it under a cake dome or in an airtight container at room temperature for up to 3 days.
If your kitchen is particularly warm, you can keep it in the fridge, but let it sit out for 20 minutes before serving so the butter and caramel can soften.
For zero waste baking, if you have leftover caramel icing that hardened in the pan, don't scrub it away! Add a splash of milk and heat it gently to create a quick caramel sauce for your morning coffee or to pour over vanilla ice cream.
Any cake scraps can be crumbled and mixed with a little leftover icing to make incredibly rich cake pops.
Best Side Pairings
To balance the intense sweetness of this cake, I love serving it with a side of tart fruit like fresh raspberries or sliced green apples. The acidity cuts right through the heavy cream and sugar. A strong, bitter espresso or a cold glass of whole milk is also a classic pairing that never fails to satisfy.
If you're looking for more treats to fill a dessert table, these Salted Caramel Chocolate recipe cookies are a fantastic companion. They offer a bit of crunch and cocoa to complement the soft, buttery nature of the cake. Whether it's a casual Sunday or a major celebration, this cake is guaranteed to be the star of the show.

Recipe FAQs
What is the critical temperature for the caramel icing?
Aim for 235°F (113°C). This temperature range ensures you achieve a firm but still pliable "soft ball" stage, preventing the icing from becoming brittle candy or remaining too runny.
How do I prevent the caramel icing from becoming grainy?
Use light corn syrup. The syrup acts as an interfering agent, physically blocking the sugar molecules from bonding into large, noticeable crystals as the mixture cools.
Can I substitute the buttermilk with regular milk?
No, use an acidic substitute. Regular milk lacks the necessary acid to tenderize the gluten structure, which results in a tougher crumb; try adding one tablespoon of lemon juice to whole milk instead.
How long should I cream the butter and sugars for the cake batter?
Cream for a full 5 minutes until pale and fluffy. This step incorporates crucial air pockets into the fat, which directly supports the cake's final rise and velvety texture; improper creaming leads to a dense cake.
Is it true that overmixing the flour ruins the cake's texture?
Yes, excessive mixing develops too much gluten. Once you add the flour, mix only until just combined; overmixing creates long, tough gluten strands that cause the cake to be chewy instead of tender.
How should I store leftover slices of the finished cake?
Store airtight at room temperature for up to 3 days. Allowing the cake to sit out lets the caramel soften slightly into the sponge; avoid the refrigerator unless your kitchen is extremely warm, as cold temperatures harden the caramel.
What is the best way to prepare the baking pans for a clean release?
Grease the pans, dust with flour, and line the bottoms with parchment. This three step process provides the maximum insurance against sticking, especially important when dealing with rich, heavy batters like this one; you can even apply this principle if you are making a Corn Pudding Recipe.
Decadent Caramel Cake Recipe

Ingredients:
Instructions:
Nutrition Facts:
| Calories | 713 kcal |
|---|---|
| Protein | 9.1 g |
| Fat | 29.7 g |
| Carbs | 104.2 g |
| Fiber | 0.8 g |
| Sugar | 78.4 g |
| Sodium | 258 mg |
