Lemon Curd: a Truly Exceptional Homemade Recipe
- The Alchemy of Perfect Lemon Curd: An Introduction
- The Science of Silk: How to Achieve That Luxurious Mouthfeel
- Gathering Your Sunshine: Detailed Ingredient Breakdown
- Mastering the Method: Step-by-Step Guide to Cooking Lemon Curd
- Troubleshooting and Expert Secrets for a Flawless Batch
- Longevity and Preservation: Storing Your Homemade Delight
- Beyond the Spoon: Inspiring Ways to Utilize Lemon Curd
- Recipe FAQs
- 📝 Recipe Card
The Alchemy of Perfect Lemon Curd: An Introduction
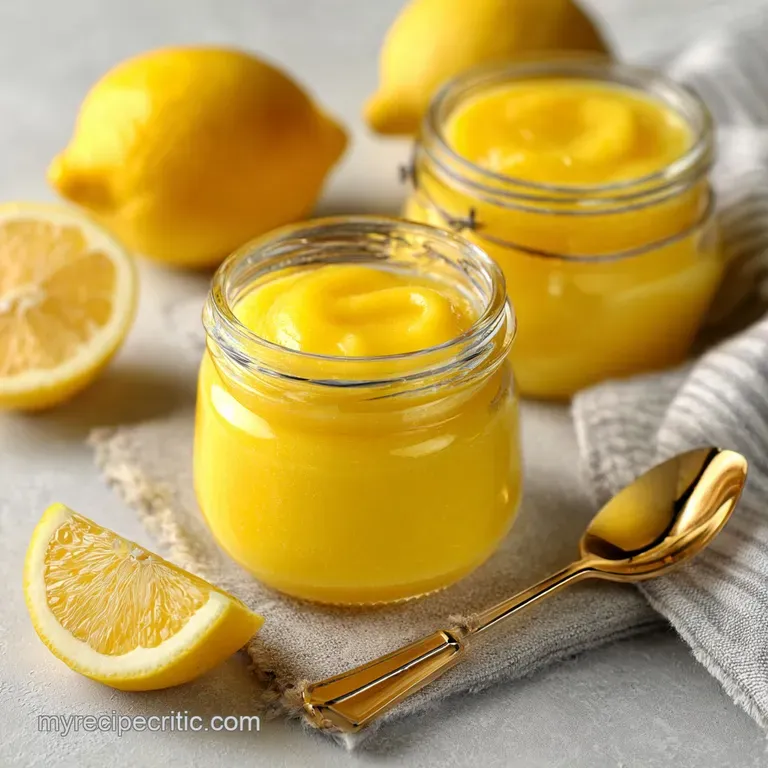
Oh, my goodness. Can you smell that? It's the scent of pure, bottled sunshine mixed with warm butter and just a hint of creamy sweetness. We are talking about homemade Lemon Curd today, and trust me, the difference between this and the jarred stuff is astronomical.
You’re aiming for something intensely vibrant, smooth as silk, and perfectly balanced between that sharp citrus pucker and rich sweetness.
It sounds like a delicate, Victorian tea party feat, right? I promise you it is not. This classic Lemon Curd recipe is one of those culinary lifesavers that uses incredibly basic ingredients you probably already have eggs, sugar, butter, and lemons.
It’s significantly cheaper than buying artisanal curd, it takes less than 20 minutes of active cooking time, and the results will make everyone think you spent all afternoon fussing.
I’ve been making this specific recipe for years, tweaking it until I landed on the perfect ratio of butter to acid, ensuring a thick, glossy, and beautifully set final product. Forget thin, watery curd or the grainy batches that haunt your nightmares.
Let’s get you started on the best Homemade Lemon Curd Recipe you'll ever need.
The Science of Silk: How to Achieve That Luxurious Mouthfeel
Making exceptional Lemon Curd isn't about complexity; it’s about control. We are essentially making a cooked custard thickened by egg protein, and the secret to that luxurious mouthfeel is managing heat and fat incorporation.
If you understand the very simple science, you will never ruin a batch again.
Why 'Patience is Key' for the Ultimate Texture
The goal is to gently cook the egg proteins until they link up and thicken the liquid, but stop just before they contract too much, which causes graininess or scrambling. High heat is the enemy here; it rushes the coagulation, leaving you with lumps.
Cooking low and slow, preferably over a double boiler, allows you to maintain continuous whisking and precise temperature control. This careful technique ensures the finished Easy Lemon Curd is impossibly smooth.
Defining the Perfect Pucker (Acidity vs. Sweetness Balance)
I find many recipes for Lemon Curd are too sweet, which dulls the beautiful zing of the lemon. This recipe is designed to hit that sweet spot: enough sugar to balance the intense acidity of fresh lemon juice, but not so much that it tastes like candy.
Remember, the fat from the butter and the yolks also helps temper the sharpness. For the best flavour, always use fresh juice and zest; the bottled stuff just can’t replicate that vibrancy.
Equipment Check: Essential Tools for Custard Making
You truly only need two main things. First, a heavy bottomed saucepan paired with a heatproof bowl that fits snugly over the top, creating a perfect double boiler (or bain marie). This setup diffuses the heat beautifully.
Second, a good balloon whisk is non-negotiable for making perfect Lemon Curd . The whisk is your anti scramble insurance policy, helping to lift the eggs and prevent them from settling and scorching on the bottom of the bowl.
The Vital Role of Zest Oil Integration
This is my number one secret for intensely flavourful Lemon Curd . Before anything else happens, you must take the sugar and the zest and rub them together vigorously between your fingers.
This process is called "muddling," and it bruises the zest, releasing its fragrant, potent essential oils directly into the sugar crystals. When the sugar melts during cooking, it carries those pure lemon oils right into the finished curd. It adds depth that simply mixing them together later cannot achieve.
Understanding the Egg Tempering Process
While we aren't technically tempering the eggs against a hot liquid like in a traditional pastry cream, we are essentially cooking them gently with the acid and sugar. Since we start with all ingredients cold, the eggs heat up gradually with the liquid.
Constant whisking acts as a form of self tempering, ensuring all the mixture heats evenly and simultaneously. This slow increase in temperature prevents the yolks and whites from cooking into unsightly strings a common failure when rushing your Thick Lemon Curd Recipe .
Butter Ratios: Achieving a Glossy, Rich Finish
The butter is added after the curd is cooked and strained. Why? Because adding cold butter cubes at the very end and whisking them into the hot mixture does two things simultaneously. First, it stops the cooking process instantly, preventing overcooked eggs.
Second, and most importantly, it emulsifies the fat into the thickened custard, which creates a beautifully glossy, opaque shine and that signature, melt-in-your mouth richness we look for in the Best Lemon Curd Recipe . Using cold butter here is critical for the final texture.
Gathering Your Sunshine: Detailed Ingredient Breakdown
You only need six ingredients for spectacular Lemon Curd . Always prioritise quality; since there are so few components, each one needs to pull its weight!
Metric vs. US Customary Measurements
I generally prefer baking in grams (metric) because it is so much more precise, but I’ve included both measurements for this Easy Lemon Curd recipe. When dealing with something as finicky as egg-based custards, accuracy matters.
Weighing your sugar ensures the balance with the lemon juice is absolutely perfect, which is crucial for safety and flavour.
Selecting the Best Lemons (Acidity and Zest Quality)
Always reach for bright, unblemished lemons. I recommend using standard, thin skinned Eureka or Lisbon lemons for their high acidity. Meyer lemons, while delicious, are sweeter and much milder, meaning you might have to slightly reduce the sugar amount if you choose to use them.
For the best flavour in your Homemade Lemon Curd , you need the vibrant zest of about three to four medium lemons. Pro Tip: Always zest the lemon before you juice it.
Can I Use Bottled Juice? (Substitution Discussion)
Please, for the love of all that is delicious, do not use bottled juice. That being said, if you find yourself in an emergency and only have bottled, ensure it is high-quality, 100% lemon juice without any added preservatives.
However, the flavour depth of true Lemon Curd comes directly from the volatile oils in fresh zest, which you won't get from a bottle. Substitution for Lemon Juice: If you wanted a slightly different flavour profile, lime or blood orange juice works, but lime is usually sharper, and blood orange is milder.
Dairy Options and Enhancing the Richness
We rely on unsalted butter for the fat and flavour profile. Using unsalted allows us to control the seasoning precisely. This recipe calls for six egg components two whole eggs and four extra egg yolks. The extra yolks provide incredible depth of colour, richness, and superior thickening power.
They are essential for a super thick and luxurious Thick Lemon Curd Recipe .
| Ingredient | Substitution Strategy |
|---|---|
| Granulated Sugar | Can substitute with caster sugar (finer grain) for faster dissolving. |
| Unsalted Butter | high-quality, flavourless vegan butter sticks will work, though the final texture might be slightly less 'fudgy'. |
| Egg Yolks | Cannot be easily substituted without commercial thickeners. For a richer, deeper colour, free range chicken eggs provide the best yolks. |
| Lemon Juice | Fresh lime juice for a sharper curd, or Meyer lemon for a sweeter, milder result. |
Mastering the Method: step-by-step Guide to Cooking Lemon Curd

This section is all about technique. Follow these steps exactly, and you will achieve that gorgeous, glossy finish every time.
Prep Stage: Zesting and Juicing Efficiently
First, grab your zest! Use a microplane to ensure you only get the bright yellow part, avoiding the bitter white pith. Now, rub that zest into your measured sugar until the kitchen smells divine. In a separate bowl, whisk together the whole eggs and the extra yolks until smooth.
Finally, whisk in the fresh lemon juice and the zest sugar mixture. We want everything ready before we put it near the heat.
The Gentle Cook: Thickening the Mixture (Avoiding Scramble)
Set your prepared bowl over your simmering water. Remember, the water shouldn't touch the bottom of the bowl! Whisk constantly, drawing the mixture up from the bottom and scraping the sides. Initially, the mixture will look thin and pale yellow. As it heats, it will foam slightly.
Keep whisking, even after the foam subsides. You are looking for a visible change in viscosity the mixture should dramatically thicken. This should take 10 to 15 minutes of dedicated whisking.
Incorporating the Butter for Emulsification
Once the curd is thick (we’ll talk about the Nappe test shortly), immediately remove the bowl from the heat. This is crucial! Now, take your cold, cubed butter and whisk it in, one cube at a time. The cold butter will quickly melt into the hot curd.
Continue whisking vigorously until the mixture is uniform, glossy, and beautifully smooth. This step gives the Homemade Lemon Curd Recipe its incredible shine and velvety texture.
Sieving for Absolute Smoothness (A Professional Finish)
Even if you whisked diligently, passing the cooked curd through a fine mesh sieve is the ultimate professional touch. It removes the spent zest and any tiny, microscopic bits of cooked egg that might have formed. Pour the hot liquid through the sieve into a clean bowl or directly into your sterilised storage jar.
Trust me on this one; sieving guarantees the silkiest Lemon Curd texture imaginable.
Troubleshooting and Expert Secrets for a Flawless Batch
We all have disasters in the kitchen. I once made a batch of Lemon Curd for a wedding cake filling and accidentally cranked the heat too high. It looked like lemon flavoured scrambled eggs. We fixed it, but prevention is always better!
My Curd Scrambled! Immediate Fixes
If you notice lumps starting to form, it means the eggs are cooking too fast. Immediately pull the bowl off the heat and plunge the bottom into an ice bath to rapidly drop the temperature. Whisk vigorously to try and break up the lumps. If the scramble is severe, the only real fix is to blend the entire mixture.
Use an immersion blender or a standard blender. This won't eliminate the overcooked texture entirely, but it will smooth the appearance for use in fillings like tarts or layered cakes.
The Nappe Test: Knowing When It’s Done (Temperature Check)
The 'nappe' test tells you when the curd is perfectly thick. Dip a clean spoon or spatula into the curd, then run your finger across the back of the spoon. If the line holds clean without the curd running back into the gap, it's done. If you have a thermometer, aim for 170°F (77°C).
Cooking the Lemon Curd past this point risks scorching the eggs, while cooking below it leaves you with a thin, runny product that won't set properly.
Preventing a 'Skin' During Cooling
Custards love to form a rubbery skin as they cool, especially Lemon Curd . To prevent this, press a layer of plastic wrap (cling film) directly onto the surface of the hot curd immediately after straining and adding the butter. Don't leave any air pockets!
This traps the steam and moisture, ensuring the surface remains soft and silky until it’s fully chilled.
The Benefits of a Double Boiler Setup
Using a double boiler (bain marie) is not optional for the Best Lemon Curd Recipe —it’s mandatory. The gap between the simmering water and the bottom of your bowl creates gentle, indirect heat.
This prevents the disastrous hot spots that cause the eggs at the bottom of the bowl to cook faster than the rest of the mixture. It's truly the secret to perfect, creamy texture.
Longevity and Preservation: Storing Your Homemade Delight
Once you make this much loved Lemon Curd , you'll want to know exactly how long you can hoard it.
Refrigeration Lifespan: How Long Will it Keep?
Provided you store your Lemon Curd in a clean, airtight, sterilised glass jar, it will last beautifully in the refrigerator for up to 2 weeks. The high acid content from the lemon acts as a natural preservative, keeping it fresh and vibrant.
Always let it chill completely first before sealing the lid tightly.
The Freezing Process (Does it Affect Texture?)
But does it freeze well? You bet it does! Lemon Curd freezes beautifully for up to 3 months. The high fat content (thanks to all that glorious butter and egg yolk) helps stabilise the emulsion during freezing.
Freeze it in a freezer safe container, leaving about half an inch of headspace as it will expand slightly. To thaw, simply move it to the refrigerator overnight. You might notice a slight separation or weeping after thawing; just give it a vigorous whisk, and it should return to its thick, smooth texture.
Beyond the Spoon: Inspiring Ways to Utilize Lemon Curd
This recipe makes a generous amount of Thick Lemon Curd Recipe —perfect for keeping a jar on hand for impromptu baking sessions. Of course, eating it straight from the spoon is a valid serving suggestion, but there are so many ways to use this liquid gold!
First, if you're looking for a quick, impressive dessert, use this curd as the filling for miniature crustless cheesecakes. It’s absolutely divine layered over the top. You can find my super simple recipe for Mini Cheesecakes in Cups: Easy No-Fuss Lemon Vanilla Recipe on the blog!
- Tarts and Pies: This Lemon Curd Filling Recipe is perfect for filling small pastry cases or a large graham cracker crust for a simple tart.
- Layer Cakes: Spread a thick layer between moist vanilla sponge cakes or use it as a filling inside my famous Italian Lemon Cake: The Zesty, Moist Torta al Limone Drizzle Recipe — it adds a fantastic bright dimension.
- Breakfast Boost: Swirl it into plain Greek yogurt, top pancakes, or use it instead of jam on your toast or English muffins.
Honestly, once you taste how superior this Best Lemon Curd Recipe is, you’ll never buy a jar again. It is intensely citrusy, perfectly rich, and the velvety smooth texture is something truly special. Get zesting, start whisking, and prepare for sunshine in a jar.

Recipe FAQs
Why is my lemon curd too thin or runny after cooling?
This common issue is usually due to insufficient cooking temperature. The mixture needs to reach approximately 170°F (77°C) for the egg proteins to fully activate and thicken the curd properly.
If it remains thin, gently return the curd to the double boiler and continue stirring slowly until it coats the back of a spoon very thickly.
My curd looks grainy or slightly scrambled. What happened?
A grainy texture indicates that the eggs cooked too quickly or the heat was too high, causing the proteins to separate, or "scramble," before they fully emulsified with the butter. To salvage the batch, you can immediately strain the curd through a very fine mesh sieve or cheesecloth to remove the cooked lumps.
How long can I safely store homemade lemon curd?
Homemade lemon curd, due to its high acidity and sugar content, stores well in the refrigerator for about 1 to 2 weeks. Ensure you store it in a sterilized, airtight glass jar immediately after it has finished cooling. For longer storage, always ensure the surface is completely covered and sealed.
Can I freeze lemon curd, and how does it affect the texture?
Yes, lemon curd freezes excellently for up to three months without significant texture degradation. Freeze it in a sturdy, airtight container, allowing a small amount of headspace for expansion. Thaw the curd slowly overnight in the refrigerator; a quick whisk after thawing will restore its smooth consistency.
Can I use bottled lemon juice instead of fresh?
While technically possible, using bottled juice is strongly discouraged as it lacks the essential oils and brightness found in fresh zest, resulting in a dull flavor. The structural integrity of the curd relies on the acid content, so stick to fresh juice and always use high-quality zest for the best color and flavor intensity.
Can I make this recipe dairy-free or vegan?
For a dairy-free version, substitute the standard butter with a high-quality vegan butter stick or refined coconut oil, which will still provide necessary richness. To make it completely vegan, you must replace the eggs; this usually requires thickening agents like cornstarch or agar agar, which will change the characteristic silky, buttery mouthfeel of classic curd.
Is it safe to make lemon curd in an aluminum pot?
It is strongly recommended that you avoid using aluminum pots when cooking acidic foods like lemon curd. The lemon juice can react with the metal, which may impart a noticeable metallic or bitter flavor and potentially cause the curd to adopt a slight greenish hue.
Use stainless steel or glass double boilers instead for safety and flavor purity.
Best Homemade Lemon Curd Recipe
Ingredients:
Instructions:
Nutrition Facts:
| Calories | 604 kcal |
|---|---|
| Protein | 11.5 g |
| Fat | 38.7 g |
| Carbs | 54.6 g |
