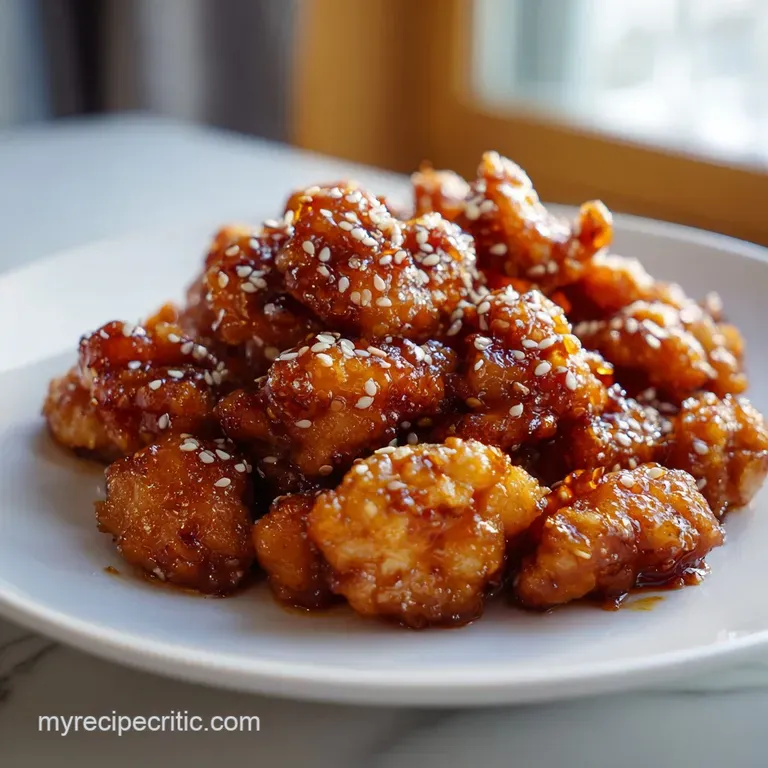
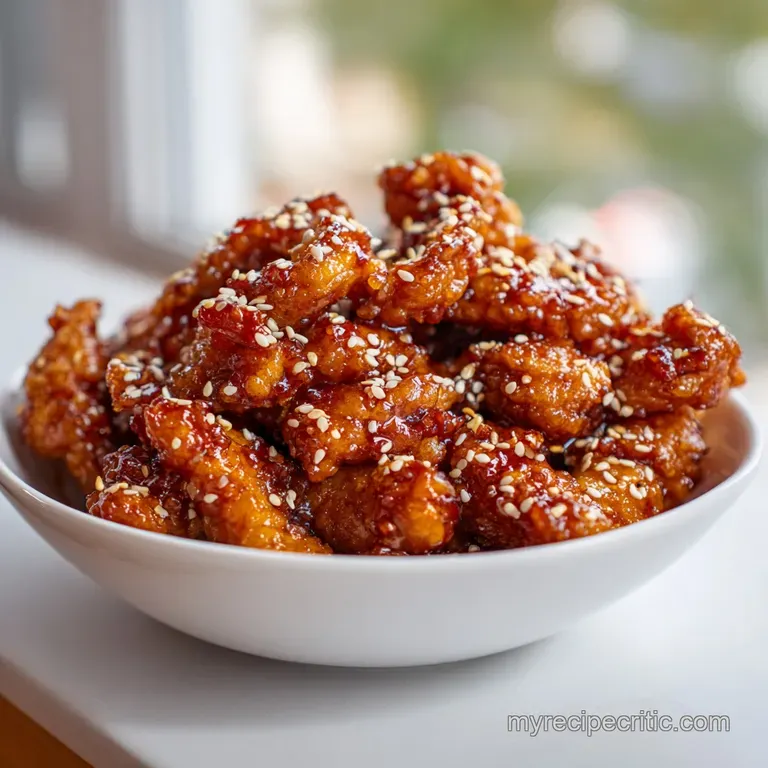
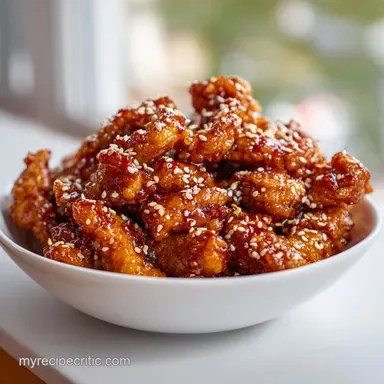
Baked Honey Sesame Chicken: Crispy and Savory
- Time: Active 15 minutes, Passive 20 minutes, Total 35 minutes
- Flavor/Texture Hook: Shatter crisp edges with a velvety, ginger spiced honey glaze
- Perfect for: Busy weeknights when you crave high-quality takeout flavor without the delivery wait
- Master Baked Honey Sesame Chicken Now
- Why This Baking Method Works
- Ingredient Deep Dive Analysis
- Ingredients Needed For This Meal
- Best Tools For Easy Cleanup
- Cooking Steps For Perfect Chicken
- Fixing Common Meal Problems Fast
- Scaling This Recipe Correctly
- Different Flavors You Might Like
- Debunking Common Cooking Myths
- Storing And Using Your Leftovers
- Best Sides To Serve Tonight
- Very High in Sodium
- Recipe FAQs
- 📝 Recipe Card
Master Baked Honey Sesame Chicken Now
The scent of toasted sesame oil hitting a hot pan is enough to stop me in my tracks every single time. It carries this nutty, deep aroma that reminds me of walking through the narrow, bustling streets of San Francisco's Chinatown on a crisp evening. Sesame chicken is a fascinating piece of culinary history.
While we often think of it as a staple of Chinese American takeout, it actually evolved from traditional Cantonese "Sesame Chicken" which usually involved a whole bird, bone in, and was much less sweet.
The version we love today became a superstar in the 1970s and 80s when chefs adapted recipes to please local palates, trading the bone in complexity for the easy, bite sized comfort of glazed breast meat.
Whenever I make this baked honey sesame chicken, I think about how much we've learned about getting things crispy in the oven. For years, I struggled with "baked" versions of my favorite fried foods because they always came out soggy or pale. It was frustrating.
I wanted that specific crunch that stands up to a thick glaze. After experimenting with different binders and temperatures, I found that the secret isn't just the coating, it's how the air moves around the meat.
This recipe isn't just a healthy alternative, it's a legitimate improvement on the original because you can actually taste the chicken and the ginger instead of just tasting old fryer oil.
You are going to love how the honey caramelizes under the broiler like heat of a 425°F (220°C) oven. It creates this glossy, mahogany colored finish that looks like it came from a professional kitchen. We are skipping the deep fryer but keeping all the satisfaction.
Let's look at why this specific method works so well and how you can get it right the first time in your own kitchen.
Why This Baking Method Works
- The Starch Barrier: Cornstarch creates a microscopic layer of "armor" that absorbs surface moisture and fries in the thin coating of sesame oil.
- Convection Advantage: Using a wire rack allows hot air to circulate 360 degrees, preventing the bottom of the chicken from steaming in its own juices.
- Honey Viscosity: Raw honey contains natural sugars that thicken rapidly when simmered with soy sauce, creating a glaze that clings rather than slides off.
- Sesame Oil Binder: Tossing the meat in oil before the starch ensures the powder sticks perfectly and provides the fat needed for the "frying" effect in the oven.
| Method | Prep Time | Texture Result | Best For |
|---|---|---|---|
| Traditional Fry | 45 minutes | Very crunchy, heavy | Weekend indulgence |
| Direct Baking | 35 minutes | Soft, slightly browned | Low calorie focus |
| Wire Rack Bake | 35 minutes | Shatter crisp edges | The ultimate weeknight win |
Most people make the mistake of putting the chicken directly on a baking sheet. When you do that, the side touching the metal gets soggy because the moisture has nowhere to escape. By elevating the meat, you let the heat attack the starch from every angle.
It's a simple tool change that makes a massive difference in the final texture.
Ingredient Deep Dive Analysis
| Component | Science Role | Pro Secret |
|---|---|---|
| Cornstarch | Moisture Absorber | Sift it onto the chicken for the most even, thin coating possible. |
| Raw Honey | Glaze Thickener | Use dark honey for a more intense, molasses like flavor profile. |
| Sesame Oil | Heat Conductor | Use "toasted" oil for flavor, but don't skip the light oil spray later. |
Ingredients Needed For This Meal
To get that classic flavor, we need to be specific about the components. This isn't just about heat; it's about the balance of acid, salt, and sugar.
- 1.5 lbs boneless, skinless chicken breasts, cut into 1 inch pieces Why this? They cook fast and even at high heat.
- 2 tbsp toasted sesame oil Why this? Provides the fat needed for crisping and the base flavor.
- 1/2 cup cornstarch Why this? Creates the crispy "skin" without using flour.
- 1 tsp kosher salt Why this? Seasoning the meat directly is vital for depth.
- 1/2 tsp white pepper Why this? Provides a subtle, floral heat common in Asian cooking.
- 1/2 tsp garlic powder Why this? Distributes flavor more evenly than fresh garlic in the breading.
- 1/3 cup raw honey Why this? The primary sweetener that thickens into a sticky glaze.
- 1/4 cup low sodium soy sauce Why this? Adds salt and umami without overpowering the honey.
- 2 tbsp unseasoned rice vinegar Why this? Cuts through the sweetness with essential acidity.
- 1 tbsp ketchup Why this? The secret ingredient for color and that "takeout" tang.
- 2 cloves garlic, minced Why this? Adds fresh, pungent aroma to the simmered sauce.
- 1 tsp fresh ginger, grated Why this? Essential for that zingy, bright finish.
- 1/2 tsp red pepper flakes Why this? Just enough heat to balance the sugar.
- 2 tbsp toasted sesame seeds Why this? Adds crunch and visual appeal at the end.
- 3 green onions, thinly sliced Why this? Freshness to finish the dish.
| Original Ingredient | Substitute | Why It Works |
|---|---|---|
| Chicken Breast | Chicken Thighs | Higher fat content makes them more forgiving if overcooked. |
| Rice Vinegar | Apple Cider Vinegar | Similar acidity levels. Note: Adds a slightly fruity note. |
| Soy Sauce | Liquid Aminos | Great gluten-free alternative with similar salt profile. |
| Cornstarch | Arrowroot Powder | Provides a similar crisp coating for those avoiding corn. |
I've tried using flour instead of cornstarch in a pinch, but it just doesn't work. Flour gets gummy when it meets the sauce. Cornstarch creates a literal barrier that stays crunchy even after being tossed in the honey glaze. If you are looking for a different vibe, these Chicken lettuce wraps use a similar flavor profile but in a fresh, crisp leaf.
Best Tools For Easy Cleanup
For this recipe, you don't need a pantry full of gadgets, but two specific items are non negotiable if you want that "fried" texture.
- Rimmed Baking Sheet: This catches any drips and keeps the hot air contained.
- Wire Cooling Rack: Must be oven safe. This is the "secret weapon" for air circulation.
- Large Mixing Bowl: You need space to toss the chicken without knocking the coating off.
- Small Saucepan: For reducing that liquid gold glaze into a thick syrup.
- Microplane: The best way to get that ginger and garlic into a fine paste that dissolves into the sauce.
Chef's Tip: If you don't have a wire rack, you can crumple up a large sheet of aluminum foil into a "mountain and valley" shape and set the chicken on the peaks. It's not as good as a rack, but it's much better than a flat tray!
Cooking Steps For Perfect Chicken
- Preheat your oven to 425°F (220°C). Place the chicken pieces in a large mixing bowl and toss with toasted sesame oil until every piece is shimmering and coated. Note: The oil acts as the glue for our starch.
- In a separate bowl or zip top bag, combine cornstarch, salt, white pepper, and garlic powder. Add the oiled chicken and shake vigorously until every piece is fully dusted and looks powdery.
- Set an oven safe wire cooling rack inside a rimmed baking sheet. Arrange the chicken in a single layer on the rack, ensuring pieces do not touch. Note: Overcrowding leads to steaming, not crisping.
- Lightly spray the tops of the chicken with a neutral cooking oil. Bake for 18–20 minutes until the edges are sharp, toasted, and golden brown.
- While chicken bakes, combine honey, soy sauce, rice vinegar, ketchup, minced garlic, ginger, and red pepper flakes in a small saucepan.
- Simmer the sauce over medium heat for 3–5 minutes until the glaze reduces and coats the back of a spoon. Note: If it's too thin, it will soak into the chicken and make it soggy.
- Transfer the crispy baked chicken to a clean bowl. Do not use the same bowl from step 1 to avoid cross contamination.
- Pour the warm glaze over the chicken and toss gently until every piece is glistening and sticky.
- Garnish immediately with toasted sesame seeds and sliced green onions. The heat from the chicken will slightly soften the onions and release their aroma.
- Serve immediately over rice or greens while the coating is at its absolute peak of crunch.
Fixing Common Meal Problems Fast
Sometimes things go sideways in the kitchen. Maybe your oven runs cold, or your honey was a bit too thin. Don't worry, most of these issues are easy fixes if you know what to look for.
Why Your Chicken Isn't Crispy
If your chicken comes out looking pale and feeling soft, the temperature was likely too low or you skipped the wire rack. Another culprit is moisture. If the chicken wasn't patted dry before the oil toss, the cornstarch turns into a paste rather than a powder.
To fix this, you can flip the broiler on for the last 2 minutes of cooking, but watch it like a hawk so it doesn't burn.
Why Your Sauce Is Too Thin
If the glaze is running to the bottom of the bowl instead of clinging to the meat, it didn't reduce enough. The sugars in the honey and ketchup need heat to create that "tacky" texture. If you've already mixed it, there isn't much you can do, but next time, make sure it simmers until it looks like a thick syrup.
| Problem | Root Cause | Solution |
|---|---|---|
| Rubbery Chicken | Overcooked | Check internal temp at 15 mins; pull at 165°F (74°C). |
| Coating Falling Off | Not enough oil | Ensure every piece is shiny with oil before adding starch. |
| Sauce Too Salty | Regular Soy Sauce | Always use low sodium soy sauce or add a splash of water. |
Common Mistakes Checklist
- ✓ Pat the chicken completely dry with paper towels before starting (moisture is the enemy of crunch).
- ✓ Don't skip the ketchup; it provides the acidity and pectin needed for a thick, red toned glaze.
- ✓ Make sure the oven is fully preheated to 425°F (220°C) before the chicken goes in.
- ✓ Use a clean bowl for the final toss to keep the crispy coating from getting contaminated by raw juices.
- ✓ Sift the cornstarch if it has lumps to ensure a feather light coating on the meat.
Scaling This Recipe Correctly
When you're cooking for a crowd or just for yourself, you can't always just double everything. For example, if you double the sauce, it will take much longer than 5 minutes to reduce because there is more volume to heat and evaporate.
Cooking for Two (Halving): You can easily cut the chicken to 0.75 lbs. Use a smaller saucepan for the sauce so it doesn't evaporate too quickly and burn. You might only need 10-12 minutes in the oven since a smaller batch allows for better airflow on the rack.
If you need half an egg for a different recipe binder, you'd beat it and measure, but here we use oil, so just use 1 tablespoon.
Cooking for a Crowd (Doubling): If you move to 3 lbs of chicken, you must use two separate baking sheets. If you crowd one sheet, the chicken will steam and you'll lose that "fried" texture.
For the sauce, don't double the red pepper flakes unless you want it twice as spicy; spices often scale exponentially rather than linearly. Increase the simmer time by about 3 minutes to account for the extra liquid.
If you find yourself with extra chicken but want a different flavor profile, you could easily adapt this technique to a Chicken Parmesan style by swapping the sesame oil for olive oil and the honey glaze for marinara and cheese. The wire rack method is truly universal for anything "crispy baked."
Different Flavors You Might Like
- Baked Honey Sesame Chicken Thighs: Swap the breast for boneless thighs. They are juicier and handle the high heat beautifully. Increase the bake time by 3-5 minutes.
- The Szechuan Kick: Add 1 teaspoon of Szechuan peppercorns (toasted and crushed) and 1 tablespoon of Gochujang to the sauce for a numbing, spicy depth.
- Orange Sesame Variation: Replace the rice vinegar with fresh orange juice and add 1 tablespoon of orange zest to the glaze. It's a brighter, citrusy take on the classic.
- The Nut Free Swap: If you can't do sesame, use avocado oil for the crisping and garnish with toasted sunflower seeds or chopped cashews for that necessary crunch.
| Ingredient Shortcuts | Time Saved | Flavor Impact |
|---|---|---|
| Jarred Ginger Paste | 5 minutes | Slightly more acidic, less "zing" |
| Pre cut Chicken | 10 minutes | Very convenient, ensures even size |
| Garlic Powder in Sauce | 2 minutes | Milder flavor, smoother texture |
Debunking Common Cooking Myths
Myth 1: You must sear the chicken in a pan first to lock in juices. This is simply not true. Searing is about the Maillard reaction (browning), not "sealing." In this recipe, the high heat of the oven and the cornstarch coating provide plenty of browning and texture without the mess of stovetop frying.
Plus, searing would knock off the starch coating we worked so hard to apply.
Myth 2: "Baked" can never be as crispy as "Fried." While it's true that immersion in 350°F oil is different from hot air, the wire rack method combined with cornstarch gets you 90% of the way there. The difference is negligible once the chicken is tossed in a thick, sticky glaze.
The air circulation mimics a convection fryer, giving you that "shatter" crunch you crave.
Storing And Using Your Leftovers
This dish is best served immediately because the steam from the chicken will eventually soften the coating. However, if you have leftovers, store them in an airtight container in the fridge for up to 3 days.
Do not freeze the glazed chicken, as the sauce will break down and the coating will become unpleasantly mushy when thawed.
Reheating Pro Tip: Forget the microwave. It will turn your chicken into rubber. To get the crunch back, put the pieces on a baking sheet in a 400°F (200°C) oven for about 6-8 minutes.
The honey in the glaze will re caramelize and the coating will crisp back up.
Zero Waste Idea: Don't throw away your green onion roots! Place them in a small jar of water on your windowsill, and they will regrow in about a week. Also, if you have extra ginger, peel it with a spoon, slice it thin, and freeze it in a baggie.
You can grate it directly from frozen into your next stir fry or tea.
Best Sides To Serve Tonight
- Fluffy Jasmine Rice: The classic choice. It soaks up the extra honey glaze perfectly.
- Steamed Broccoli: The bitterness of the char or steam balances the sweet honey. Toss it with a little extra sesame oil.
- Quinoa or Brown Rice: For a nuttier, high fiber alternative that stands up well to the sauce.
- Cold Smashed Cucumber Salad: A refreshing, vinegary side that cleanses the palate between bites of sweet chicken.
This baked honey sesame chicken is truly a staple in my house. It's faster than waiting for a delivery driver, and I know exactly what went into the sauce. No mystery oils, just real honey, fresh ginger, and that incredible crunch.
Give it a try tonight, and I bet you'll never look at that takeout menu the same way again. Happy cooking!

Very High in Sodium
845 mg 845 mg of sodium per serving (37% 37% of daily value)
The American Heart Association recommends a limit of about 2,300mg of sodium per day, with an ideal limit of less than 1,500mg for most adults.
Tips to Reduce Sodium
-
Eliminate Added Salt-25%
The 1 tsp kosher salt added to the chicken coating contributes significantly to the sodium content. Removing it entirely will make a noticeable difference.
-
Choose Low-Sodium Soy Sauce-20%
Replace the 1/4 cup low-sodium soy sauce with an even lower sodium version or use coconut aminos, which are naturally lower in sodium.
-
Reduce High Sodium Condiments-5%
Consider reducing the amount of 1 tbsp ketchup, as it often contains added sodium. Look for reduced sodium ketchup varieties.
-
Boost Flavor with Herbs & Spices
Amplify the taste without salt by generously using fresh ginger, garlic, white pepper, and red pepper flakes. You can also add fresh herbs like cilantro or parsley.
Recipe FAQs
Is it true I must use an egg wash to make the cornstarch stick?
No, this is a common misconception. You only need to toss the chicken in toasted sesame oil before adding the cornstarch mixture to achieve a perfectly adherent, crispy coating.
How to get the crispiest texture for the chicken?
Pat the chicken completely dry with paper towels before starting. Moisture is the enemy of crunch, so ensuring the meat is dry before applying the oil and cornstarch is vital for that sharp, toasted edge.
Can I bake this at a lower temperature to prevent burning?
No, stick to 425°F (220°C). This high heat is necessary to crisp the cornstarch coating quickly; if you enjoyed mastering this high heat searing technique, you will see how it creates the desired texture here without drying out the meat.
How to reheat leftovers without making them mushy?
Use your oven instead of the microwave. Place the pieces on a baking sheet and heat at 400°F (200°C) for 6 8 minutes to restore the crunch, as the microwave will only make the coating rubbery.
Is it safe to freeze the glazed leftovers?
No, avoid freezing this dish. The sauce will break down during the freezing process, and the breading will become unpleasantly mushy once thawed.
How to ensure the glaze thickens properly?
Simmer the honey, soy sauce, and ketchup mixture for 3 5 minutes. The ketchup is a key ingredient because it provides the necessary acidity and pectin to achieve a thick, glossy consistency.
Why is my cornstarch coating lumpy?
Sift the cornstarch before mixing it with the seasonings. Removing any clumps ensures a feather light, even coating on every piece of chicken when you shake the bag.
Baked Honey Sesame Chicken
Ingredients:
Instructions:
Nutrition Facts:
| Calories | 454 kcal |
|---|---|
| Protein | 40.6 g |
| Fat | 13.4 g |
| Carbs | 42.1 g |
| Fiber | 1.2 g |
| Sugar | 24.3 g |
| Sodium | 845 mg |
